
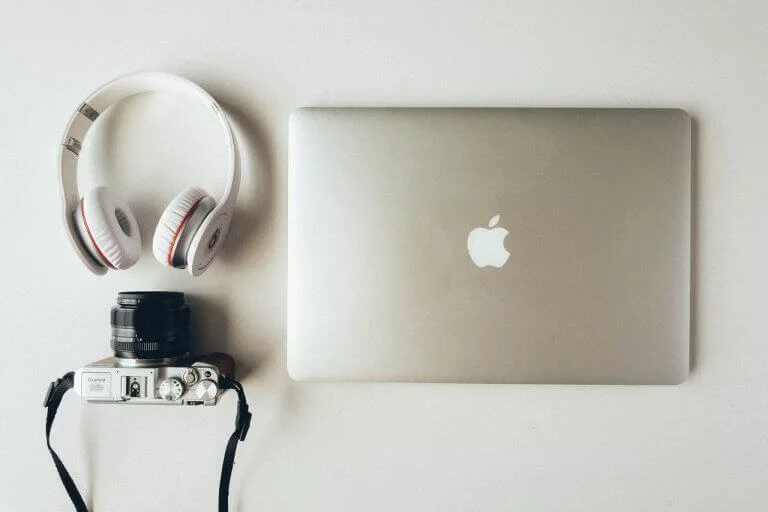
Choosing the right camera and microphone for a webinar is not only about looking professional. It directly affects how long people stay, how clearly they understand the speaker, and whether they trust the brand behind the event. Even the best presentation can feel weak if the picture is dark, the sound is noisy, or the speaker keeps disappearing because of poor setup.
Best Camera and Microphone for Webinars and Other Essential Gear
Good webinar equipment does not have to be expensive, but it must be chosen with the goal of the event in mind. A quick internal meeting can work with a laptop webcam and built-in mic. A paid training session, product demo, online course, or customer-facing webinar needs a better setup.
The basic kit includes:
- A camera or external webcam.
- A separate microphone or high-quality headset.
- Stable lighting.
- A stand or tripod.
- A reliable internet connection.
- A stable webinar platform that supports clear video, audio, screen sharing, and recording.
This guide explains what equipment you need for a webinar, when to upgrade, and how to weigh a webcam against a separate microphone, headphones against speakers, and a built-in microphone against a standalone one.
What a workable setup looks like
For most webinars, you do not need a studio. You need a setup that makes you easy to see and hear. Sound quality is usually more important than video quality, because people can tolerate a slightly imperfect image, but they quickly leave when the audio is painful to listen to.
| Equipment | Minimum acceptable option | Better option | Why it matters |
|---|---|---|---|
| Camera | Built-in laptop webcam | External 1080p webcam | Makes the speaker look clear and professional |
| Microphone | Built-in laptop mic | USB condenser or dynamic mic | Makes speech clear and reduces background noise |
| Headphones | Simple wired headphones | Closed-back or noise-cancelling headphones | Prevents echo and helps the speaker monitor sound |
| Lighting | Natural light from a window | Ring light or soft LED light | Prevents shadows and grainy video |
| Stand | Laptop on books | Tripod, webcam stand, or microphone arm | Keeps the camera and mic in the right position |
| Platform | Any basic video call tool | Dedicated webinar software | Adds registration, recording, analytics, chat, and audience tools |
For serious sessions, your webinar equipment should be tested before every event. Open your webinar room, check the camera preview, speak into the microphone, record a short test, and listen to it with headphones.
When the camera earns its place
You do not always need to be on camera for a webinar. If the session is a technical training, software walkthrough, or audio-first lecture, you can host it with slides and voice only. However, being visible usually improves trust and attention, especially at the beginning and end of the event.
So, do I need a camera for a webinar? In most business cases, yes. A camera helps when you:
- introduce yourself and build trust;
- sell a product or service;
- teach a course where personality matters;
- answer questions live;
- want the recording to look more professional.
But do you need a webcam for a webinar if you are only sharing slides? Not necessarily. You can start with voice and screen sharing, then turn on the camera during the introduction, Q&A, or important explanations. For product demos, you can combine your webcam with screen sharing, so the audience sees both the speaker and the product.
Mixing camera and slides through the session
You do not need to be on camera for the entire webinar. In many cases, the best structure is mixed:
- Show your face during the introduction.
- Switch to slides or screen sharing for the main part.
- Return to camera for questions and closing remarks.
This format feels natural and reduces fatigue. It also helps speakers who are nervous about appearing on camera. You can still deliver a strong webinar if your voice is clear, your slides are useful, and your room setup is stable.
For live webinars, camera presence is especially useful because it gives the session a human feeling. For recorded lessons or automated webinars, you can decide whether your face adds value or distracts from the material.
Best camera for webinars: what to look for
The best camera for webinars is not always the most expensive one. It is the camera that gives a stable, sharp image in your room and works without complicated setup. For most speakers, a good external USB webcam is enough.
When choosing the best camera for webinars, pay attention to these features:
- Resolution. Choose at least 1080p. A 720p camera can still work for small meetings, but it may look outdated.
- Frame rate. 30 fps is enough for webinars. Higher frame rates matter more for streaming than for business presentations.
- Autofocus. Useful if you move, show objects, or change distance from the camera.
- Field of view. A 60 to 90 degree angle is usually enough. Too wide an angle can distort your face and show too much background.
- Low-light performance. Some webcams look bad unless the room is well lit.
- Tripod mount. Helpful if you want the camera at eye level.
A camera should be placed slightly above or at eye level. If it is too low, the angle looks unflattering. If it is too high, the speaker looks disconnected from the audience.
Built-in laptop camera vs external webcam
A built-in laptop camera is convenient, but it often has three problems, namely low sharpness, poor color, and a bad angle. It is fine for internal calls but weak for public webinars.
An external webcam gives you more control. You can move it, mount it, adjust the frame, and combine it with better lighting. This is why a separate webcam is usually the first upgrade after you fix your sound.
Best microphone for webinars: why sound matters more than video
The best microphone for webinars is the one that makes your voice clear, stable, and comfortable to listen to. Audio quality shapes the whole experience. If people cannot hear you well, they will not care how good your slides are.
A good webinar mic should:
- capture your voice clearly;
- reduce room echo;
- avoid keyboard and fan noise;
- connect easily to your computer;
- stay in the same position during the session;
- work reliably with your browser and webinar software.
For most hosts, a USB microphone is the easiest choice. It connects directly to the computer and does not require an audio interface. A dynamic USB microphone may be better in noisy rooms, while a condenser microphone can sound more detailed in a quiet room.
The best microphone for webinars does not have to cost a lot. A budget USB mic is usually better than a laptop mic or a microphone built into a webcam.
Built-in webcam microphone vs separate USB microphone quality comparison
The difference between a built-in webcam microphone and a separate USB microphone is usually obvious. A webcam mic is added as a convenience feature. A separate microphone is designed specifically for audio.
| Setup | Audio quality | Background noise | Best for | Main drawback |
|---|---|---|---|---|
| Laptop built-in mic | Low to medium | High | Quick internal calls | Picks up typing, fan noise, and room echo |
| Webcam built-in mic | Medium | Medium to high | Casual video meetings | Sound can feel thin or distant |
| Separate USB microphone | High | Lower | Webinars, courses, demos, podcasts | Needs space and correct placement |
| Headset microphone | Medium to high | Low | Training, support, frequent calls | Visible on camera and less "studio-like" |
| Lavalier microphone | Medium to high | Medium | Standing presentations | Cable and clothing noise can be an issue |
The comparison is simple. If the webinar matters, use a separate mic. If you can upgrade only one thing, upgrade audio first.
What is the difference between a webcam and a microphone?
A webcam captures video and a microphone captures sound. They record different things, so neither replaces the other, and a webinar needs both. Many webcams ship with a small microphone built into the housing, which is why the two get confused, but that built-in capsule sits near the fan and far from your mouth, so it records the room rather than you.
The same split runs through the rest of the kit. Headphones and speakers play sound back to you, while a microphone records sound from you. A headset is simply the two combined in one device. So the honest comparison is not webcam against microphone, it is which of them to spend money on first.
Webcam vs microphone: what should you buy first?
The webcam vs microphone question has a clear answer for most webinar hosts. Buy the microphone first. Viewers can follow a useful presentation with average video, but bad audio makes the session hard to watch.
The same applies to microphone vs webcam when your budget is limited. Start with sound, then improve video.
Choose a microphone first if:
- your room has echo;
- your laptop fan is loud;
- you record webinars;
- you sell through webinars;
- people often ask you to repeat yourself;
- your sessions last more than 30 minutes.
Choose a webcam first if:
- your current camera is very blurry;
- you speak directly to camera most of the time;
- your webinars depend on visual trust;
- you already have a decent headset or mic.
For most business hosts, the right answer is not "camera or microphone." The right answer is to first get understandable audio, then get clean video.
Webcam vs headphones: which matters more?
The webcam vs headphones comparison depends on your role in the webinar. If you are the presenter, headphones are important because they prevent echo and help you hear questions clearly. If you are also visible on screen, the webcam shapes the audience’s first impression.
For presenters, headphones are especially helpful when:
- several speakers join the same session;
- you answer live questions;
- you play videos during the event;
- you use a laptop speaker that causes echo.
Headphones are worth weighing against a camera upgrade too. Noise-cancelling headphones help you focus and prevent external sounds from distracting you. However, they do not automatically make your microphone sound better unless they include a good mic.
In noisy rooms it is not even a real contest. Fix the listening and speaking environment first, then worry about image quality.
Webcam vs microphone stand: why positioning matters
A stand is not as exciting as a camera or mic, but it can improve the result more than people expect. Positioning is often the difference between "cheap" and "professional."
A webcam stand helps place the camera at eye level. A microphone stand or boom arm helps keep the mic close to your mouth without forcing you to bend over the desk. When the microphone is too far away, it captures more room noise. When the camera is too low, the image looks awkward.
Which one to buy depends on your current setup. If your camera is already decent but your mic is lying on the table and picking up vibrations, buy a stand. If your mic is stable but your laptop camera looks terrible, buy a webcam.
Camera and microphone for video conferencing
The best camera and microphone for video conferencing does not have to be different from your webinar setup. The same principles apply, namely clear voice, stable image, good lighting, and comfortable framing.
The difference is that webinars usually have a larger audience and higher expectations. In a regular team meeting, people forgive small imperfections. In a customer webinar, training session, or sales presentation, poor quality can damage trust.
For video conferencing and webinars, use this simple setup:
| Use case | Recommended setup |
|---|---|
| Internal team meeting | Laptop camera + headset |
| Client call | External webcam + headset or USB mic |
| Public webinar | 1080p webcam + USB mic + lighting |
| Paid course | High-quality webcam or camera + USB/XLR mic + controlled lighting |
| Panel discussion | Each speaker uses headphones and a separate mic if possible |
Should you use a headset instead of a separate mic?
A headset is a good choice if you need simplicity. It combines headphones and a microphone, prevents echo, and keeps the mic close to your mouth. For trainers, support teams, and frequent speakers, a good headset can be more practical than a desktop microphone.
Look for:
- lightweight design;
- adjustable microphone arm;
- noise reduction;
- mute button;
- wired USB connection for stability;
- comfortable ear pads.
A headset may not look as polished as a separate microphone on a boom arm, but it is reliable. It is also better than speaking into a laptop from across the room.
Webinar equipment for different budgets
You can build a webinar setup gradually. Start with the weak point in your current setup, not with the most expensive item.
| Budget level | Camera | Microphone | Extra equipment |
|---|---|---|---|
| Free | Laptop camera | Laptop mic or phone headset | Natural light, quiet room |
| Low budget | 1080p USB webcam | Budget USB mic or headset | Simple tripod |
| Medium budget | Better 1080p/4K webcam | USB mic with stand | LED light, pop filter |
| Pro setup | Mirrorless camera or premium webcam | USB/XLR mic | Boom arm, softbox lighting, acoustic treatment |
For most people, the low-budget or medium-budget setup is enough. The audience cares more about clear delivery than about expensive gear.
How to test your webinar mic and camera before going live
Do not test your setup five minutes before the event. Test it at least a day before, then again shortly before going live.
Use this checklist:
- Open the webinar room in the same browser you will use during the event.
- Allow access to the camera and microphone.
- Select the correct devices in platform settings.
- Record a short test video.
- Listen to the recording with headphones.
- Check whether your voice is clear.
- Check whether your face is well lit.
- Close other apps that may use the camera or mic.
- Test screen sharing if you plan to show slides or software.
- Prepare a backup device or headset if possible.
If you record sessions for replay, check whether your platform supports webinar recording. A recording can reveal problems you do not notice during the live session.
Common mistakes when choosing webinar equipment
Many webinar hosts buy equipment in the wrong order or focus on features that do not matter. Avoid these mistakes:
- Buying a 4K camera while still using a laptop microphone.
- Sitting too far from the microphone.
- Using a camera without enough light.
- Placing the webcam below eye level.
- Forgetting to mute system notifications.
- Using Bluetooth audio without testing delay or stability.
- Speaking in a room with echo.
- Recording a webinar without checking sound levels first.
- Choosing a platform that compresses video too much.
- Assuming expensive gear automatically means better quality.
The goal is not to own the most impressive equipment. The goal is to make the audience comfortable.
Key takeaways on webinar equipment
The best setup depends on your webinar format, room, budget, and audience. Still, the priority is usually the same, with sound first, then video, then lighting and stands.
A practical setup for most hosts is simple:
- external 1080p webcam;
- separate USB microphone or high-quality headset;
- stable light source;
- camera at eye level;
- microphone close to the speaker;
- quiet room;
- reliable webinar platform.
If you are choosing between upgrades, start with the microphone. A good mic makes your presentation easier to follow, improves recording quality, and helps people stay focused. A better camera improves trust and visual impression, but audio is the foundation.
When your camera, sound, lighting, and webinar software work together, your audience can focus on the message instead of technical distractions.
FAQ
What equipment do you need for a webinar?
You need a camera, microphone, headphones, lighting, stable internet, and webinar software. For a basic session, a laptop and headset may be enough. For a professional webinar, use an external webcam, separate USB microphone, good lighting, and a dedicated webinar platform.
What is the best camera for webinars?
The best camera for webinars for most hosts is a 1080p USB webcam with autofocus, 30 fps, and a 60 to 90 degree field of view. A 4K webcam can be useful if you record premium content, but lighting and framing matter as much as resolution.
What is the best microphone for webinars?
The best microphone for webinars is usually a USB microphone placed close to the speaker. It gives clearer sound than a built-in laptop mic or webcam mic. If your room is noisy, a headset with a noise-cancelling microphone can be a better practical choice.
Do I need a camera for a webinar?
You do not always need a camera for a webinar, but it is useful for introductions, trust-building, Q&A, sales presentations, and live events. If the webinar is mostly slides or software training, you can use voice and screen sharing for the main part.
Do you need a webcam for a webinar?
You need a webcam only if the audience should see the speaker. Many webinars work with slides, screen sharing, and voice. However, an external webcam makes the event feel more personal and professional.
Do I need to be on camera for a webinar?
You do not need to be on camera during the whole webinar. A good format is to appear on camera at the start, switch to slides or screen sharing for the main content, and return on camera for the Q&A and closing.
What is the difference between a webcam and a microphone?
A webcam records video, a microphone records sound. A webinar needs both, and they are not interchangeable. Webcams often include a small built-in microphone, but it sits far from your mouth and close to the laptop fan, so it picks up the room instead of your voice.
What is better: webcam with built-in microphone vs separate microphone?
A separate microphone is usually better. A webcam with a built-in microphone is convenient, but the sound is often thinner and noisier. A separate USB microphone gives clearer voice, less background noise, and better recording quality.
What should I choose first: webcam vs microphone?
Choose the microphone first if your audio is weak. In the webcam vs microphone decision, audio usually matters more because bad sound quickly ruins the webinar experience. After that, upgrade the camera and lighting.
Is a headset better than a microphone for webinars?
A headset is better when you want simplicity, echo prevention, and stable speaking distance. A separate microphone is better when you want more natural, polished sound. For most beginners, a good USB headset is a safe starting point.
What is the difference between webcam vs noise cancelling headphones?
A webcam improves how you look. Noise-cancelling headphones improve how well you hear and help reduce distractions. They solve different problems, so the better choice depends on whether your current issue is video quality, echo, or background noise.