
On our webinar platform, you can host reliable webinars in two different ways. The first option allows you to run sessions directly through a web browser using secure broadcasting technology powered by WebRTC, which means there is no need to install any additional software.
Master Secure Webinar Broadcasting
Summarize with
The second option involves using our dedicated application that you can download and install on your computer for an alternative hosting experience.
Benefits of using secure broadcasting technology
Table of contents
This second method is called “secure broadcasting technology,” and today, we will get acquainted with it.
Protect your data and streamline your communications with our secure broadcasting technology. Discover how it safeguards your sensitive information, ensures seamless delivery, and builds trust with your audience. Explore the benefits and elevate your broadcasting experience today.
- More stable connection even with low Internet speeds (our tests showed that even presenters with an EDGE mobile connection can conduct webinars without any problems).
- Bypass browser limitations for unstoppable webinars. Our platform works even when WebRTC or UDP protocols are blocked, ensuring seamless connectivity.
- In addition, full-fledged work through a VPN allows you to conduct and view webinars. However, it is recommended to avoid using free VPNs, as they usually have low bandwidth.
Our TCP-based alternative broadcasting technology works on an event-by-event basis. You can activate it for specific events and disable it for others, providing flexibility in how you broadcast.
Also, please note: Ordinary participants who will simply attend, listen to, and watch your webinar do not need to download or install anything! Everything continues to work directly in a browser.
Having learned these nuances, let’s move on to how to launch this plugin.
How to launch alternative broadcasting technology
First, we need to schedule a webinar. To do this, we need to log into our account.
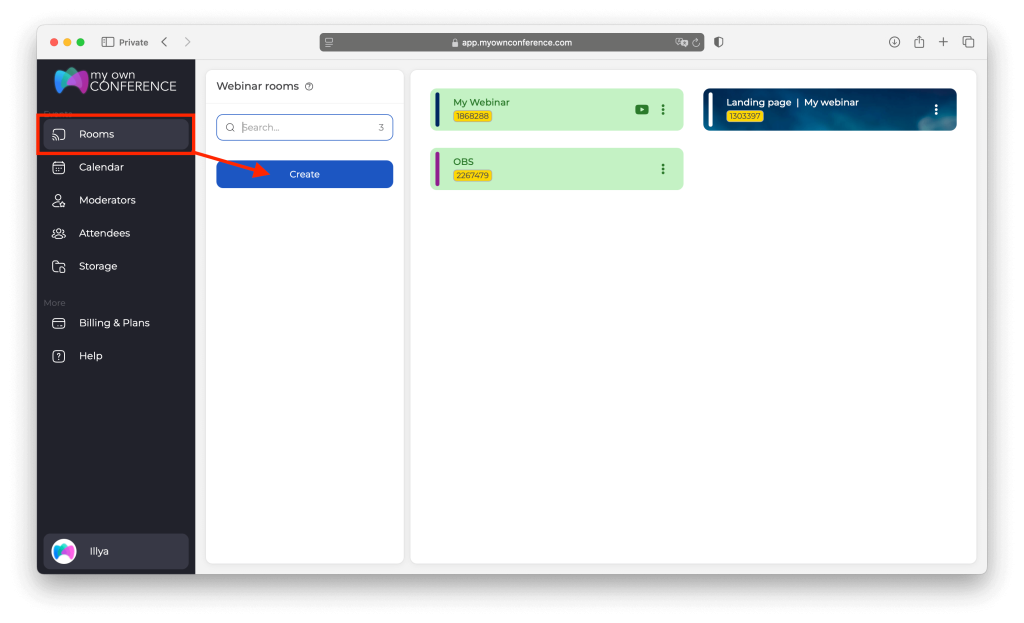
After which we can create either a permanent room for webinars, for our tasks in the “Permanent Webinars” tab.
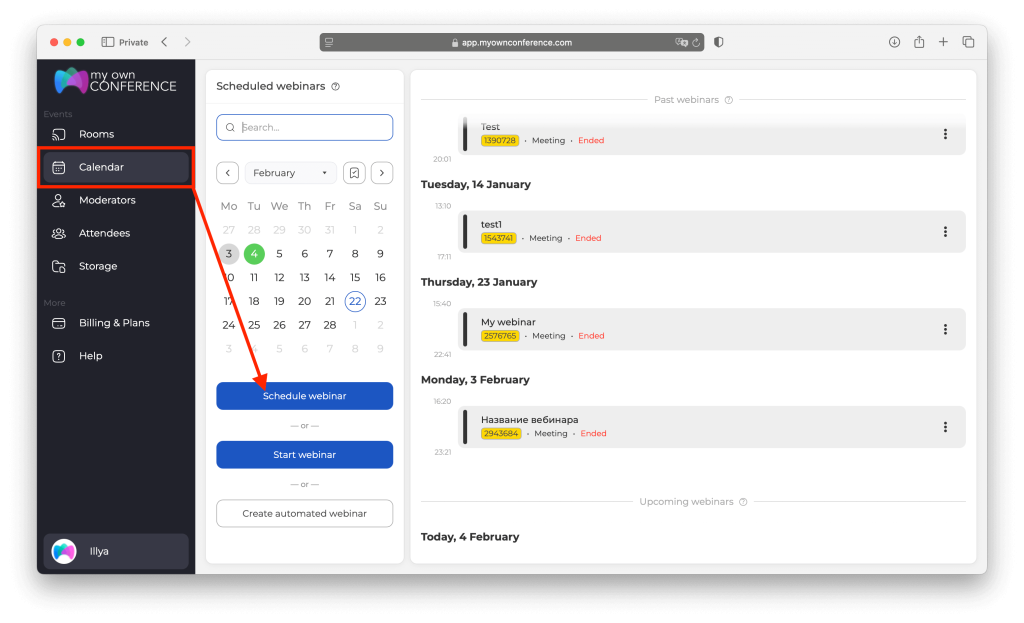
Or schedule a separate webinar for a specific time in the “Scheduled Webinars” tab.
If you want to know a little more about webinar rooms, follow this link
After creating one of these options, we will personalize the general information of your event (name, date, time, etc.).
In the “General” tab, select “Plugin DTS”.
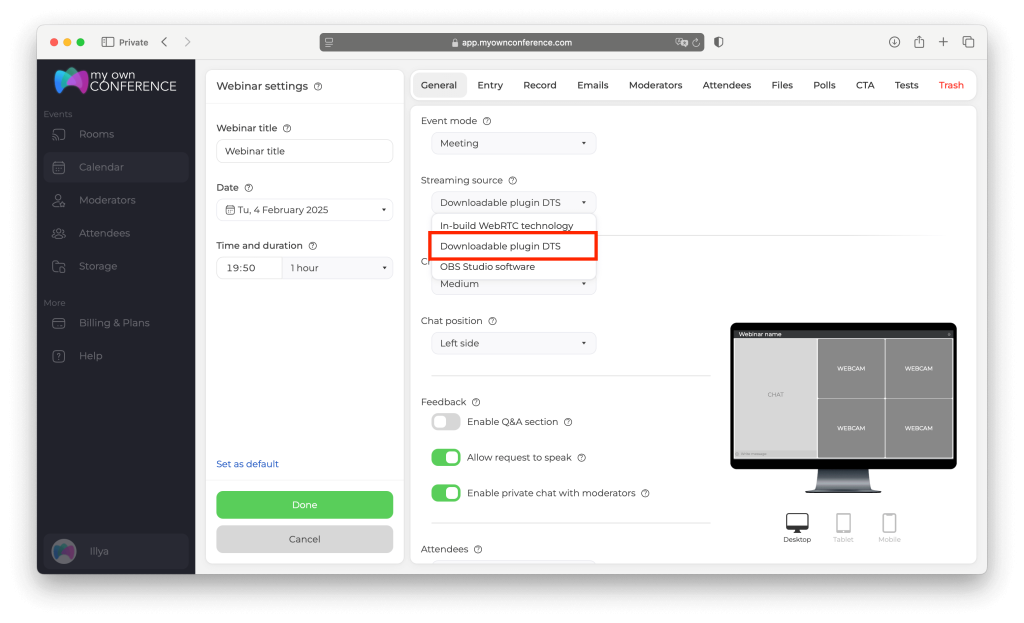
After you adjust settings, use the back arrow. Your changes save automatically. Now, we can launch the webinar using the “Create webinar” button.
The system will automatically prompt you to take a test to check your equipment and internet connection beforehand. Once this quick test is complete, you’ll be ready to broadcast in the webinar room.
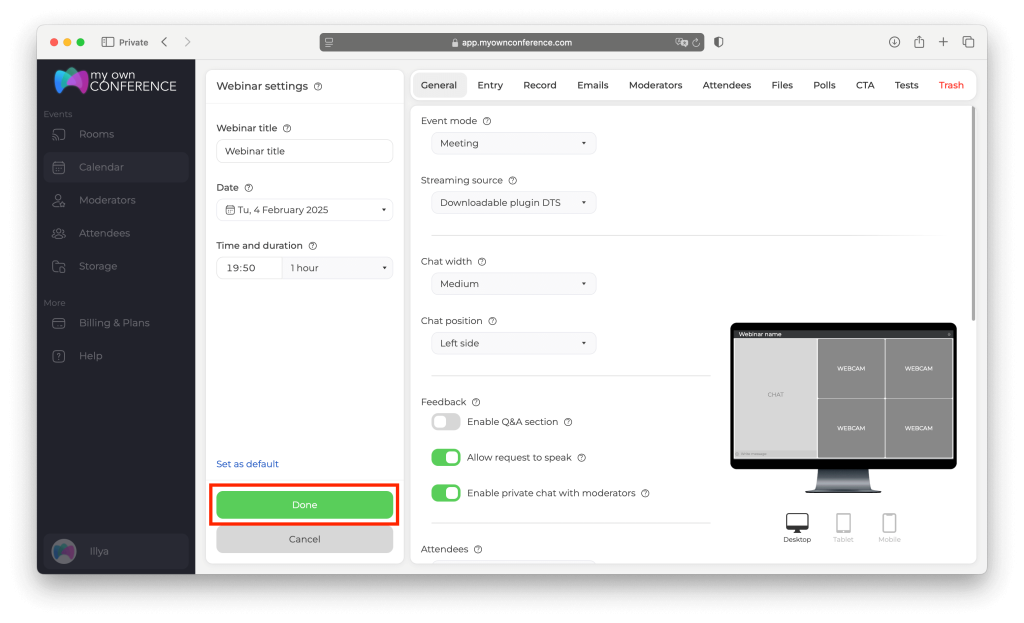
After automatically going to the “Share webinar” tab, where you can copy the link to your webinar, you need to click on the “Open” button.
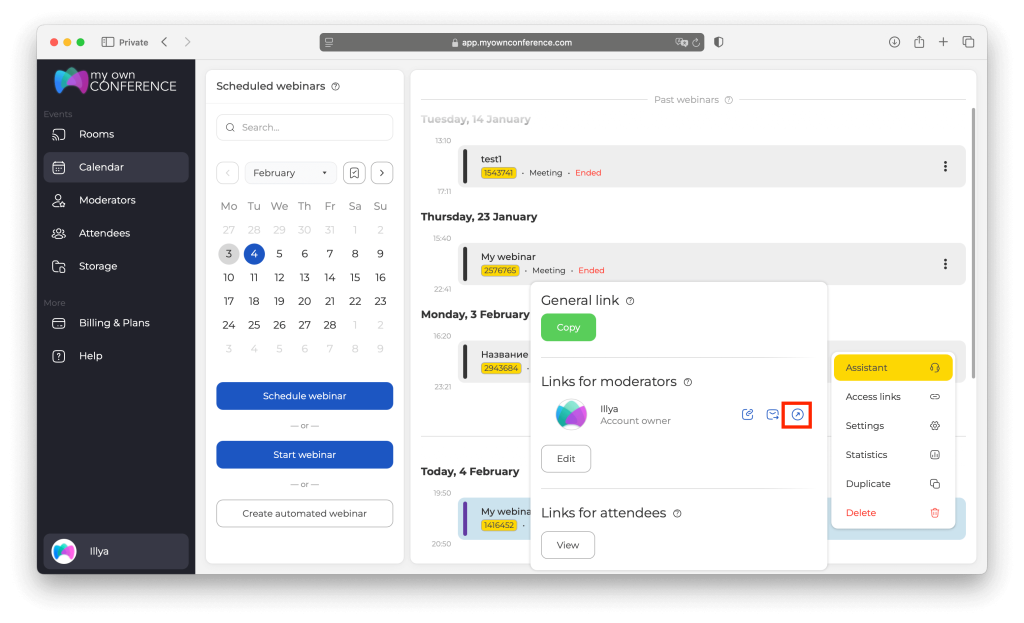
Before broadcasting in the webinar room, the system will automatically prompt you to take a test to check your equipment and Internet connection.
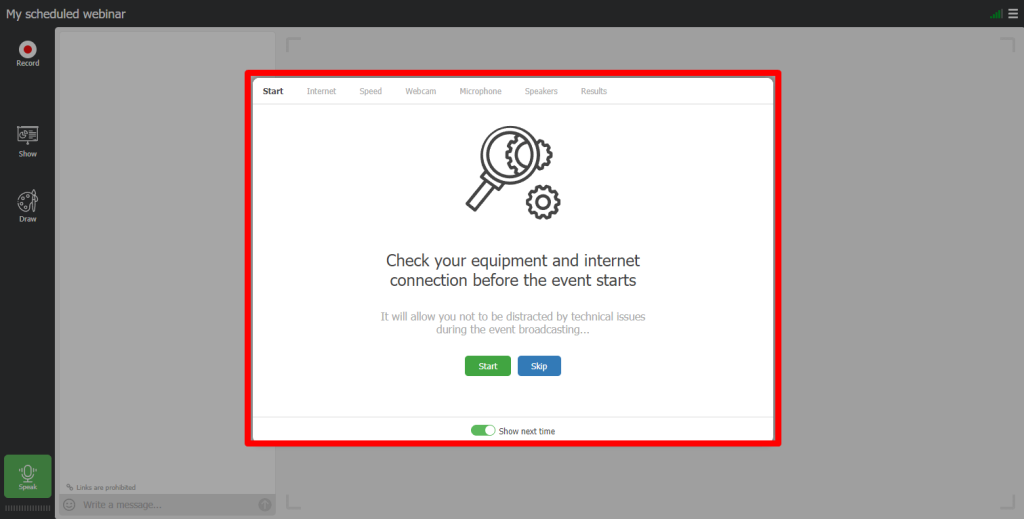
At the end of the test, we close the window with the results and click on the green “Speak” button.
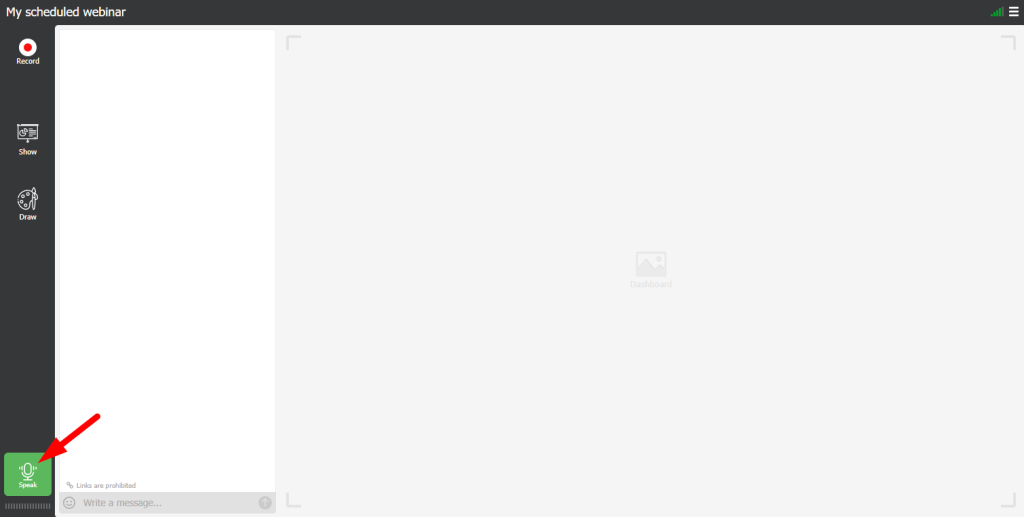
Click the green “Speak” button. After a few seconds, you’ll see a prompt to download the DTS plugin. In order to download it, click on the “Download” button.
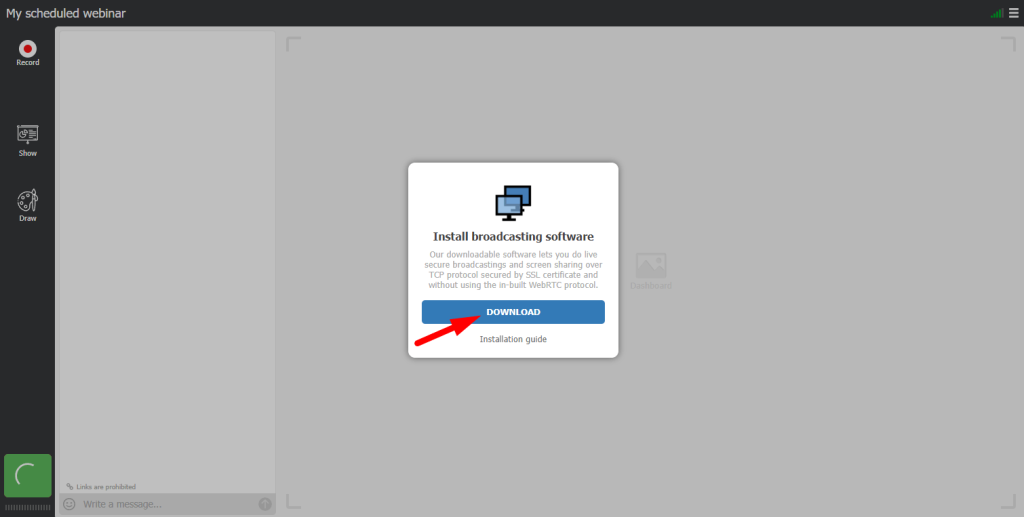
Once the archive is downloaded, you must unpack it and run the plugin. Once the plugin is launched, you will see a notification that tells you that the plugin has successfully launched and is running.
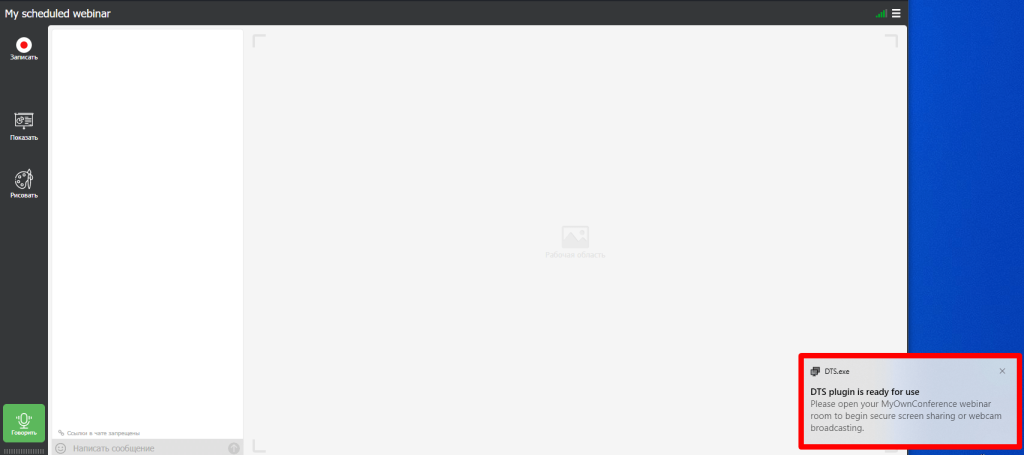
Important! After installing the plugin, it will automatically launch when you turn on the computer; if not needed, this function can be turned off in the application settings.
Other way to install DTS plugin
The second option for activating alternative technology is to enable it directly in the webinar room. To start it, open the settings to the webinar room you created.
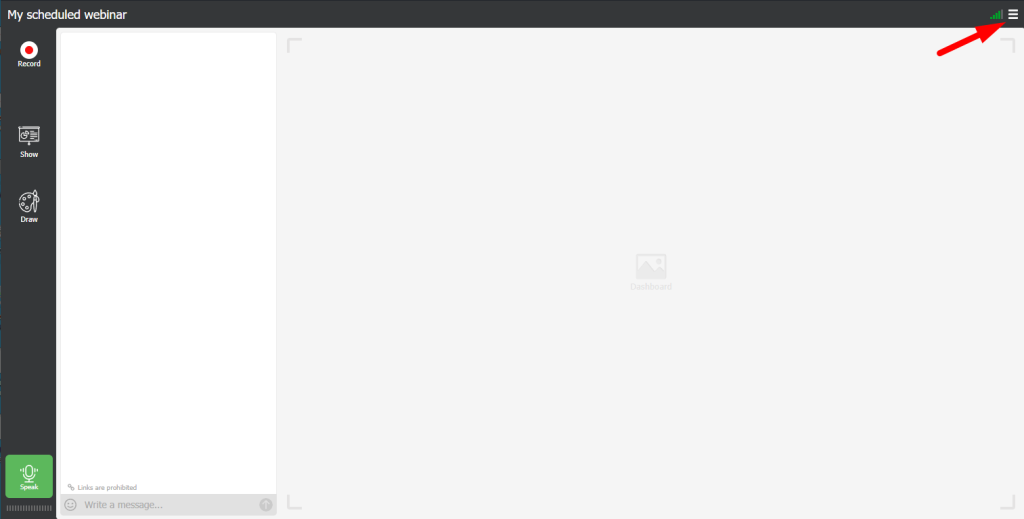
Find “Devices settings” and click on it.
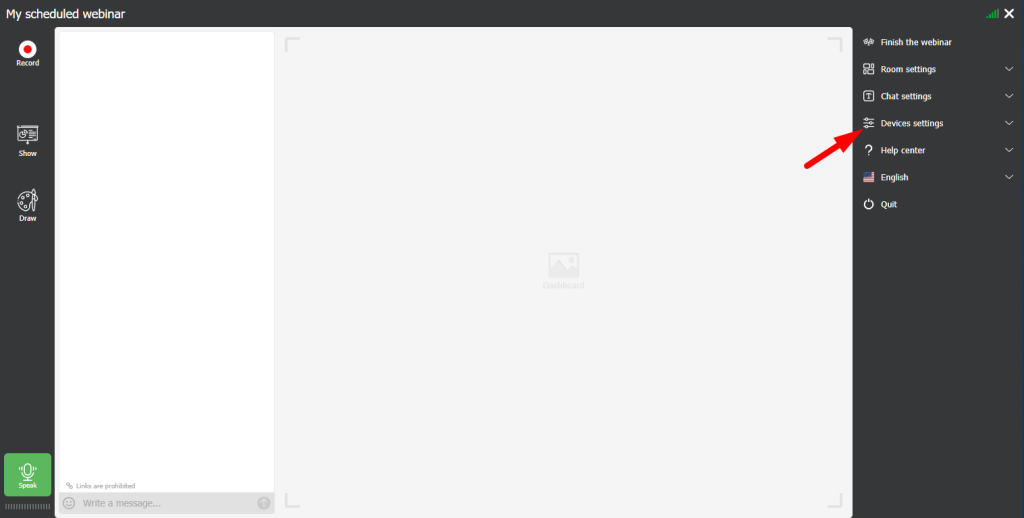
In the “Broadcasting protocol” sub-item, you will see what technology you have enabled. The green indicator next to WebRTC indicates that this technology runs in the room.
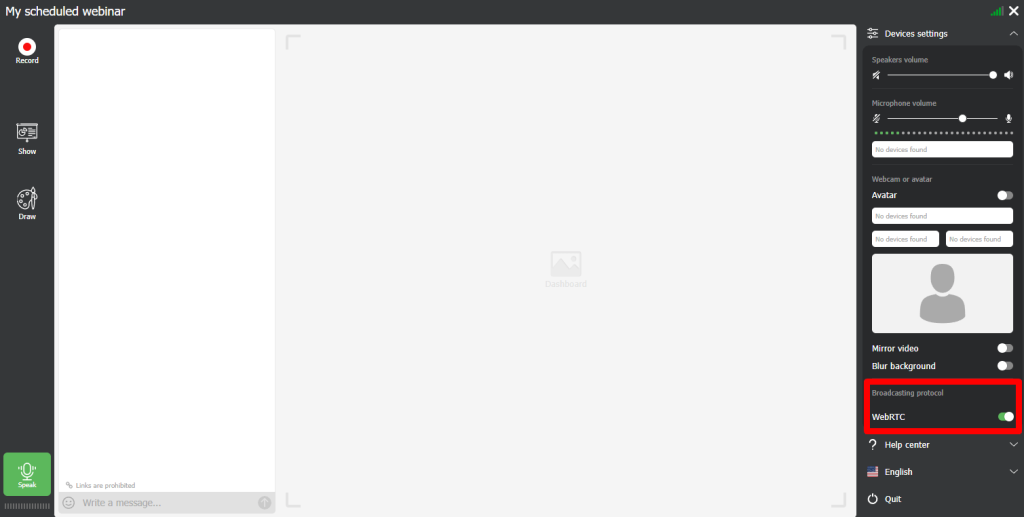
To switch a room to alternative broadcasting technology, press the switch. You can tell that the alternative technology has been activated by the changed color of the indicator. It will turn gray.
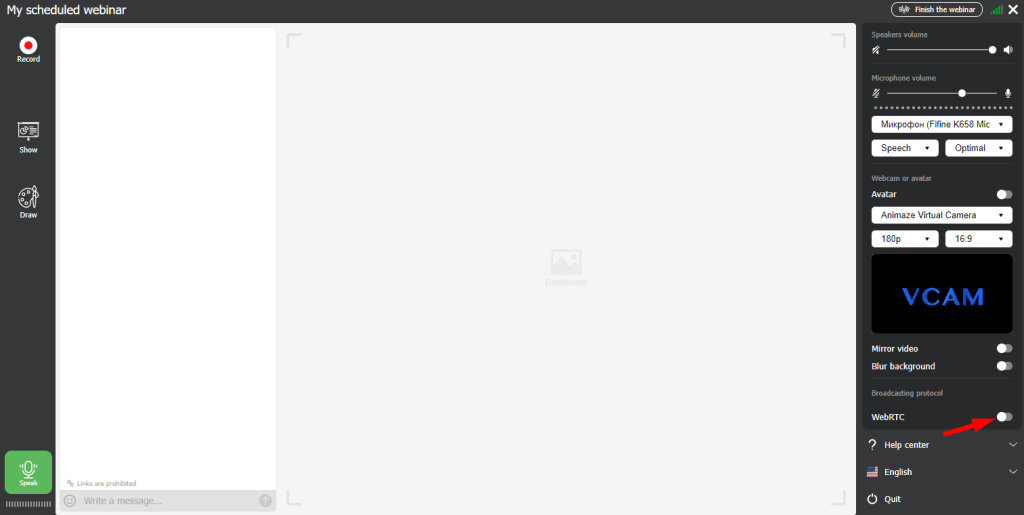
If you enable this feature for the first time, the system will try to find a plugin running on your device; if it is not there, you will be prompted to download the plugin after some waiting time. Do it. The alternative technology will only work if there is a plugin.

Then, follow the simple instructions.
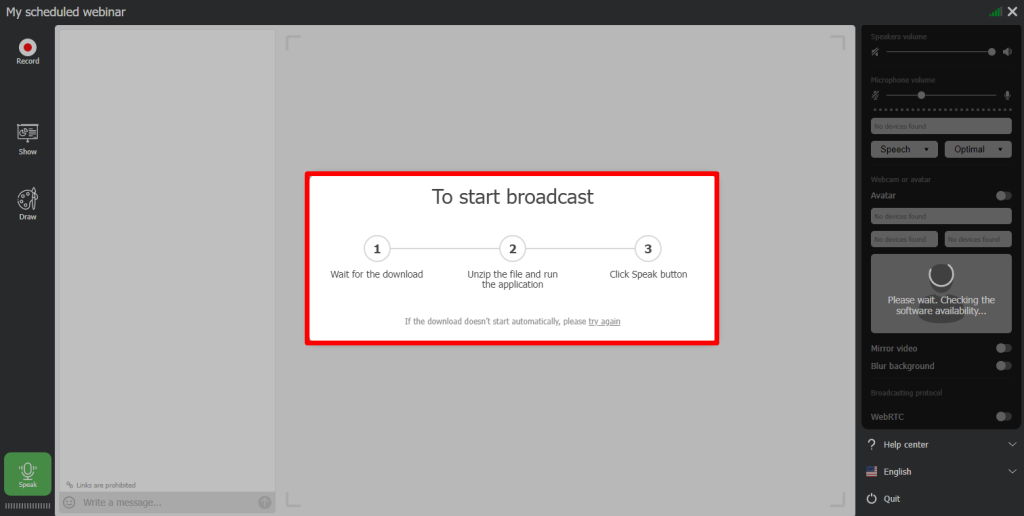
- Wait for the download to finish;
- Unpack the archive and run the application;
- Click the “Talk” button;
What do you do if the plugin is installed, but…
The system asks you to download it again and again? Follow the simple instructions:
- Find the Notepad application (
notepad.exe) on your computer and run it as Administrator. - In Notepad, find and open the “
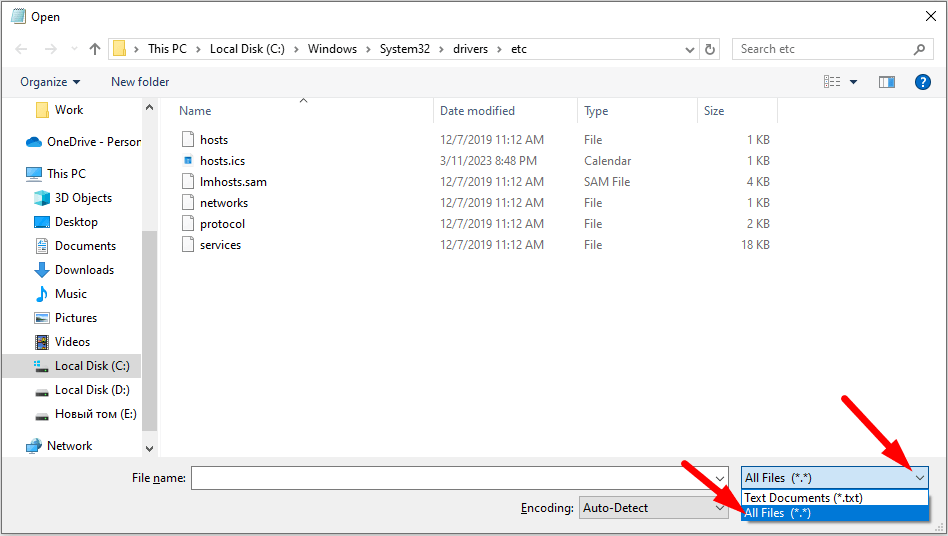
hosts” file; in order to find it, you need to enterC:\Windows\System32\drivers\etcin the address bar (after changing the type of files you are looking for to “All files”).
3. Add the text 127.0.0.1 add-on.mywebinar.io to the file at the very bottom
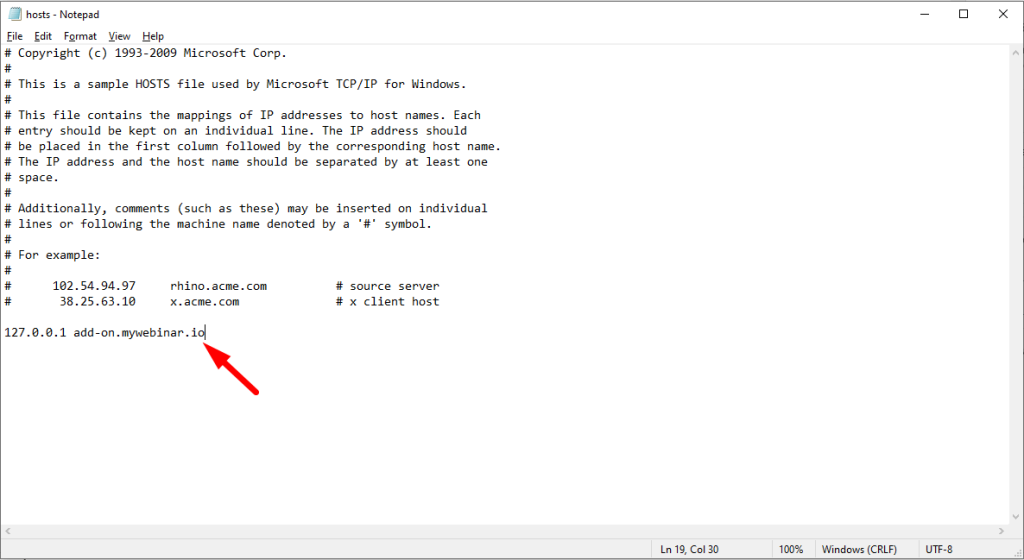
4. Save the file to your desktop.
5. Transfer the saved file here C:\Windows\System32\drivers\etc.
6. Refresh the webinar page and click on the “Speak” button.

How to activate WebRTC alternative in the macOS?
Unpack the archive and run the plugin by double-clicking, then click “Open”
You may see a message that the program cannot be opened. In this case, Control-click the DTS program icon, then select Open from the context menu.
Click “Open”.
The program will be saved in the list of exceptions in security settings, and it can be launched by double-clicking it like any other program in the future.
After all these steps, we need to install the plugin and grant screen-sharing permission in system settings. To do this, open “System Settings”, then go to the “Privacy & Security” section.
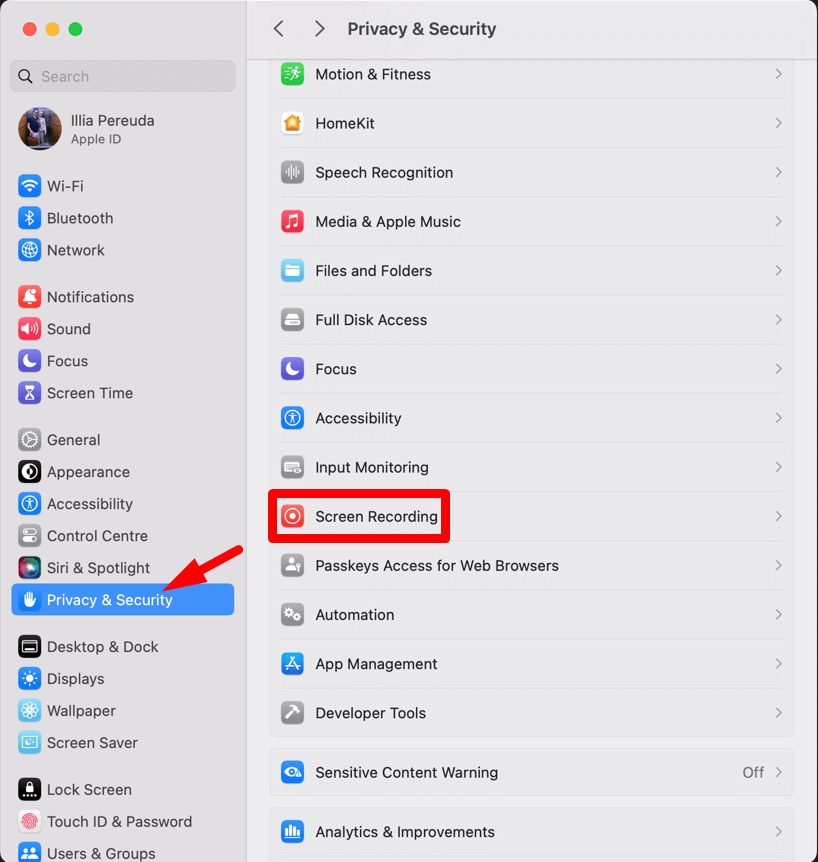
Select the “Screen Recording” section and check the box next to the DTS extension.
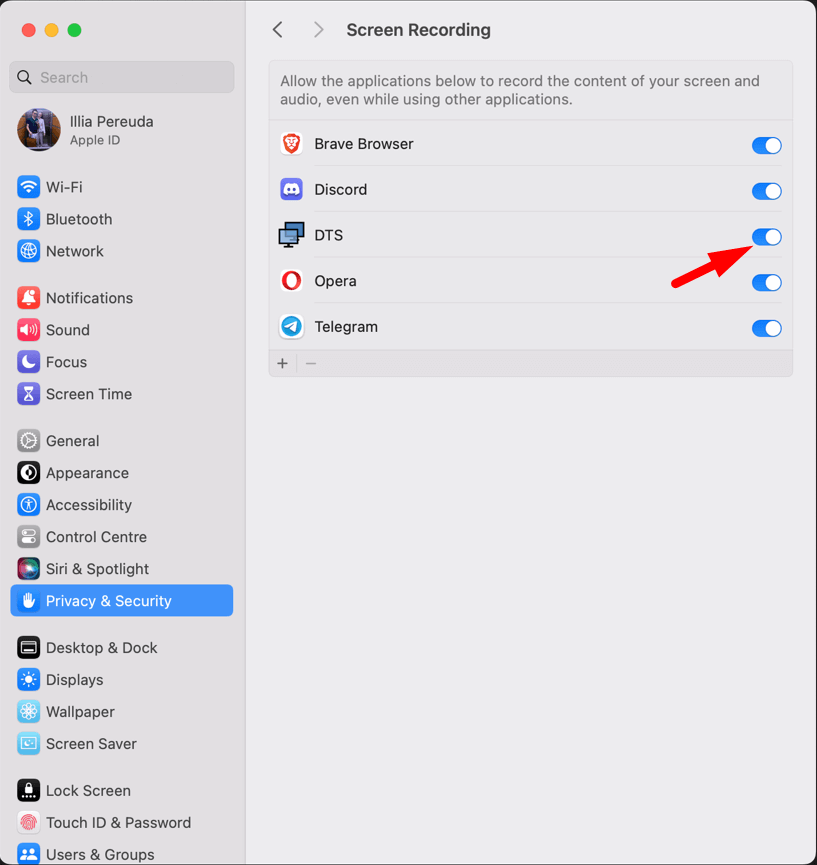
Launch the DTS plugin. Afterward, return to the room and press the “Speak” button.

Plugin already installed, but system asks for download?
Follow the simple instructions.
Find and launch the Terminal application on your computer. There are several ways to do this.
1. In the search bar “Launchpad”
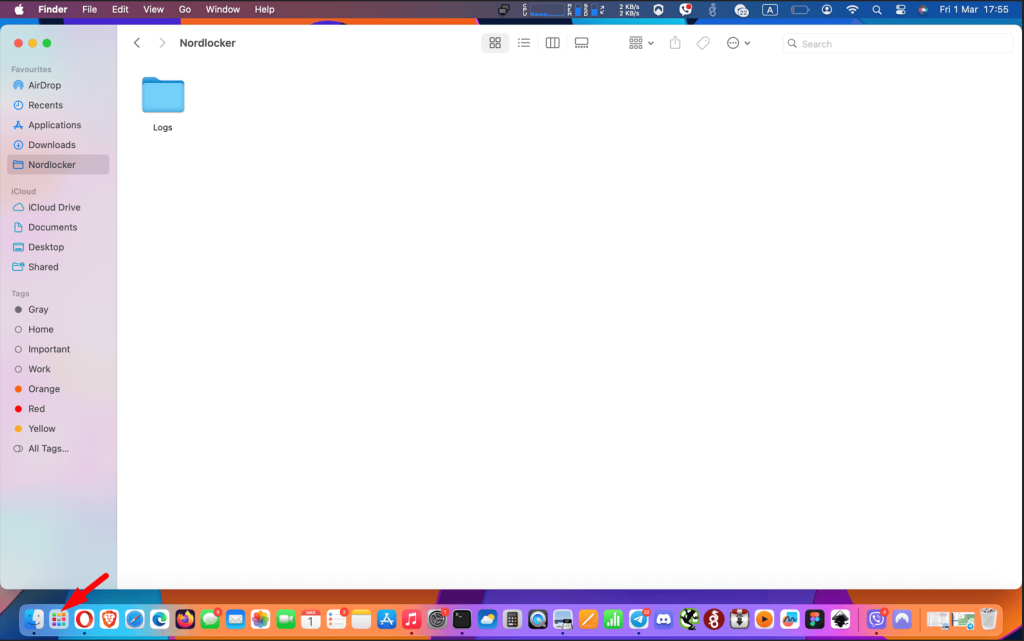
2. Type the word “Terminal” and press “Enter”. Then launch “Terminal”.
3. In a Terminal window, run the command: sudo nano /etc/hosts
After entering the command, the system will prompt you for the password.
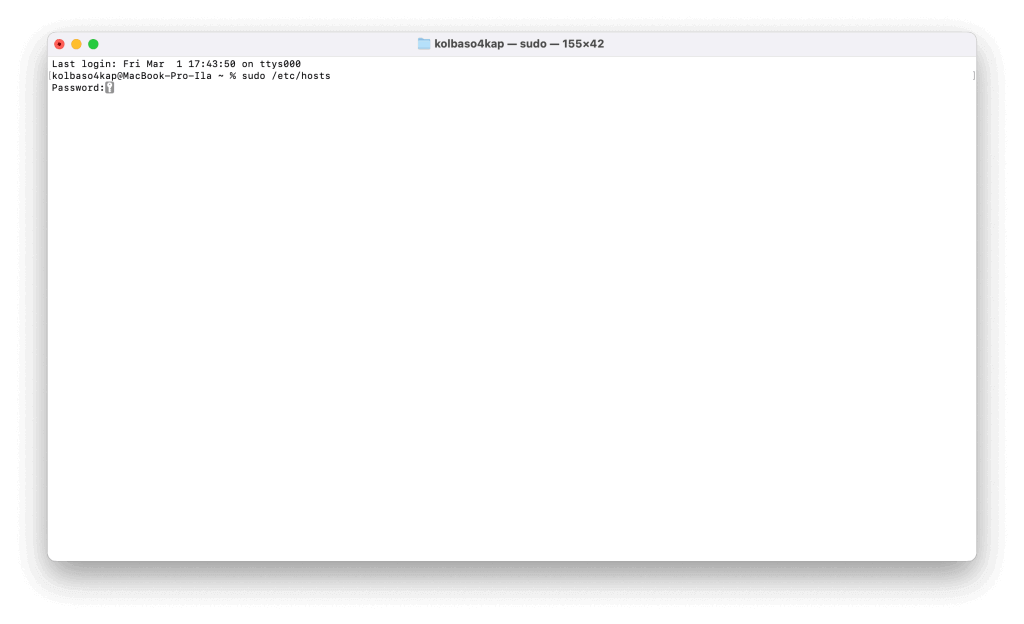
4. After executing the command, add the required text “127.0.0.1 add-on.mywebinar.io” from a new line.
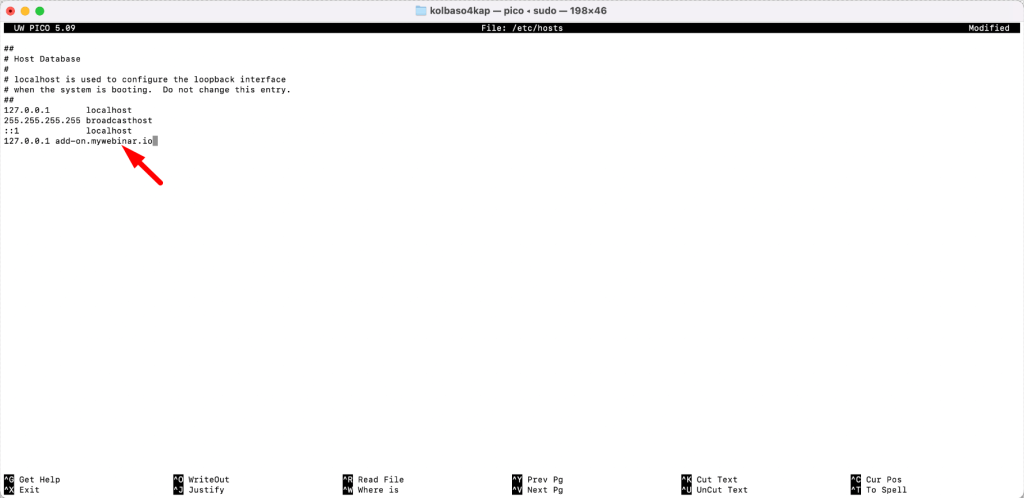
Save changes:
5.1. To save the file, press the keyboard shortcut “Control-O”.
5.2. To exit, press “Control-X”.
Refresh the webinar page and click on the “Speak” button.
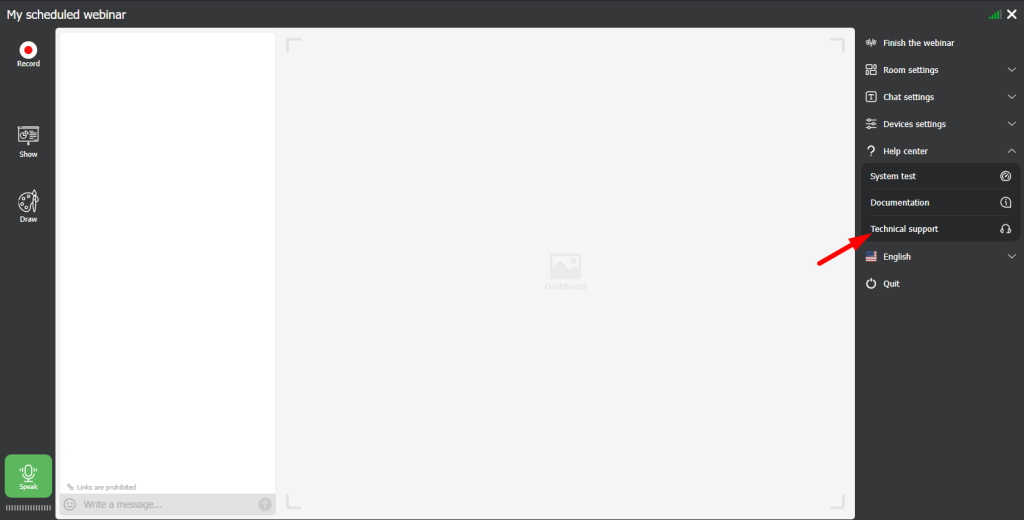
If you’re facing any issues while broadcasting using an alternative technology, please don’t hesitate to contact our technical support team.
Browser with built-in secure VPN
Our Alternative Broadcasting Technology plugin won’t work with browsers that have built-in free VPNs enabled. This is because the free VPN creates a secure tunnel that blocks the plugin’s local connection. Here’s how to use both the plugin and a VPN:
- Disable your browser’s built-in VPN.
- Use a separate, third-party paid VPN service.
By following these steps, you can ensure smooth operation of both the plugin and your preferred VPN.
FAQ
Alternative Broadcasting Technology involves conducting webinars through a special plugin that you can download to your computer. This allows you to bypass restrictions if you block WebRTC technology or use VPNs.
A more stable connection, and most importantly, it works even on poor internet.
1. Go to your webinar settings page;
2. Select the DTS plugin in “Advanced Settings”; Or
3. Find it directly in your webinar room under “Devices settings.”
Download and install the DTS plugin for your operating system (Windows or macOS) using the links in our article. Once you’ve downloaded the archive, extract the files and run the installer.
Add the line “127.0.0.1 add-on.mywebinar.io” to your computer’s “hosts” file. Then restart the webinar and try to press “Speak” again.

Dedicated to enhancing your online meetings and webinars in today’s digital-first era. Join us as we share in-depth insights, proven strategies, and expert guidance on organizing, promoting, and excelling at virtual events and conferences.


