
Your slides are finished and the invitations have gone out. The part most guides skip is what comes next, when you open the room and people start arriving.
This walkthrough covers that part. It starts about twenty minutes before you go live and finishes once you have stopped the recording.
If you are earlier in the process than that, what a webinar is and how one works covers the planning side.
Twenty minutes before you go live
Run the equipment check
The room checks your connection, camera, microphone and speakers before you go anywhere near an audience. It takes well under a minute, and it is the reliable way to discover that your headset is still paired to your phone.

Run it the day before as well as on the day. A driver that worked last week can stop working after an update, and you want to find that out while there is still time to plug something else in.
Put your material in the room first
Everything you plan to show goes in ahead of time. The room converts what you upload, and conversion takes a moment. Drop a file in at the last second and your audience gets to watch you wait for it.
Slides go in as PDF, PPT, PPTX, PPTSX, PPSX or ODP, images as PNG, JPG or JPEG, and video and audio as MP4, MOV, WEBM, MKV or MP3. A presentation can run to 200 MB and 200 slides, and a video file to 1 GB. The full list lives in which file formats are supported.

One thing worth knowing before you build your deck. Uploaded presentations are split into one static page per slide, so animation, transitions and embedded sound do not play. If your deck depends on any of those, share your screen instead and run it from your own machine.
Decide who else is on camera
Speakers are added in the webinar settings, on the "Moderators" tab, and there are two permission levels you can hand out. "Moderator & speaker" can run the room alongside you. "Guest speaker" can appear on camera and little else. Moderator and presenter management covers what each one can reach.
How many you can bring depends on your plan. The free plan seats two speakers, paid plans up to 500 attendees seat ten, and above 500 you get twelve.
Going on air
The room does not put you on air the moment you walk in. Your camera and microphone stay off until you press the green "Speak" button in the bottom left corner.
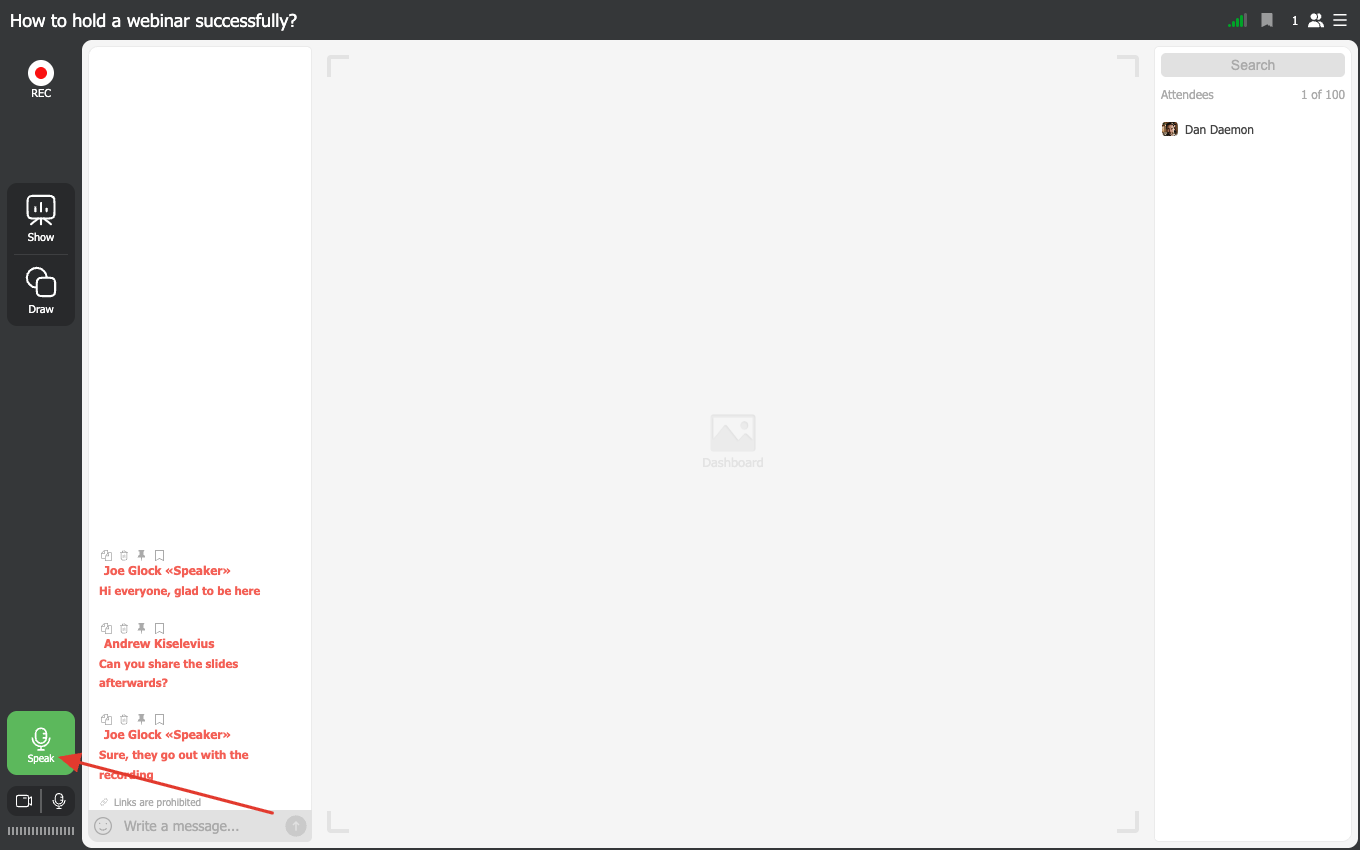
The browser then asks for permission to use your camera and microphone. Allow it. If you blocked that prompt at some point in the past, the browser has remembered. Clicking "Speak" will not help until you clear it in the site settings. Going on air walks through where that setting hides in each browser.
One thing you do not need to watch is the clock. There is no time limit on the broadcast itself, on any plan, the free one included.
Putting your material on screen
"Show" opens the materials panel, with a tab for each kind of thing you can put in front of people. Presentations, Media, Screen, Recordings, Polls, Surveys and CTAs.
Pick a file, press play, and it fills the workspace for everyone in the room.
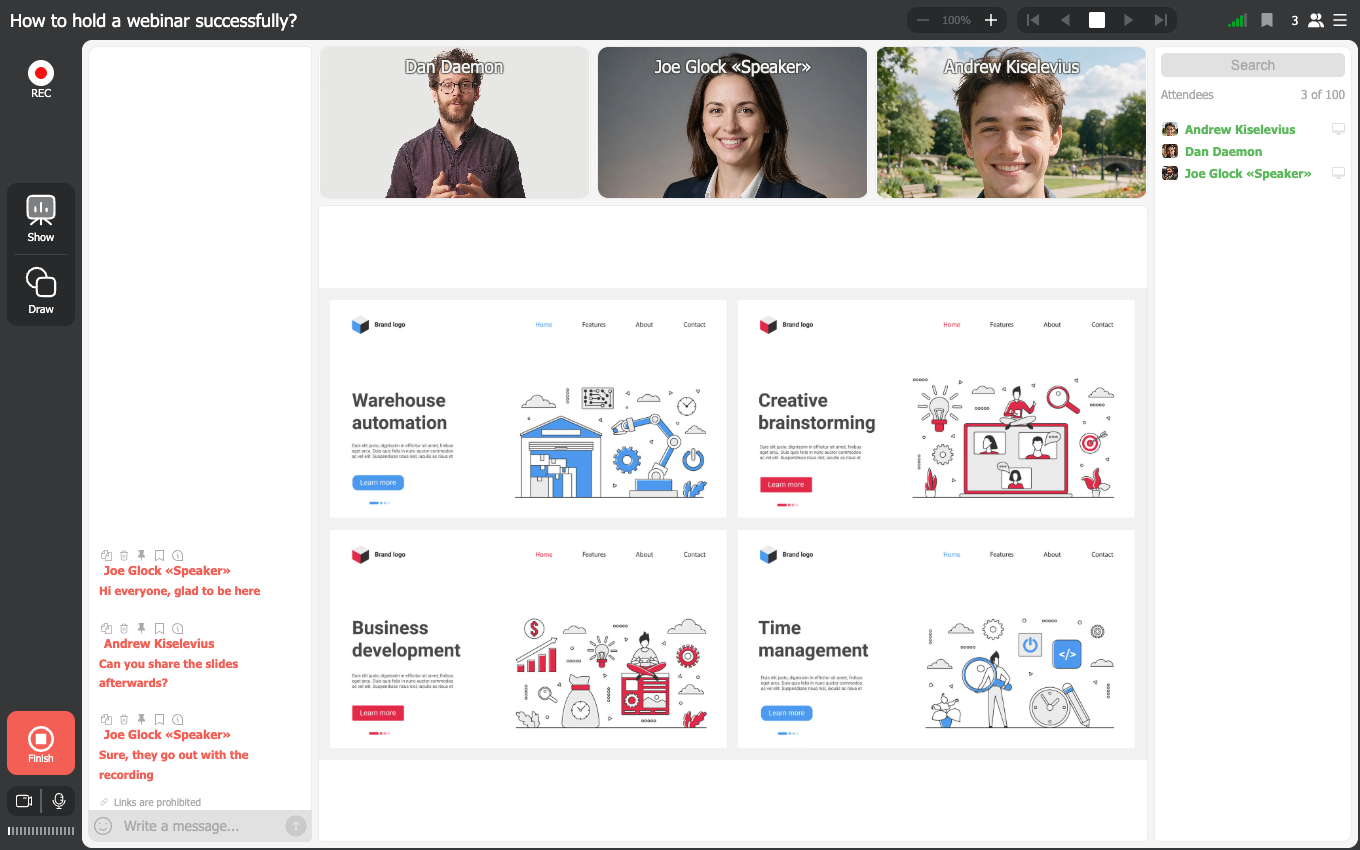
Screen sharing sits on the "Screen" tab of the same panel. It runs through an app called DTS, which the tab offers to download the first time you open it. Install it before the event rather than during it. How to share your screen during a webinar covers the install and picking a monitor or a single window.
"Draw" puts annotation tools over whatever is currently on screen. Circling the figure that matters while you talk about it beats saying "the one on the left, no, the other left".
Running the room
The chat, and the three switches behind it
Your chat controls live in the right hand panel, under "Chat settings". Three of them matter while you are live.

"Messaging" turns the chat off completely, which is worth knowing about before you need it rather than after. "Pre-moderation" holds every message until you approve it, so nothing reaches the room unread. "Links in messages" decides whether attendees can post URLs, and it starts switched off, which is why your room says "Links are prohibited" under the message box.
Leave pre-moderation off for a small friendly group. Switch it on for anything public, anything paid, or anything where a stray link would cost you. Chat moderation covers the rest of the controls, including the buttons above each message that let you pin, copy or delete it.
Bringing an attendee on camera
Click a person in the attendee list and a strip of actions opens beside their name. The green megaphone is the one that matters, and it invites them into the conversation with their own camera and microphone.
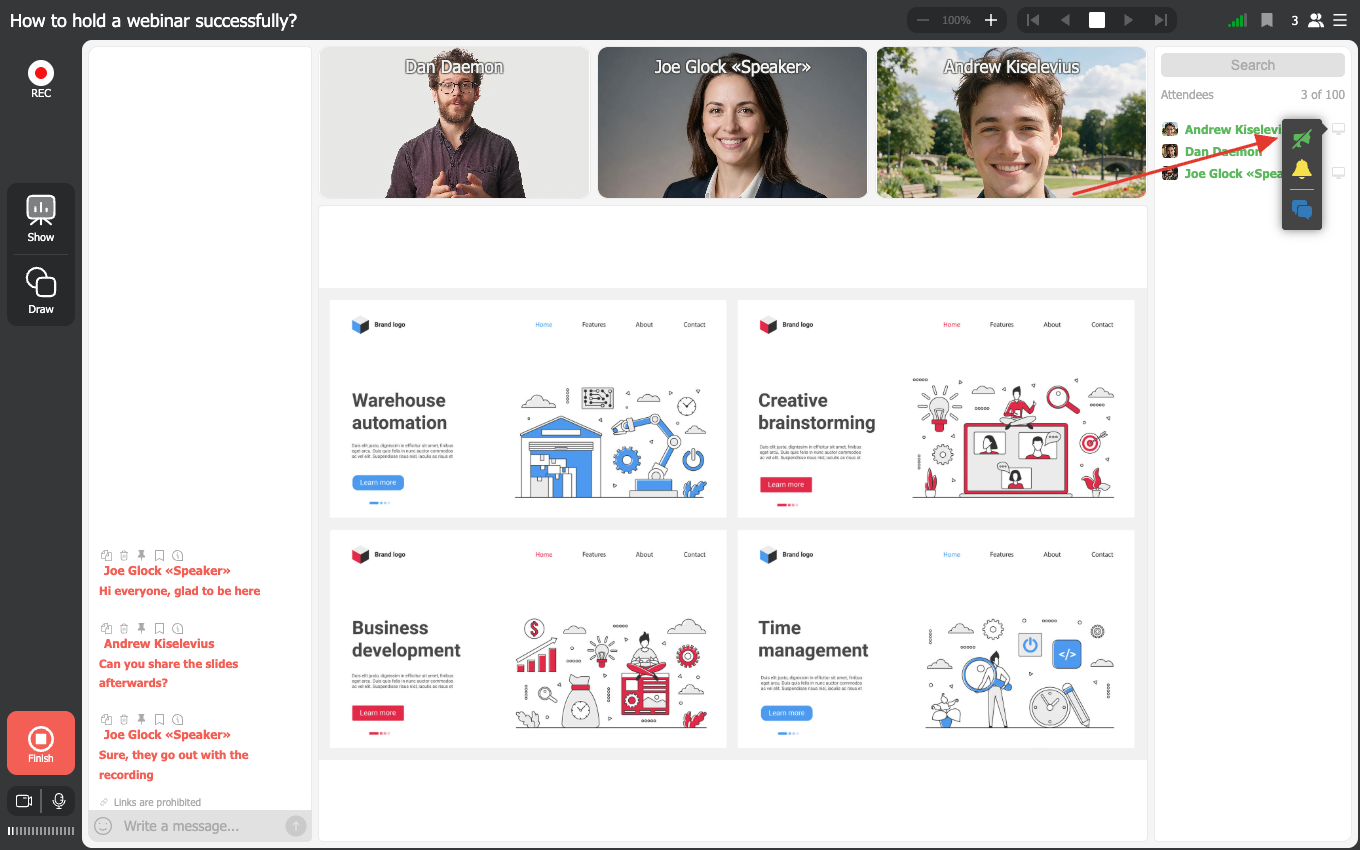
Nothing happens straight away. You confirm, then they confirm, and only then are they on camera. Say so in the chat first, because an invitation that arrives out of nowhere gets declined by reflex. Attendees can also raise a hand themselves, but only if you switched "Allow request to speak" on beforehand. Inviting an attendee to speak has both routes.
Polls
Polls live on the "Polls" tab of the materials panel, and you can build one mid-broadcast if the mood of the room tells you to. Launch it and a window opens for everyone, which closes once they have answered.
Polls are the cheapest way to find out whether anybody is still with you. Twenty minutes into a talk, "quick show of hands, has anyone here done this before?" gets you an answer in seconds. Polls and surveys covers what you can ask and what the results look like afterwards.
Recording
"REC" in the top left corner starts the recording. Press it a minute before you begin so the opening is not missing from the file.

A single recording stops itself at ten hours on any paid plan, and at twenty minutes on the free one. Ten hours is the ceiling for one file rather than a daily quota, so stopping and starting again simply gives you a second file. The number of recordings is limited only by your storage.
If you would rather not think about it at all, the panel can start recording for you every time. Automatic recording sets that up, and finding a recording is where the files turn up afterwards.
One catch worth knowing. YouTube and Vimeo videos play in the room through a link, but they do not reach the recording. If a video matters to the session, upload it as an MP4.
When something goes wrong
"We can't hear you"
Check the microphone icon at the bottom of the left column first, because muting yourself and forgetting is the single most common thing that happens in a webinar room. If the icon looks right, open "Devices settings" in the right hand panel and check that the room is listening to the microphone you think it is. A headset that connected after the room opened often is not the one selected.
The delay
In the browser you are looking at somewhere between a tenth of a second and just over half a second. On a struggling connection it can stretch to about three seconds. That is normal, and nobody notices it.
If you broadcast through OBS instead, the picture reaches your audience roughly ten seconds later. This is worth remembering before you run a live Q&A that way, because ten seconds turns a conversation into a series of awkward pauses. Broadcast latency has the detail.
"My link doesn't work"
Every invitation link carries one seat. If your attendee forwarded theirs to a colleague, the colleague is now sitting in the room and your attendee is not, because the link admits whoever opened it last. It is a ticket issued to one person rather than a password for the group.
If more people turn up than you have seats for, you can add seats to a running webinar. Extra seats during a webinar explains how that works and what it costs.
Someone's video has frozen
Ask them to reload the page. Nine times out of ten that fixes it, and it costs them a few seconds. If it happens to several people at once, the problem is more likely at your end, so check your internet speed.
Wrapping up
Leave a few minutes at the end for questions, and say out loud that you are about to finish, because people leave the moment they think it is over.
Stop the recording before you close anything. Then press "Finish" in the bottom left corner, which ends the broadcast for everyone.
The recording is converted to MP4 on its own, and how long that takes depends on the quality setting, the length and how busy the server is. It appears in your dashboard when it is ready. Nothing gets removed from a working account at our end, and a recording you delete yourself sits in "Trash" for seven days before it goes.
FAQ
Do I need to install anything to host a webinar?
No, not for a standard webinar. The room runs in the browser you already have, for you and for your attendees. The DTS plugin is only needed for screen sharing, and OBS only if you want to stream from your own software.
How long can a webinar run?
As long as you like. There is no time limit on the broadcast on any plan, including the free one. Only the recording has a ceiling, at twenty minutes on the free plan and ten hours per file on any paid one.
How many people can be on camera at once?
Two on the free plan, ten on paid plans up to 500 attendees, and twelve above that.
What happens if I lose my internet connection mid-webinar?
The room keeps running for everyone else while you reconnect, and your material stays on screen. Rejoin through the same link and press "Speak" again. This is the best argument for having a second moderator in the room, because somebody can then tell the audience what is happening.
Can attendees talk to each other privately?
No. The private chat in the room runs between an attendee and a moderator, not between two attendees. Attendees can only start one if you switched it on in the webinar settings beforehand.