
How to share your screen during a webinar
You can show your audience a whole monitor or a single window. Sharing runs through a small app of ours rather than through the browser, and why screen sharing requires our software explains what that buys you.
One thing surprises almost everybody the first time, so it is worth knowing before you start. You will not see the shared picture in your own room.
Getting into the room
Open the event with the three dots next to it in your dashboard, choose "Links", and click "Sign in" next to your own name.
Getting the app
In the room, click "Show" in the left rail and open the "Screen" tab. What you find there depends on whether the app is already running.
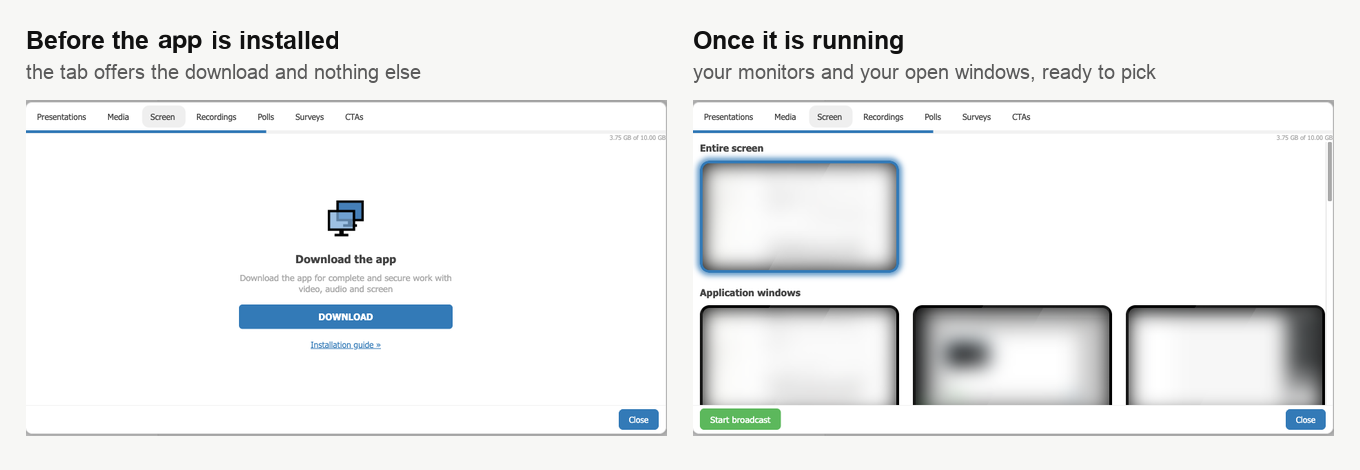
Without it, the tab offers the download and nothing else. With it, your monitors and your open windows are listed and ready to pick.
Start the download and the tab turns into a three-step guide while the file arrives.
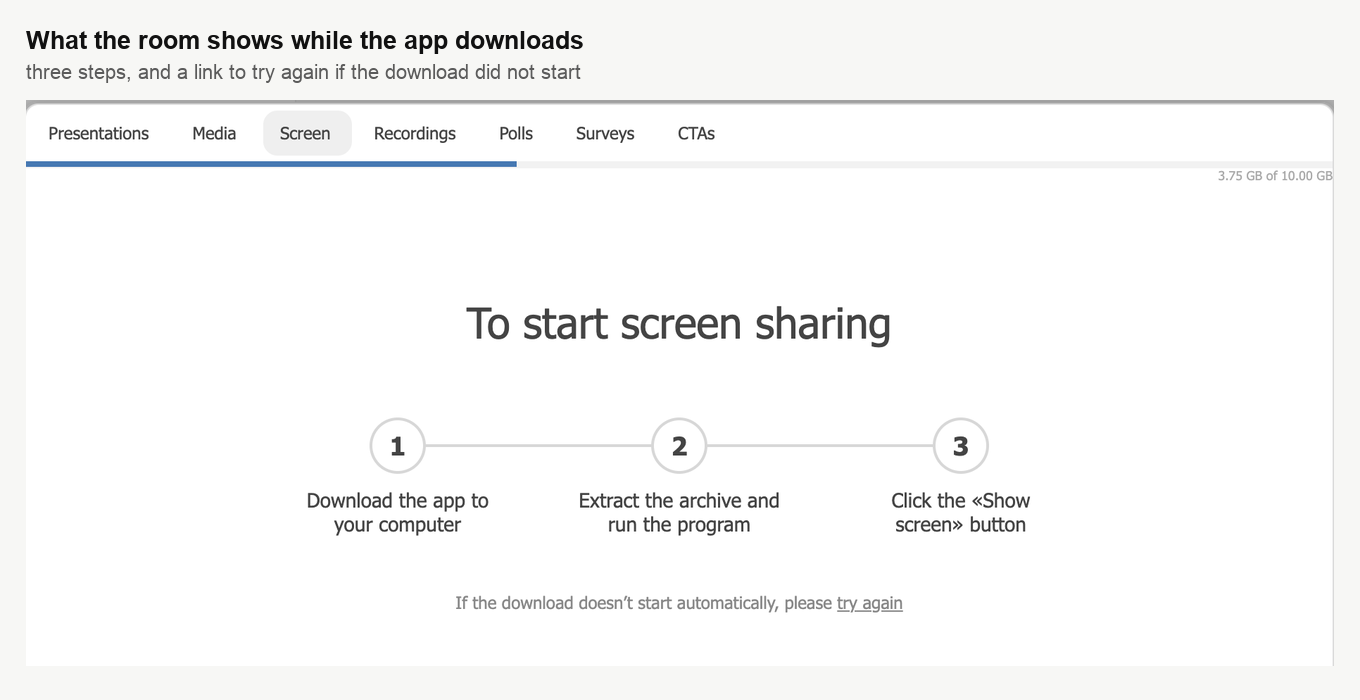
Those three steps describe the Windows package. On macOS the second one differs, because you get a disk image rather than an archive, and the sections below give each system its own version.
On macOS
You get a disk image. Open it, drag DTS across into Applications, and launch it from there.
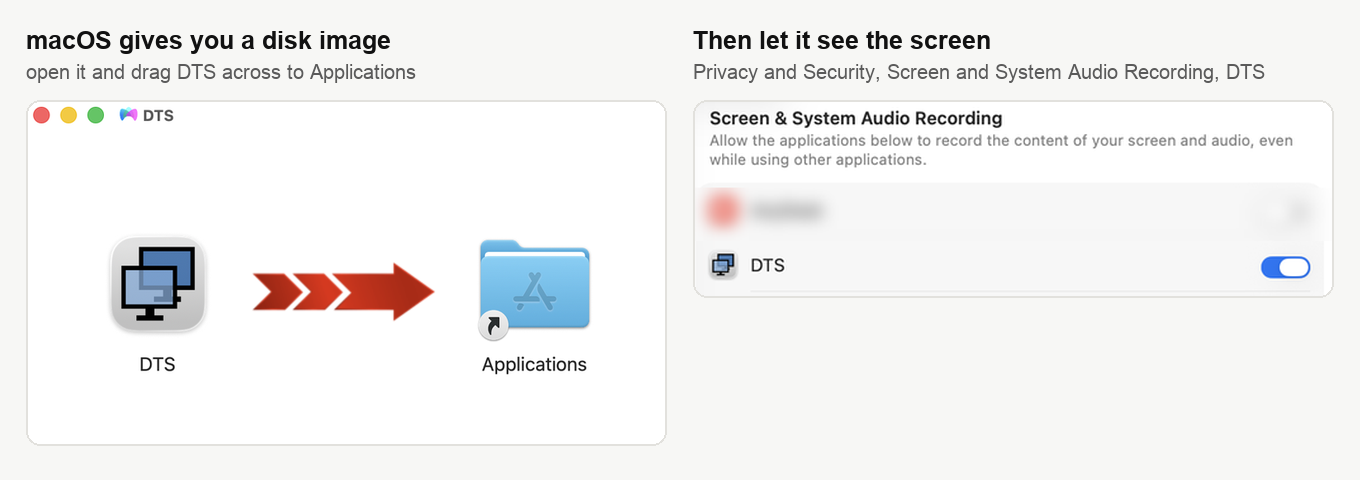
That first launch does two things worth knowing about. It adds DTS to your login items, and macOS says so in a notification, which means the app starts with your computer from then on and you never have to launch it by hand again. It also asks for the one permission it needs, in a window headed "Screen Recording". Click "Open System Settings" there and macOS takes you straight to the right pane.
DTS sits in that list switched off, as any app does until you say otherwise. Turn it on. macOS wants Touch ID or your password before it will let you, since this counts as changing a system setting, so on a work computer you may need whoever holds the administrator account.
Then macOS offers to restart the app, warning that DTS may not be able to record until it is quit. Take the offer. It closes the app, and you start DTS again from Applications yourself afterwards, because the reopen it promises does not happen.
Almost always that is the whole of it, and the room picks the app up as soon as you refresh.
On Windows
The steps inside the room are identical. The difference is the package, since we ship a ZIP archive signed with a Microsoft certificate rather than an installer. There is nothing to install, so download it, unpack DTS.exe and run it.
Windows being Windows, a restart is usually needed before the room sees the app for the first time.
Nothing else has to be switched on. Windows has no equivalent of the macOS screen recording permission.
On Linux
Screen sharing is not available. The app does not run there, which technical requirements lists alongside the other platform limits.
If the room still does not see the app
There is one case where a correctly installed app stays invisible to the browser, and it is worth recognising rather than reinstalling.
The room reaches the app on your own machine, through the address add-on.mywebinar.io, which is supposed to resolve to 127.0.0.1. Some internet providers answer that lookup with an address of their own instead. The app is running, the browser cannot find it, and nothing you do inside the room helps.
Pointing the name at your own machine by hand fixes it. On macOS open Terminal and run the following, entering your computer password when asked.
sudo nano /etc/hostsOn Windows, find Notepad, run it as Administrator and open the hosts file, which lives in C:\Windows\System32\drivers\etc.
Either way, add these two lines at the very bottom of the file, each on its own line.
127.0.0.1 add-on.mywebinar.io
::1 add-on.mywebinar.io
On macOS press Control-O to save and Control-X to exit. On Windows, if it refuses to save into that folder, save the file elsewhere and copy it back over the original.
That closes the problem. A restart may be needed, though on every machine in our own lab the browser picks the change up at once. Alternative broadcasting technology covers the same fix in the context of the app itself, along with switching to Google DNS, which is the gentler thing to try first and which how to set up Google DNS on Windows 11 walks through.
If your screen arrives as bare wallpaper
This one is macOS only, and it is the permission rather than the app. Nothing announces it either, since the app runs, the room finds it, and the "Screen" tab opens exactly as it should.
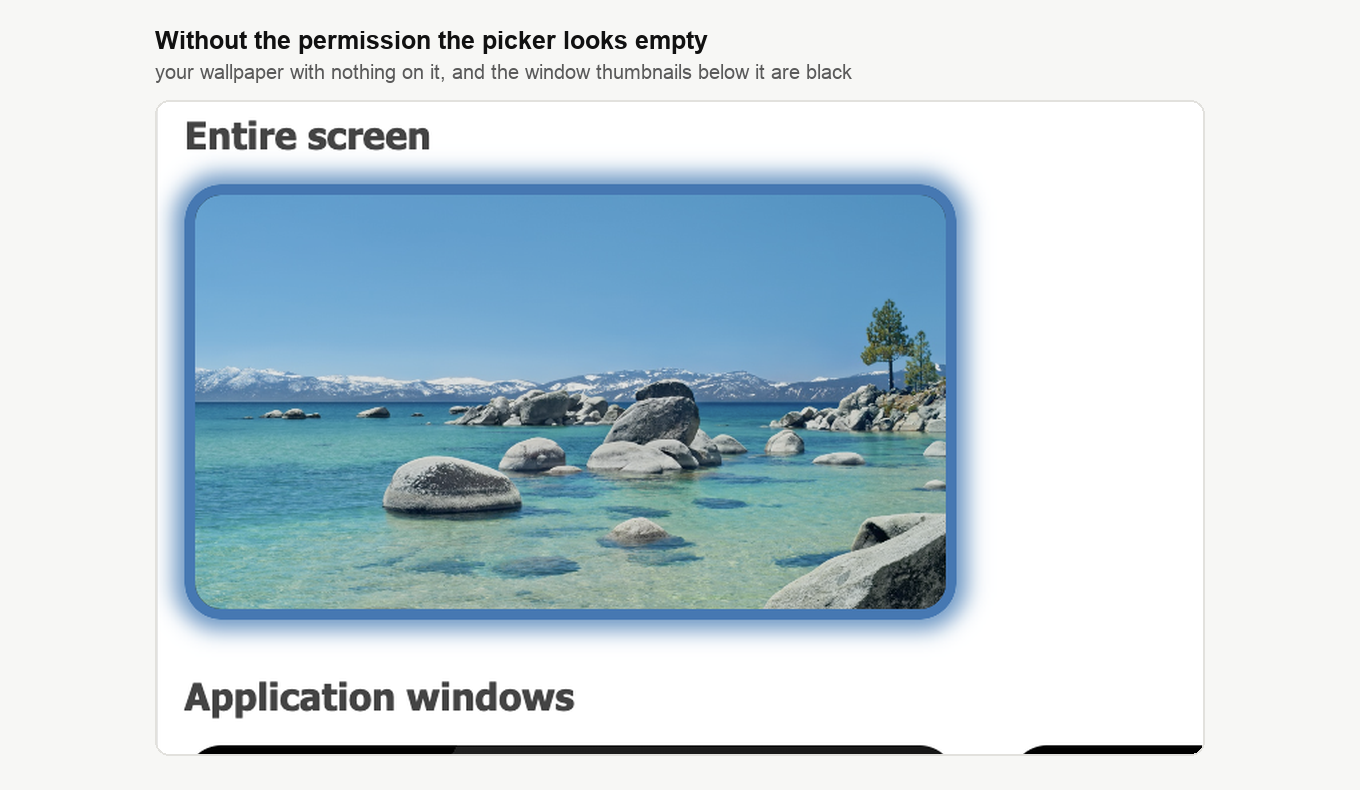
What is missing is the content. Your desktop appears as bare wallpaper with none of your open windows on it, and the thumbnails under "Application windows" are black rectangles. Go back to "Screen & System Audio Recording" and check the switch beside DTS rather than reinstalling anything.
Choosing what to show
Back on the "Screen" tab, your monitors are under "Entire screen" and everything you have open is under "Application windows". Click one, then click the green "Start broadcast".
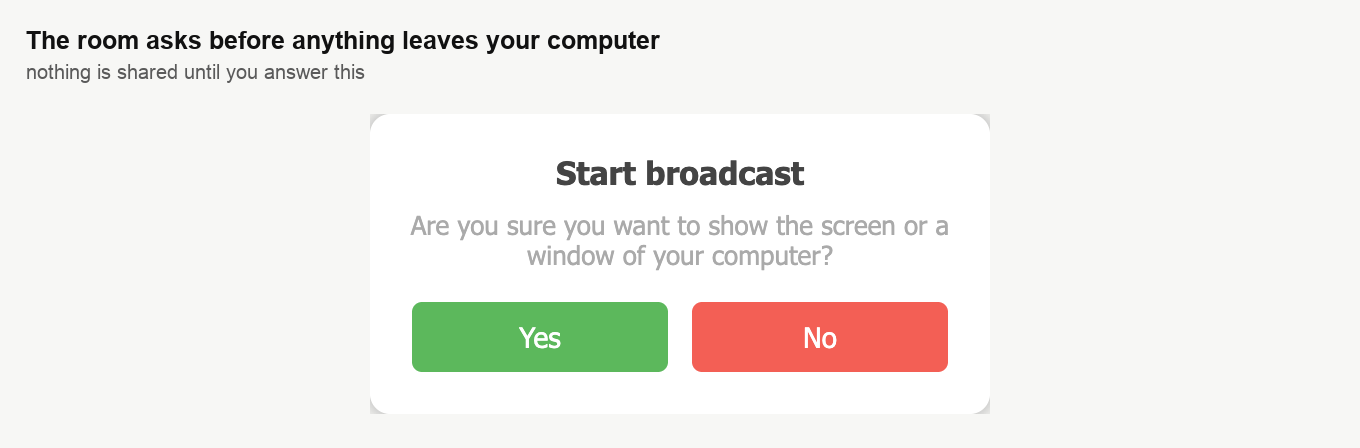
Nothing leaves your computer until you answer that. Use the moment, because it is the last one before your desktop is public.
Why you cannot see your own screen
Once sharing starts, your working area does not show the picture. It shows a line of text instead.
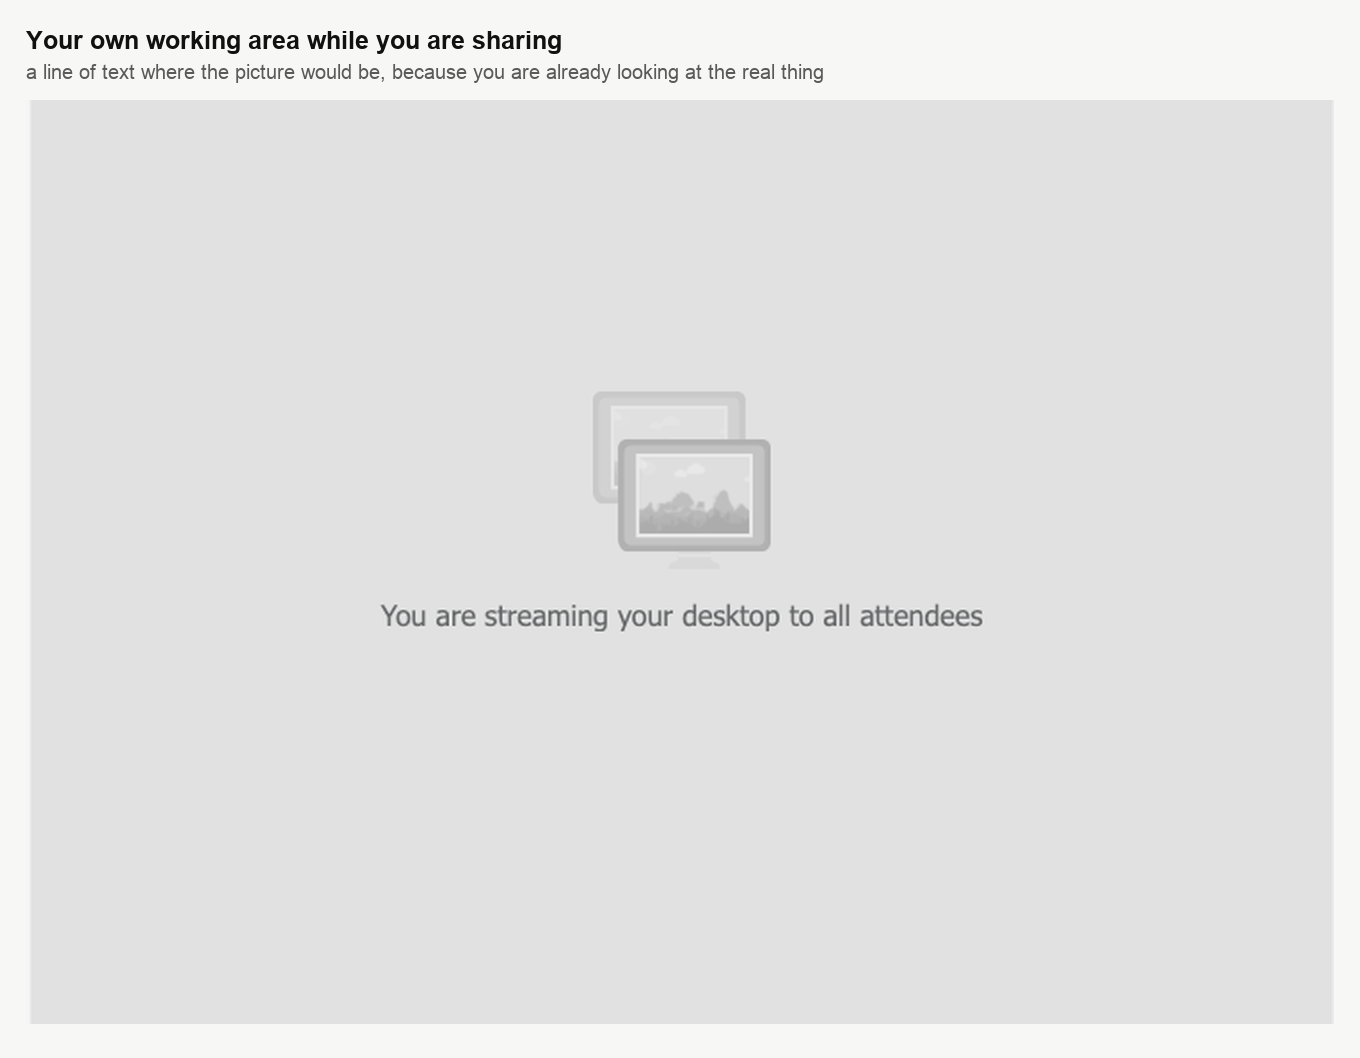
This is deliberate rather than a fault. You are already looking at the thing you are sharing, so putting a copy of it in the room would give you a picture of your own screen inside your own screen and tell you nothing you cannot see by looking up.
To check what your audience is actually getting, open the room as an attendee in a second browser, which is worth doing once before an event rather than in the middle of one.
Stopping
There are two ways, and both end the same thing.

The white square sits in the header, top right, where a player keeps its stop button. Or go back to "Show" and the "Screen" tab, where the green "Start broadcast" has turned into a red "End broadcast".
Starting a presentation or a video also ends it, since the working area can only carry one thing at a time.
A whole screen or a single window
Share a whole screen and your audience sees everything on that monitor, so your desktop, whatever else is open and any notification that arrives. Share a single window and they see that window alone, with nothing behind it.
The single window is the safer choice by a wide margin. Close what you would not want recorded before you start either way, because the recording keeps whatever the room saw.
Still stuck
If sharing will not start, or your attendees see something other than what you picked, open the online chat and tell us your system, whether the app is running and what the "Screen" tab offers you.
Frequently asked questions
Our IT department locks down my work Mac. Can I still share my screen?
Only with an administrator's help. macOS wants Touch ID or your password before it will let you switch DTS on, since this counts as changing a system setting, so on a work computer you may need whoever holds the administrator account. Without that switch nothing announces the problem, because the app runs and the "Screen" tab opens as it should, but your desktop arrives as bare wallpaper with none of your open windows on it.
Does DTS stay on my computer after the webinar?
Yes, on a Mac it starts with your computer from then on. The first launch adds DTS to your login items and macOS says so in a notification, which is why you never have to launch it by hand again. The one time you do start it yourself is straight after granting the permission, because macOS offers to restart the app and the reopen it promises does not happen.
How do I check my audience can actually see the shared screen?
Open the room as an attendee in a second browser, which is worth doing once before an event rather than in the middle of one. Your own working area will not show the picture, since you are already looking at the thing you are sharing, so it carries a line of text instead. That is deliberate rather than a fault.
Why did my screen sharing stop when I opened a presentation?
Because the working area can only carry one thing at a time, so starting a presentation or a video ends the sharing. To stop it deliberately instead, use the white square in the header, top right, or go back to "Show" and the "Screen" tab, where the green "Start broadcast" has turned into a red "End broadcast".
Is there anything to allow on Windows?
No. Windows has no equivalent of the macOS screen recording permission, and there is nothing to install either, since we ship a ZIP archive signed with a Microsoft certificate rather than an installer, so you download it, unpack DTS.exe and run it. Windows being Windows, a restart is usually needed before the room sees the app for the first time.
