
Inviting and managing attendees without platform emails
You do not have to let the platform send the invitations. Publish the entry link yourself, or hand out personal access links one by one, and switch the automatic mailing off entirely.
Open webinars
If anyone is welcome at your webinar, create the event and skip adding attendees while you plan it. Open the webinar's menu in your calendar and choose "Links". The panel opens with the general guest link at the top, and "Copy" puts it on your clipboard.

Publish that link on your website or your social accounts. It works just as well in your own newsletter, or in whichever messenger your audience actually reads, such as WhatsApp, Instagram, Facebook or Telegram.
Closed webinars
For an event only personally invited people may attend, open the webinar's "Attendees" tab and click "Add new". Fill in the name and leave the email field empty.
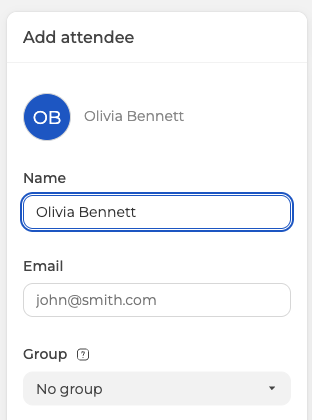
The platform accepts an attendee with no address and labels them "No email provided" from then on, which is how you tell at a glance who you have to reach yourself.
Then stop the platform writing to anyone. Open the webinar settings, go to the "Emails" tab and set "Recipients" to "Nobody". The other three options narrow the mailing rather than end it, because "Moderators only" and "Attendees only" both still send.
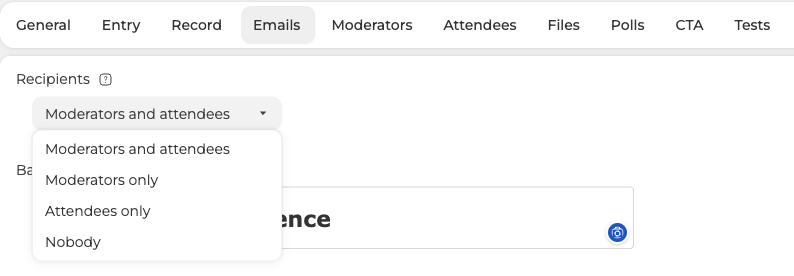
Each of the eight messages further down the tab also carries its own "Send" switch, so you can silence them one at a time instead if you only want to drop some of them.
Personal access links
Finish setting up the webinar, then decide how people get in. "Invitation link login only" on the "Entry" tab restricts entry to personal links.
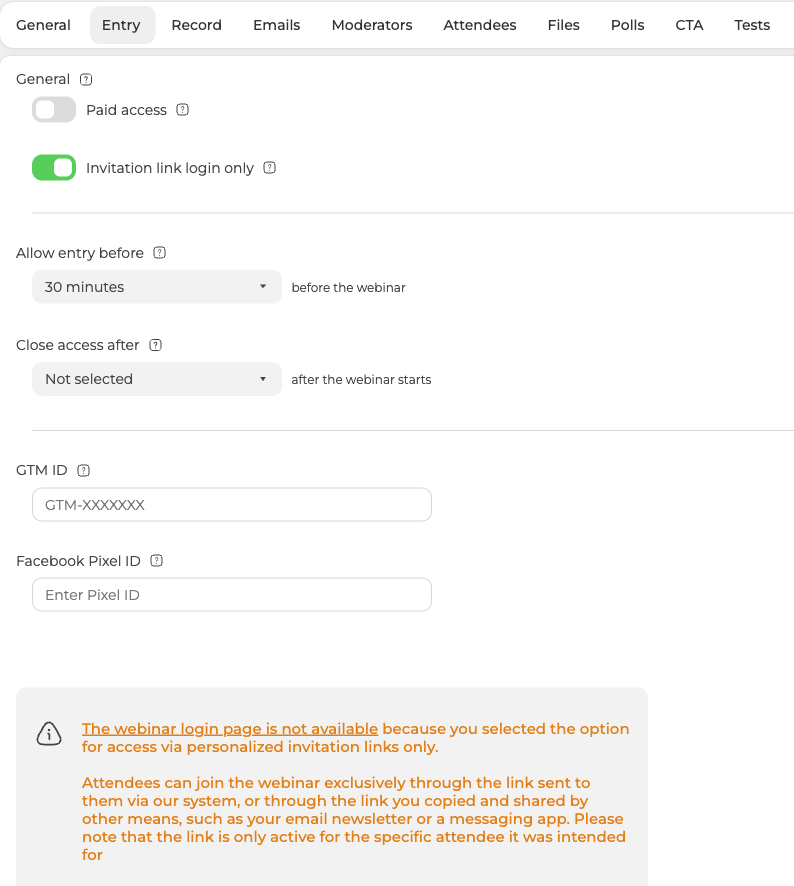
Switching it on takes away the general guest link, the login form and the form embedding option, and the panel says as much, that the webinar login page is no longer available because access now runs through personalised invitation links.
Copying links one at a time
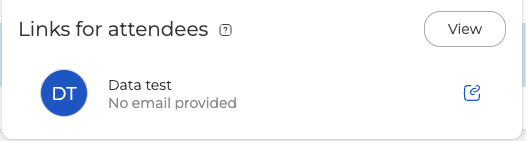
The same "Links" panel you took the guest link from lists your attendees who have no email address on file, meaning exactly the people our system cannot write to. The icon at the end of a row copies that person's personal link.
Exporting the whole list
For a longer list, use "Export" on the "Attendees" tab. Switch on "Autologin link" among the fields, together with the name and anything else you need, and every row of the file comes back with that person's personal link on it. "Save as" offers CSV or Excel, and the delimiter below it takes a comma or a semicolon, whichever your spreadsheet expects.
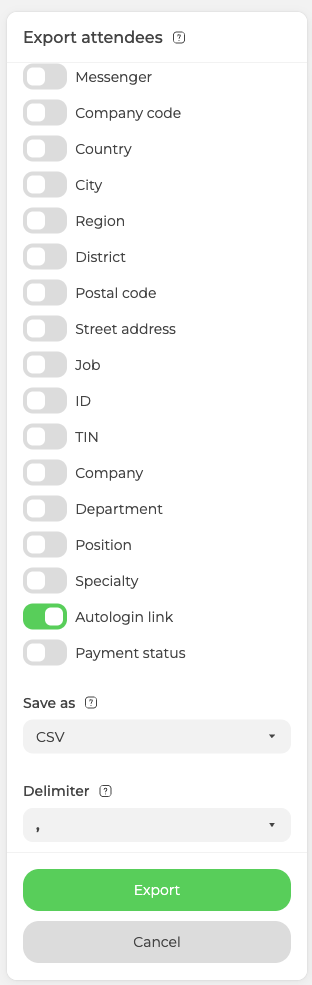
Send each link separately to the person it belongs to. Any channel works here, so use WhatsApp, Instagram, Facebook, Telegram or plain email, whatever your attendees actually read.
Every link is one person's ticket
This matters whichever way you hand the links out. Every entry link, both the ones our system emails and the ones you copy and send yourself, is issued to one named attendee and to nobody else. Think of it as a ticket with a name printed on it rather than a door code that works for whoever holds it.
Passing it around does not multiply the seat. Only whoever used the link most recently is actually in the webinar, because a second entry on the same link disconnects the session already running on it. Two people cannot watch on one invitation. They can only take turns knocking each other out of the room.
With "Invitation link login only" switched on, attendees who do have an address on file get a second check on top. When somebody else opens one of their links, the platform emails a one-time code to that address, so a stranger needs the mailbox as well as the link. Personalized access links walks through that check.
Attendees with no address on file sit outside all of that mail. They get neither the invitation nor the link from us, because there is nowhere to send either. That is exactly what the two methods above are for, so copy each person's link from the "Links" panel or pull it out of the export, then hand it over through a messenger or whatever channel you already use with them. Once they have it, that link is their ticket on the same terms as everyone else's.
The practical warning for your attendees is short. An attendee who gives their own link away has only themselves to blame when they cannot get in, because they handed over the one ticket that was theirs.
Mixing both approaches
You can invite attendees with email addresses and attendees without them to the same event. The ones with an address receive the standard invitation from our system, as long as "Recipients" still includes attendees. The ones without an address are yours to reach, so you send them their links yourself.
If a link you handed out yourself will not let somebody in, open the online chat and tell us the event and what the page says when they open it.
Frequently asked questions
What happens if an attendee passes their link to a colleague?
Only one of them is in the webinar at a time. Every entry link is issued to one named attendee and to nobody else, and a second entry on the same link disconnects the session already running on it, so the two can only take turns knocking each other out of the room. Passing a link around does not multiply the seat, whether our system emailed it or you sent it yourself.
How do I stop the platform emailing anybody at all?
Open the webinar settings, go to the "Emails" tab and set "Recipients" to "Nobody". The other three options narrow the mailing rather than end it, because "Moderators only" and "Attendees only" both still send. If you only want to drop some of the messages instead, each of the eight further down the tab carries its own "Send" switch.
What do I give up by switching on "Invitation link login only"?
The general guest link, the login form and the form embedding option, all three at once. The panel says as much when you switch it on, that the webinar login page is no longer available because access now runs through personalised invitation links. Finish setting the webinar up first, then decide how people get in.
How do I tell which attendees I have to reach myself?
The platform labels anyone saved without an address "No email provided", which is how you spot them at a glance. The "Links" panel lists exactly those people, meaning the ones our system cannot write to, and the icon at the end of a row copies that person's personal link. For a longer list, switch on "Autologin link" in "Export" on the "Attendees" tab and every row of the file comes back with its own link.
If somebody else gets hold of an attendee's link, can they use it?
Not easily, provided that attendee has an email address on file. With "Invitation link login only" on, the platform emails a one-time code to that address when somebody else opens one of their links, so a stranger needs the mailbox as well as the link, and Personalized access links walks through that check. Attendees with no address on file sit outside all of that mail, so there is no code to send them.
