
Attendee invitations and management
Everyone you invite and everyone who signs up on their own lands in the same place, the "Attendees" section of your control panel. There are four ways to get people onto that list. After them come the filters that keep the list usable once it grows past a screenful.
Before you start
You need contacts in the system before you can invite anyone to a scheduled webinar. If you already have a client base, bring it in with the import in step 3. If you are starting from nothing, the other three methods build the list for you as people arrive.
Whichever route you take, the platform keeps every registered person, so new and returning attendees sit in the same list.
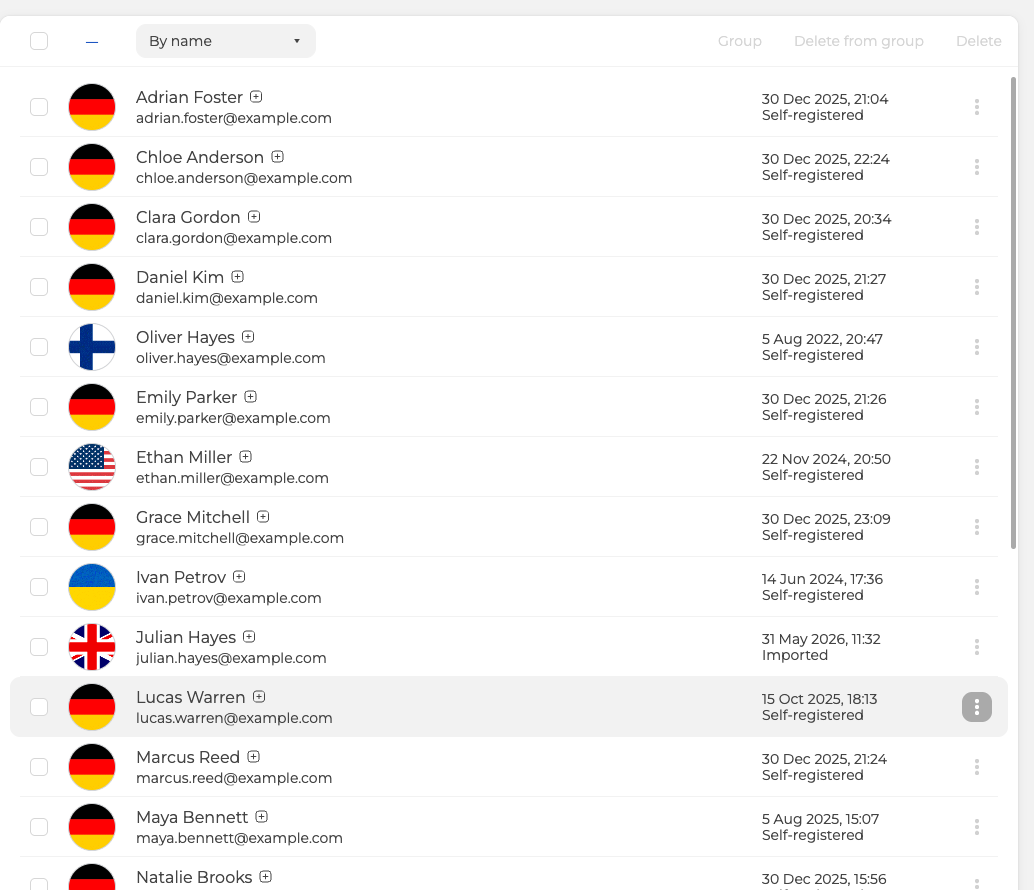
Each row records how that contact reached you. There are two values, "Self-registered" for the people who signed up through one of your own forms, and "Imported" for everyone you put there yourself.
1. Let people sign themselves up
Open the webinar settings and go to the "Entry" tab. "Login form" holds the fields the registration page asks for. It starts with a full name and an email, and "+ Add field" holds eighteen field types in all, from a phone number to a street address.
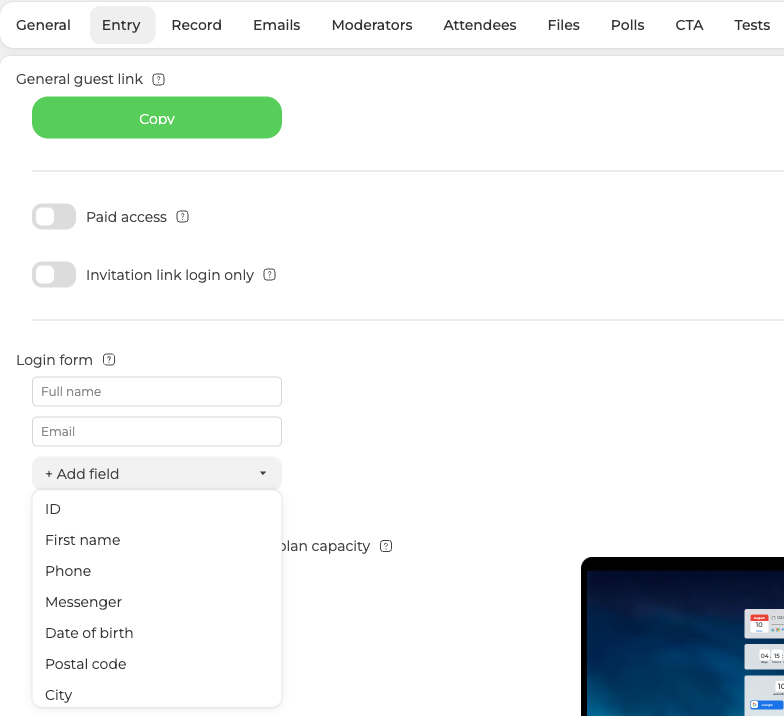
The same tab carries the "General guest link", which is the public address of the event, with "Copy" next to it. You can also collect it from the "Links" item in the webinar's own menu, which is where inviting people without our email picks it up.
Publish that link wherever your audience already is. Anyone who opens it lands on the registration page.
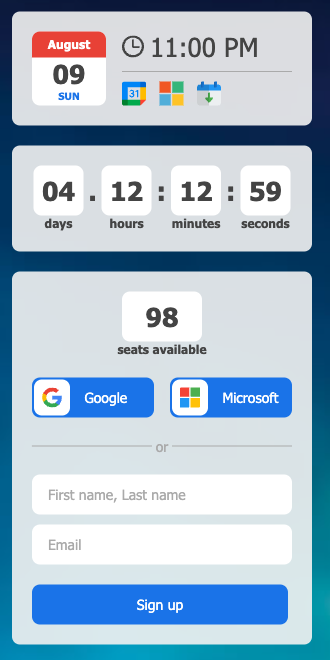
Everything above the form is optional and comes from "Preferences", further down the same "Entry" tab. The example here has "Show the webinar date", "Show countdown timer" and "Show number of available spots" left switched on, so a visitor meets all three before signing up. Registration itself takes a name and an email, or a Google or Microsoft account while "Allow sign-up with social accounts" stays on. Whoever signs up appears in your attendee list straight away.
2. Add attendees by hand
Open "Attendees" in the control panel and click "Add new". Fill in the name and the email address, pick a group if you use them, then click "Add".
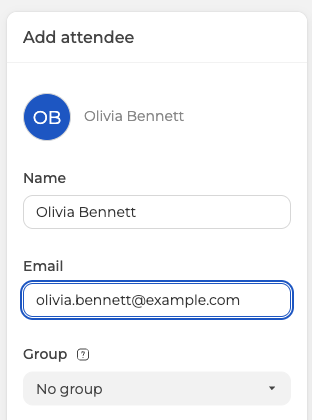
The email address is optional. Leave it empty and the contact is still saved, which is what you want for anyone you plan to reach yourself rather than through our mailing. Inviting people without our email covers what follows from that.
Choosing who gets invited
Adding somebody to your contacts does not invite them to anything. Invitations are decided one event at a time, on the "Attendees" tab inside the webinar settings. That screen is headed "Webinar attendees" and it shows the same contacts as the "Attendees" section, with the same "Add new" button on it.
Mark the people you want. As the note above the list says, only marked attendees will be invited to the webinar.

The figure in the top right shows how many invitations your plan has left for this event, and it moves while you work. Mark three more people and it drops by three, clear them again and it climbs back. Click "Done" once the selection is right.
All of this applies to scheduled webinars only. A webinar room has eight settings tabs rather than ten, with no "Attendees" tab and no "Emails" tab, so there is nobody to mark and nothing for us to send.
3. Import a list
Open "Attendees" and click "Import". You can upload a CSV or XLSX file, or paste the rows straight into the box on the right.
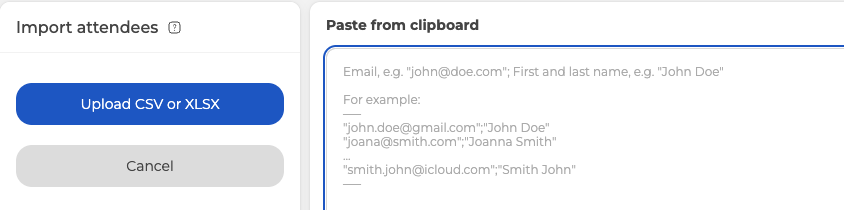
The paste box expects one contact per line, the email address first and the name second, both in quotes and separated by a semicolon, and it shows a worked example of exactly that. One import takes up to 5,000 rows, so split a larger base into several files.
How many of those people can then be in the room at the same time is a separate question, answered by your plan rather than by the size of your list. The platform can also close registration on its own once that number is reached, which Registration limit by plan capacity explains.
4. Collect contacts with a landing page
Any of your webinar rooms can serve a registration page instead of the room itself. It goes on collecting contacts while you have nothing scheduled, and everyone who signs up arrives in the same "Attendees" list, ready to be invited to a future event. Landing page mode walks through the switch and everything you can set up behind it.
Filtering the list
Eight filters run down the left of the "Attendees" section.
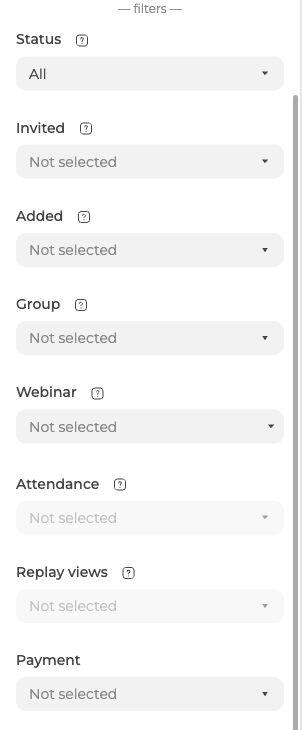
- "Status" separates the contacts we can still write to from the ones we cannot, and it also holds the people you banned.
- "Invited" splits the list by how somebody was invited, either automatically by email or by hand through a link.
- "Added" is the same two origins the rows carry, imported or self-registered.
- "Group" narrows everything down to one of the groups you created.
- "Webinar" picks a single event, and it is the key to the two filters under it.
- "Attendance" divides that event's audience into the people who spent time in the room and the people who did not visit.
- "Replay views" does the same for the recording, sorted by how much of it somebody watched, with steps at nothing at all, above zero, ten, fifty and ninety per cent.
- "Payment" tells paid registrations from unpaid ones, and both from the ones you activated by hand.
"Attendance" and "Replay views" stay greyed out. Choosing a webinar does not wake them, so for now read attendance from the "Attendance" tab of that webinar's own statistics screen instead.
An inactive contact is one our mail can no longer reach, and the panel keeps the reason. It is an unsubscribe, an abuse complaint, a full mailbox, a message the receiving server rejected, or an address or a whole domain that does not exist.
Exporting attendees
"Export" sits under "Import" in the same column. You choose the columns, the file format and the delimiter separately, so you can pull a narrow set of fields in the layout the receiving tool expects.
The same panel opens from a webinar's own "Attendees" tab, and there it offers one column it cannot offer here, the personal access link for that event. A link belongs to one webinar, so there is nothing to export until you pick one. Inviting people without our email goes through the panel field by field.
If an invitation did not reach somebody on your list, open the online chat and tell us the event and the address it should have gone to.
Frequently asked questions
I added a contact. Does that invite them to my webinar?
No. Adding somebody to your contacts does not invite them to anything, because invitations are decided one event at a time on the "Attendees" tab inside the webinar settings. Mark the people you want there, since only marked attendees will be invited, then click "Done".
How many people can I invite, and how many of them can be in the room?
Those are two separate limits. The figure in the top right of the webinar attendee list shows how many invitations your plan has left for this event and it moves while you work, dropping by three when you mark three more people. How many can then be in the room at the same time is answered by your plan rather than by the size of your list, and Registration limit by plan capacity covers closing registration once that number is reached.
Why has my webinar room no "Attendees" tab?
Because marking and inviting attendees applies to scheduled webinars only. A webinar room has eight settings tabs rather than ten, with no "Attendees" tab and no "Emails" tab, so there is nobody to mark and nothing for us to send. A room can still gather contacts for you in landing page mode, where everyone who signs up arrives in the same "Attendees" list.
How large can an import file be?
One import takes up to 5,000 rows, so split a larger base into several files. You can upload a CSV or XLSX file or paste the rows into the box on the right, which expects one contact per line, the email address first and the name second, both in quotes and separated by a semicolon.
Why are the "Attendance" and "Replay views" filters greyed out?
They stay greyed out for now, and choosing a webinar does not wake them. Read attendance from the "Attendance" tab of that webinar's own statistics screen instead. The other six filters in the same column are unaffected.
