
Step-by-step guide to setting up a webinar from scratch
This page walks the whole path, from a new account to the recording in your hands. Everything runs in your browser, so there is nothing to download and nothing to install. Each step says what to decide, what the default already does and what you can safely leave alone the first time, and the checklist near the end collects the details that most often catch people out.
What you need before you start
A current browser and a working internet connection, and nothing else. Attendees can join in any major browser, so Safari, Microsoft Edge, Firefox, Chrome and Opera all work, and on a phone or a tablet that means Safari on an iPhone or iPad and Chrome on Android. For presenting we recommend Google Chrome or another Chromium browser such as Brave, on a desktop or a laptop rather than a phone.
One rule catches co-presenters out. Everyone who speaks at the same time has to run the same browser and the same version of it, because Chrome and Firefox cancel echo differently and a mixed pair ends up hearing itself. Agree on one with your co-presenters in advance. Technical requirements has the full list along with the ports a corporate network has to leave open.
Registering puts you on the free Starter plan straight away, so you can build and run a real webinar before paying anything. It holds 5 attendees in the room and 2 speakers on camera at once, gives you 500 MB of storage, records for up to 20 minutes at up to 1080p and allows one automated webinar a day. The broadcast itself is not capped in length on any plan, including this one. Starter is meant for non-commercial use and puts our watermark on the broadcast and on the recording, and how to choose and pay for a plan covers what changes when you move up.
Step 1: Create your account and set your time zone
Register, then open your profile from the bottom of the sidebar before you touch anything else.
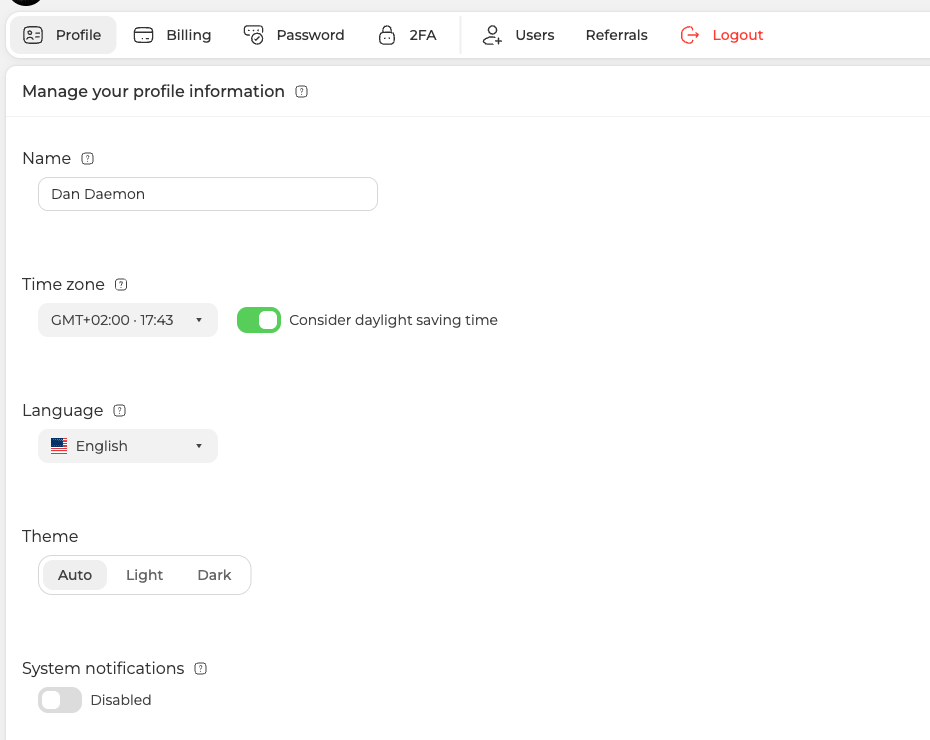
Check the "Time zone" field. This is the one setting worth fixing first, because both your webinar start times and every reminder we send are calculated from it. Get it wrong and your invitations go out at the wrong hour, and nothing later in the process will warn you. The same screen sets the language of the control panel and the theme. Time zones covers what happens around daylight saving changes.
Step 2: Choose how the webinar will run
Open "Calendar". Four routes lead to a live room, and picking the right one now saves undoing work later.
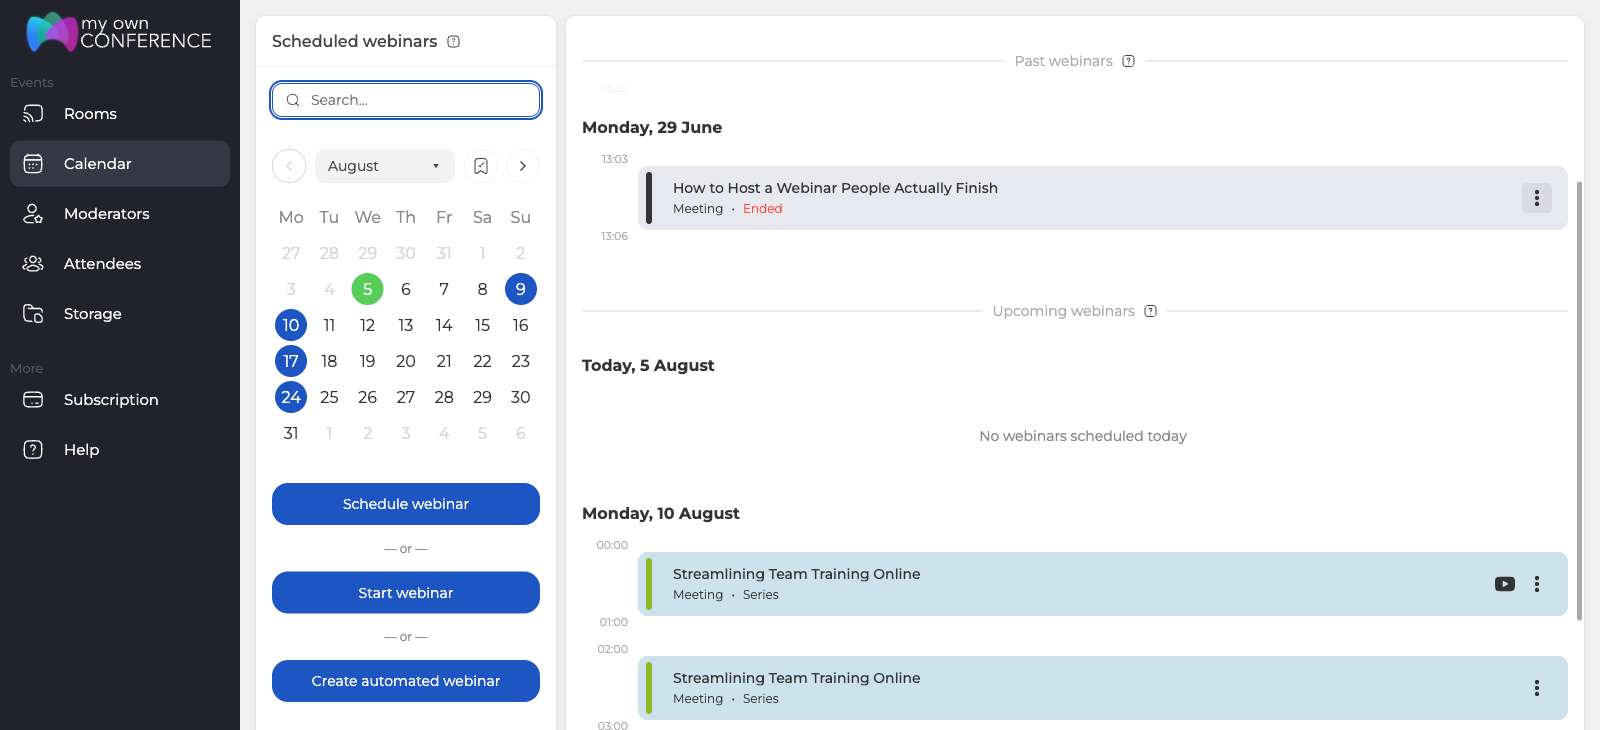
| Route | Where it lives | Choose it when |
|---|---|---|
| "Schedule webinar" | Calendar | You have a date and want registration, invitations and reminders around it |
| "Start webinar" | Calendar | You want a room right now, with no planning at all |
| "Create automated webinar" | Calendar | A recording should play to an audience on a schedule |
| A permanent room | "Rooms" | You hold session after session and want one address that never changes |
The rest of this guide follows "Schedule webinar", because that is the route that carries the full set of settings. A permanent room has eight of the same tabs, without "Emails" and "Attendees", since there is no date to write about and no list to invite. Permanent-link room compares the two.
Take care with "Start webinar". It opens a brand new instant room rather than launching an event you have already scheduled, which is a common way to end up alone in an empty room while your audience waits at another address.
Step 3: Name it and set the date
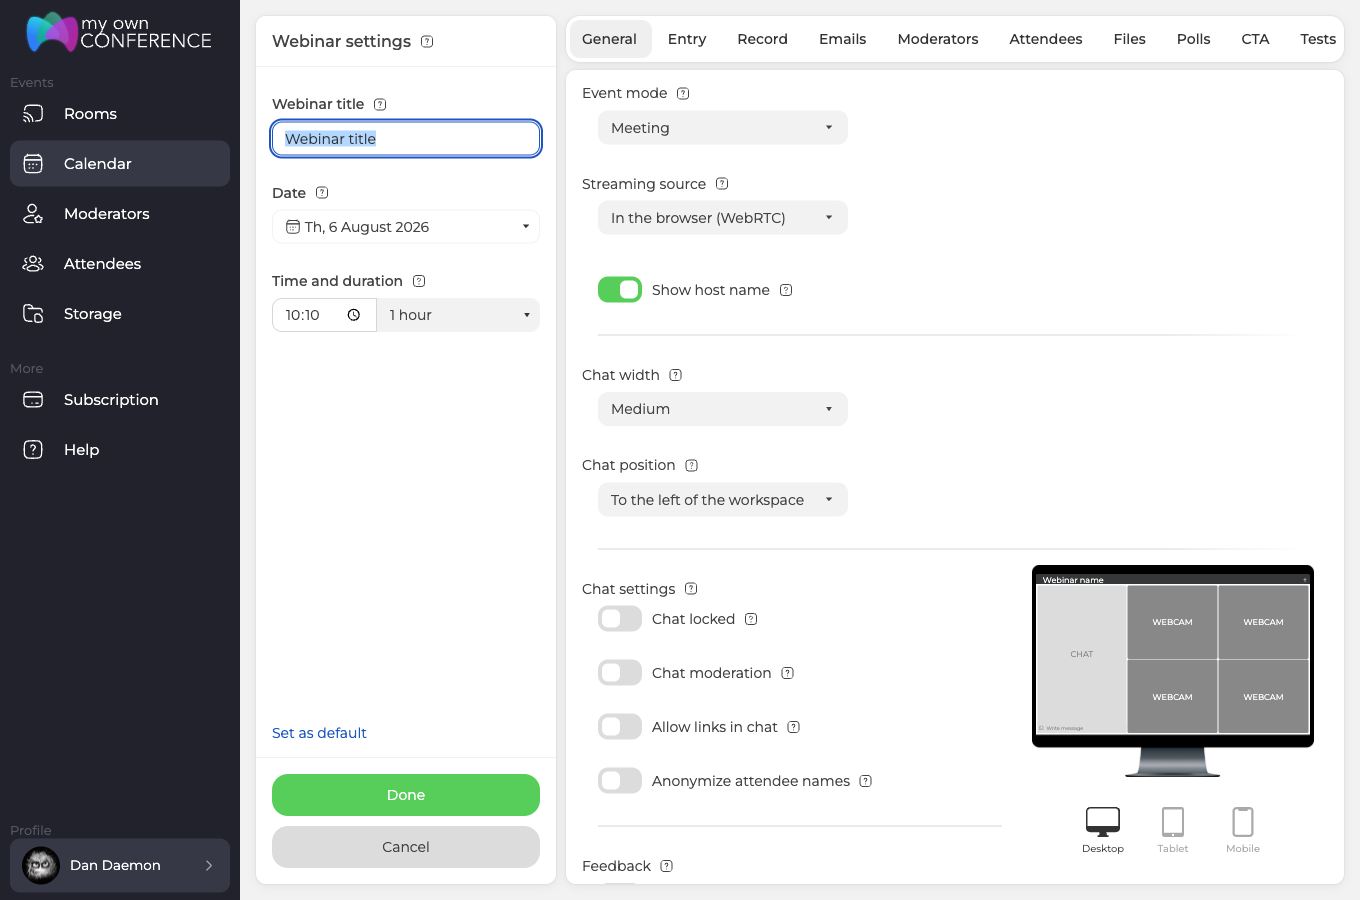
The left column holds the three things no webinar can go without, meaning a title, a date and a time. Your title travels further than you might expect, since it rides in every email you send, heads the registration page and sits inside the room, so write it for somebody who has never heard of the event.
Time and duration share one row. The duration is informational, so nothing stops when the time is up. The "Finish" button at the foot of the room's left rail is available at any point whatever the planned end says, and the room closes on its own only after 8 hours with no activity.
Times follow the time zone from step 1, and every attendee sees the start converted into their own local time.
If you need several dates, click the date field and turn on "Multiple dates". "Webinar series" switches itself on at the same moment, and that is what ties those dates together as one series rather than a pile of unrelated events. Webinar series covers how a series behaves afterwards.
Step 4: General settings and branding
A scheduled webinar has ten tabs. The four to start with are "General", "Entry", "Record" and "Emails", and the six that follow in steps 8 to 10 are the ones you fill in as a particular event needs them.
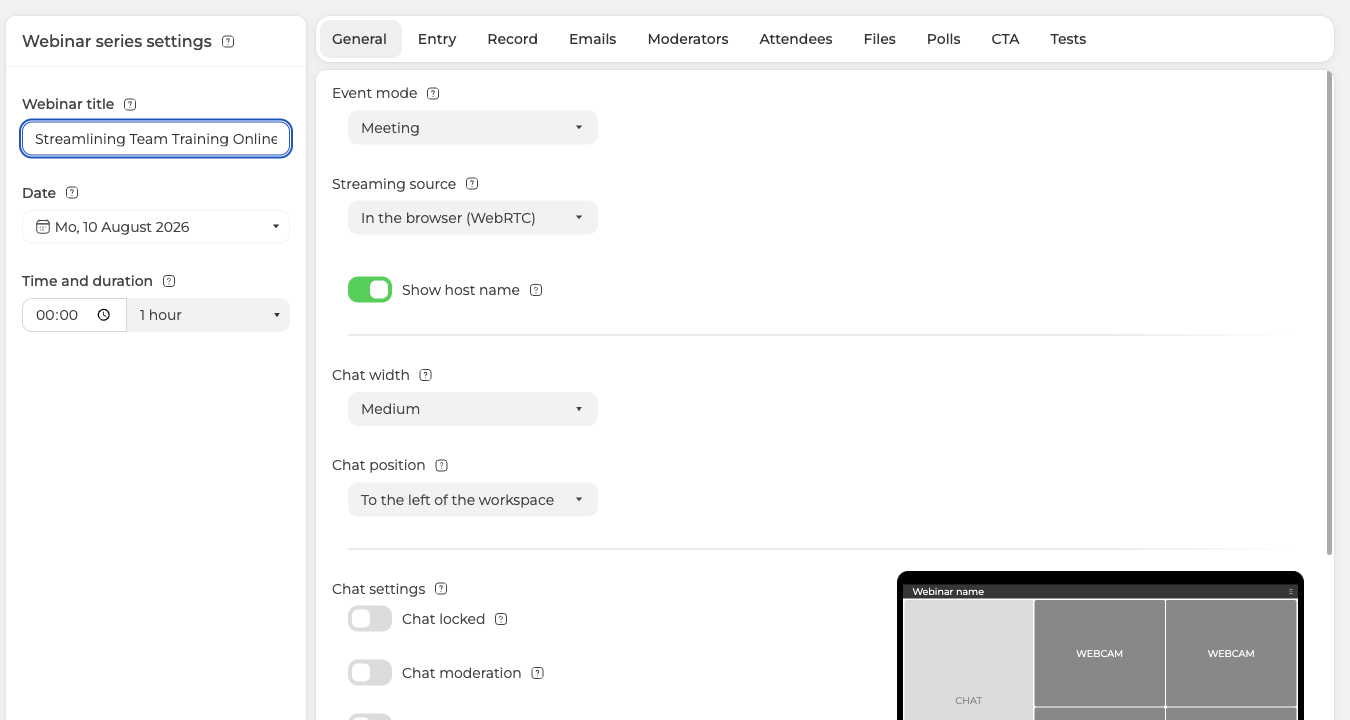
Event mode is the first real choice, and there are two. "Webinar" puts your audience in the role of viewers, and "Meeting" lets everyone speak. Pick "Webinar" unless you genuinely want a round table, because the viewer role is what keeps a large room calm.
Everything else on this tab governs how the room behaves once people are inside, so the chat rules, the Q and A section, whether attendees may ask for the microphone, whether they see the attendee list, and which language the room and its emails speak. The defaults suit a first event. The one to set deliberately is the language, and the one to think about if you expect a crowd is chat moderation. Planning a webinar lists every control here.
Scroll on and you reach the part that makes the room look like it belongs to you.
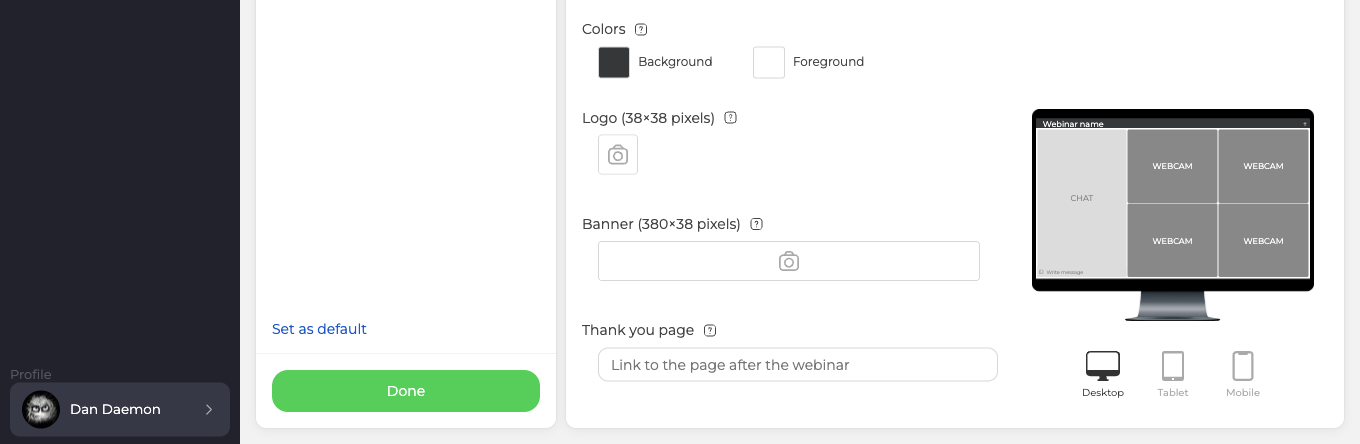
There are two colours to choose, a foreground and a background, a logo that wants 38 by 38 pixels and a banner that wants 380 by 38. The "Thank you page" field at the end decides where somebody lands after the webinar finishes, and also where they land if they leave halfway through, which makes it more useful than its name suggests. This is the part your audience judges in the first second, so it repays a few minutes.
Step 5: Decide how people get in
The "Entry" tab decides who reaches the room and how.
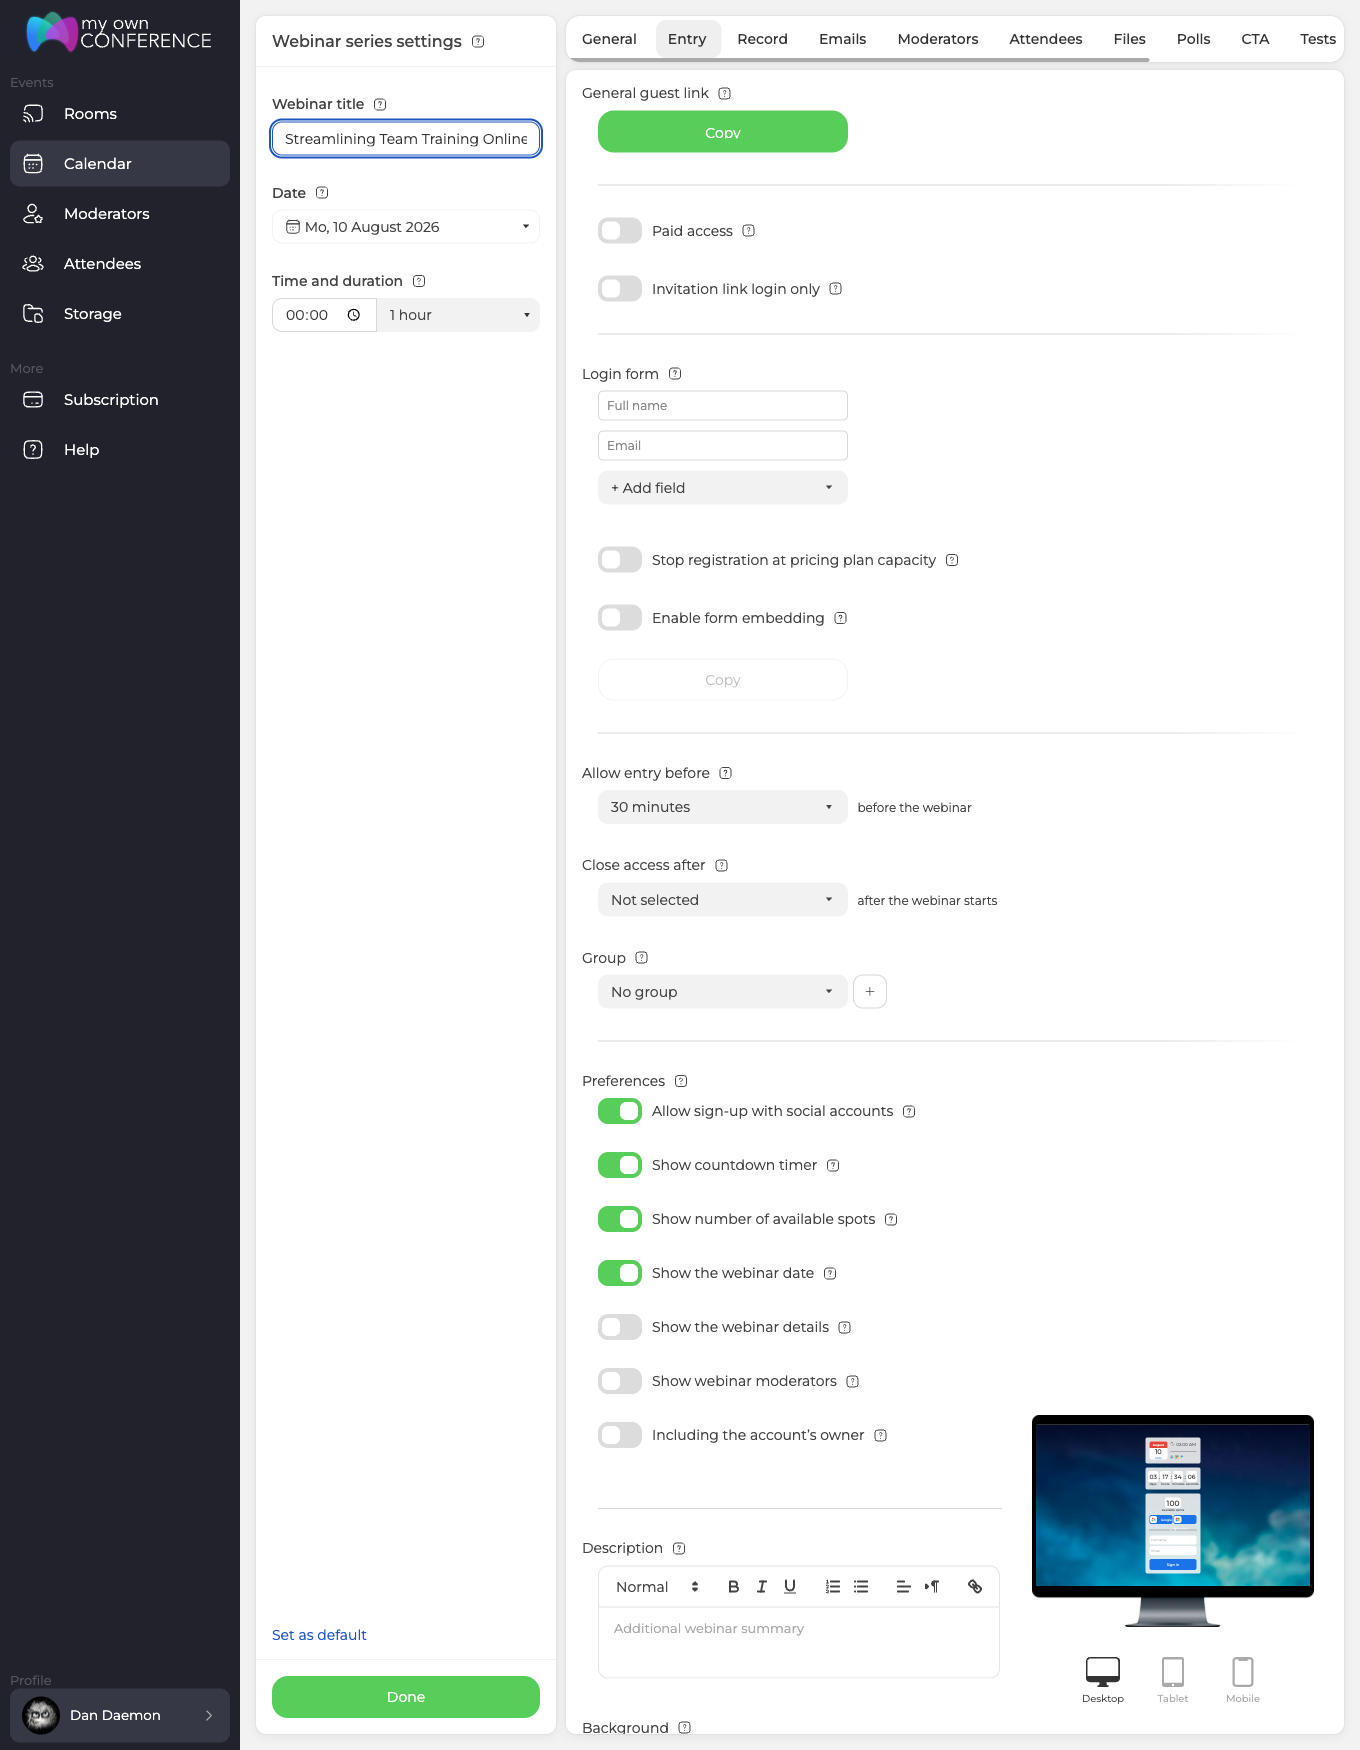
The default suits most first webinars, meaning a login form asking for a full name and an email, open to anyone holding the link. "+ Add field" asks for anything else you need. Change the rest only when you have a reason, and those options are requiring an invitation link, charging for access, capping registration at your plan's capacity, embedding the form on your own site and setting how long before the start the doors open.
That last one matters on the day. "Allow entry before" opens the doors 30 minutes ahead of the event unless you change it, and until then attendees get the event page with a countdown instead of the room. A preview of the registration page tracks your changes on the right of the tab, which saves guessing at what a visitor will actually meet.
Step 6: Recording
Quality and mode are the two settings worth your attention. Mode decides how much of the room ends up in the file.
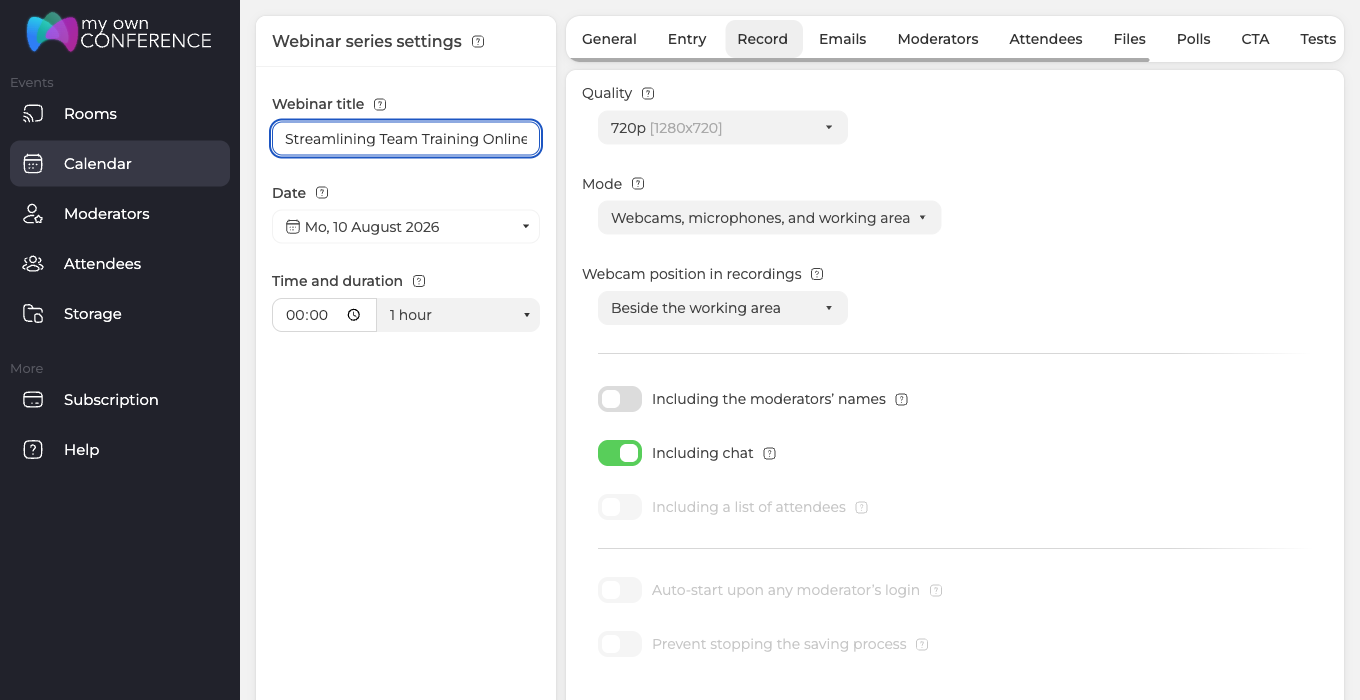
- "Webcams, microphones, working area, and interface" gives you the room as your audience saw it, chat panel and all.
- "Webcams, microphones, and working area" keeps what you presented and throws away the furniture around it, which suits a recording you intend to publish rather than to archive.
- "Webcams and microphones only" keeps the speakers alone, and choosing it pins quality at 480p with no way to raise it.
There is no "do not record" option on this tab, because recording usually starts by hand inside the room and these settings describe what gets captured when it does. Plans from 300 attendees can switch recording on automatically at the foot of the same tab, and Automatic webinar recording covers that.
One combination catches people out. "Including a list of attendees" depends on two switches agreeing. Your mode has to be the one that keeps the interface, and the attendee list has to be visible under "General" back in step 4. Satisfy only one and the option simply greys out with no explanation.
Step 7: Invitation emails
This tab shapes the messages themselves, so the banner across the top, the signature at the foot, the calendar invite that travels with them and the addresses their buttons point at. You cannot rewrite the body text, and that restriction is deliberate, because wording we control is wording that keeps landing in inboxes rather than spam folders.
Below that sits the full schedule, and all eight messages are switched on when you start.
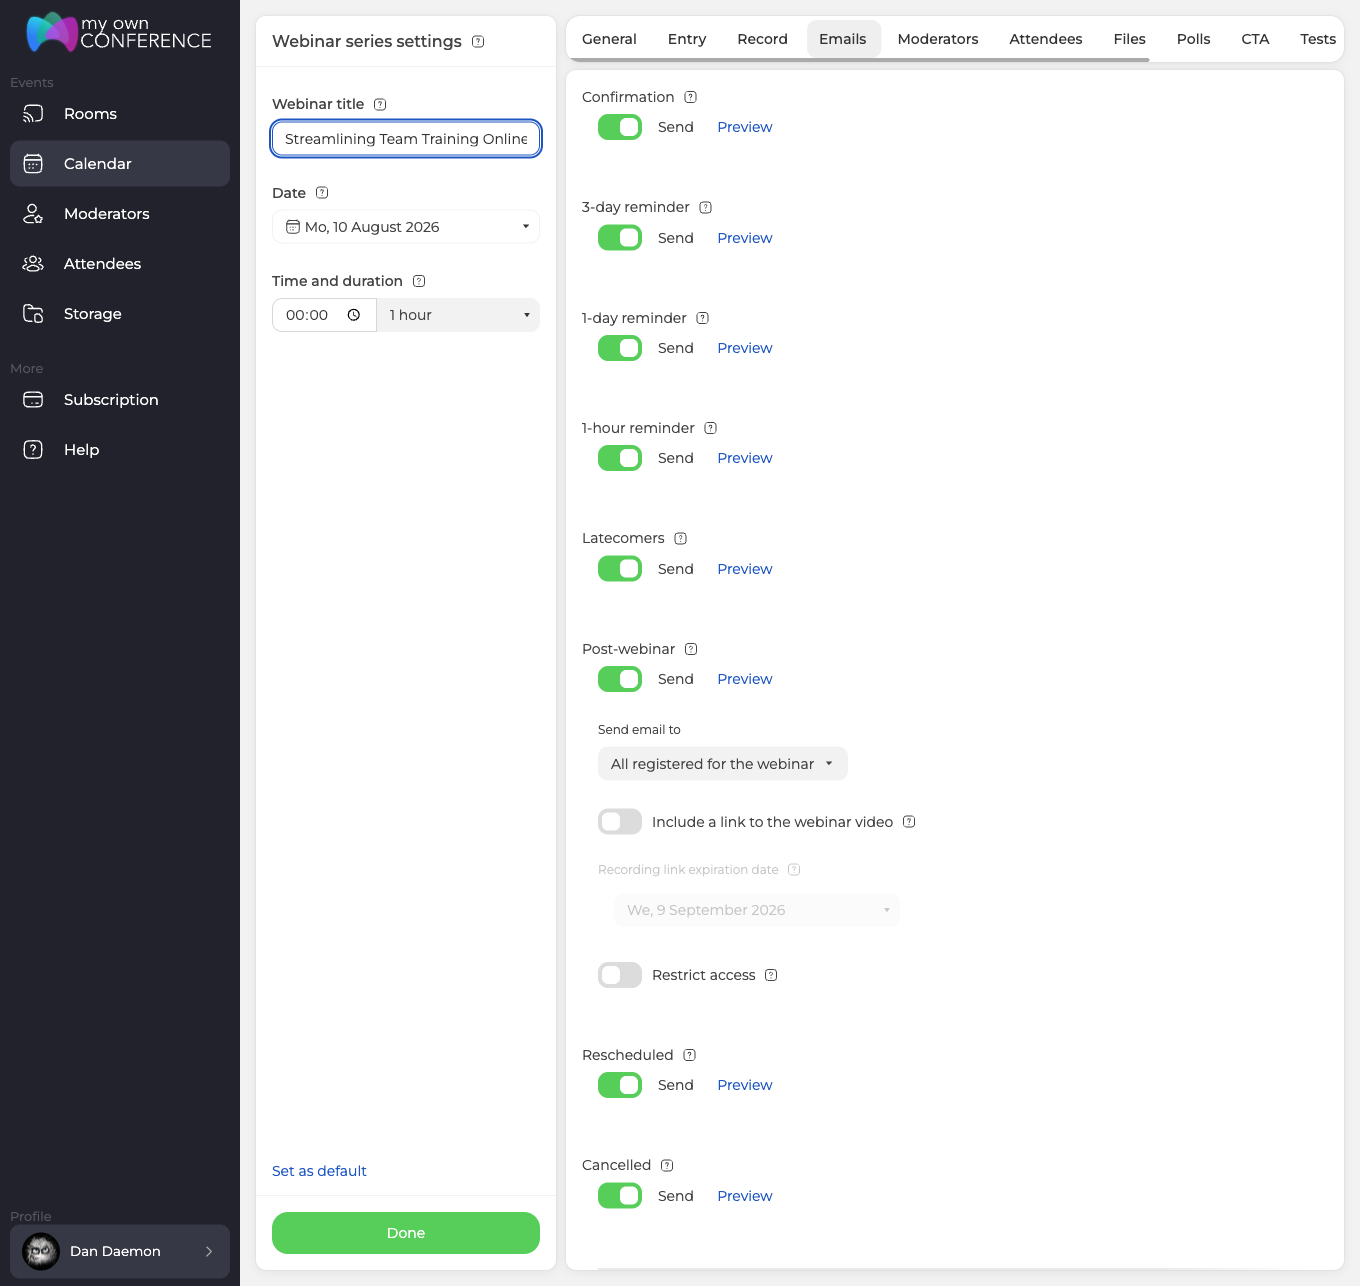
Three of them simply count down, at 3 days, 1 day and 1 hour. "Confirmation" answers a registration the moment it arrives, and "Latecomers" chases whoever is still missing after you begin. "Post-webinar" arrives afterwards and can carry the recording link, which stops working 30 days later unless you move that date yourself. "Rescheduled" and "Cancelled" stay quiet unless you move the event or call it off.
Leave the whole chain on for a first webinar. Any single message switches off with its "Send" toggle, and "Preview" lets you read one before your audience does. When webinar email notifications are sent covers the timing in detail.
Step 8: Invite your presenters
Everyone in your account appears on the "Moderators" tab, and a tick against a name is what attaches that person to this particular event. Nothing else does, which is why a co-host who never heard about the webinar is usually a co-host nobody ticked.
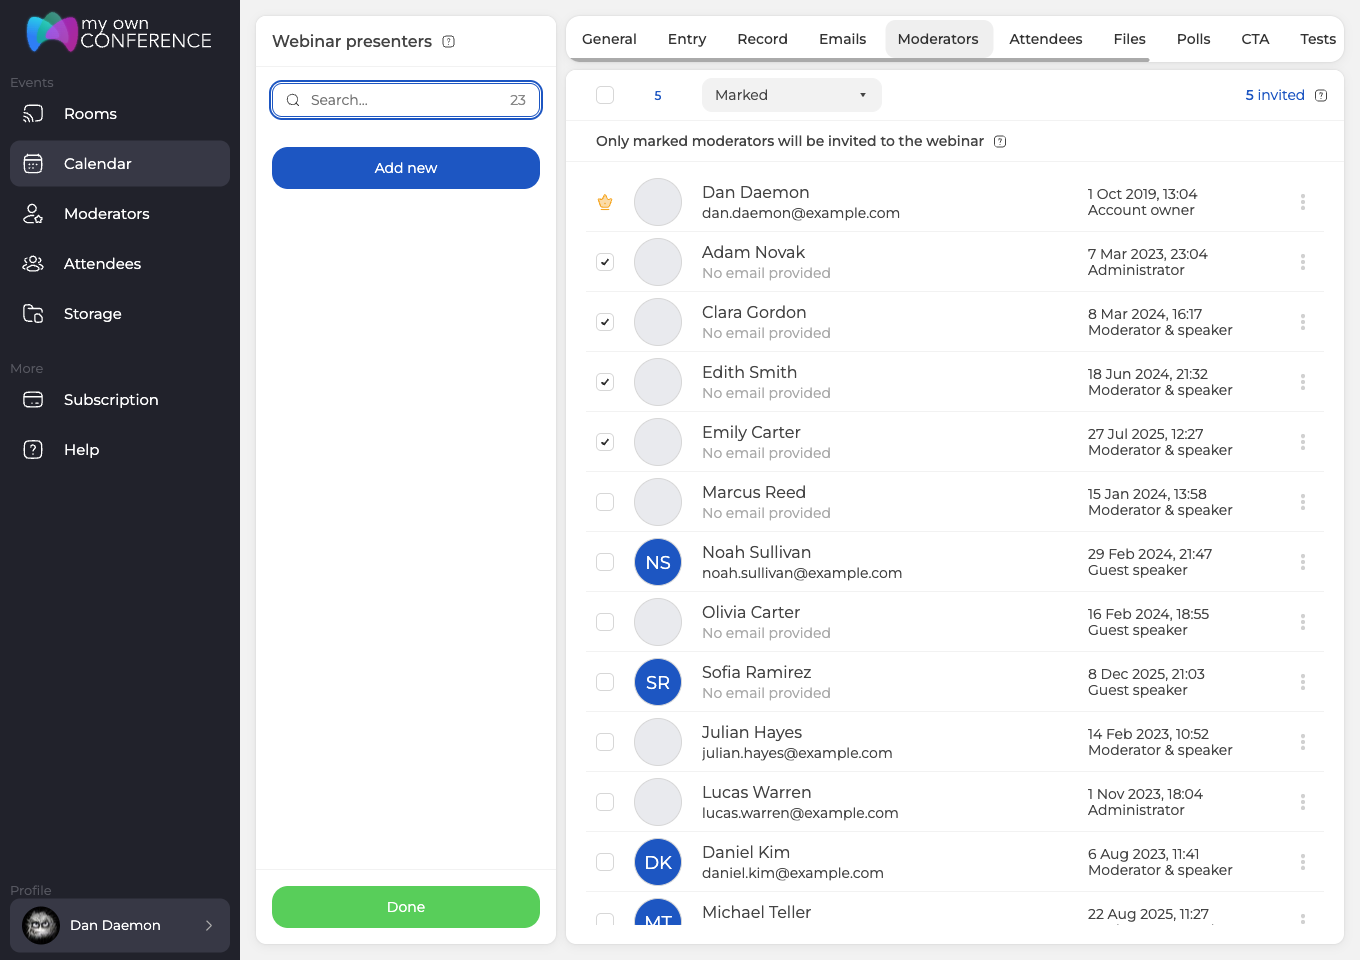
The account owner carries a crown instead of a checkbox, because that access cannot be removed. Attach nobody at all and you present alone.
Two roles are handed out from the form itself. "Moderator & speaker" can go on air and run the room, and "Guest speaker" joins to present without the wider controls. Moderator and presenter management covers all four roles and what each one reaches.
Step 9: Invite your audience
Your audience lives in an address book that you build once and reuse, so nobody needs typing in twice. Tick whoever this particular event is for.
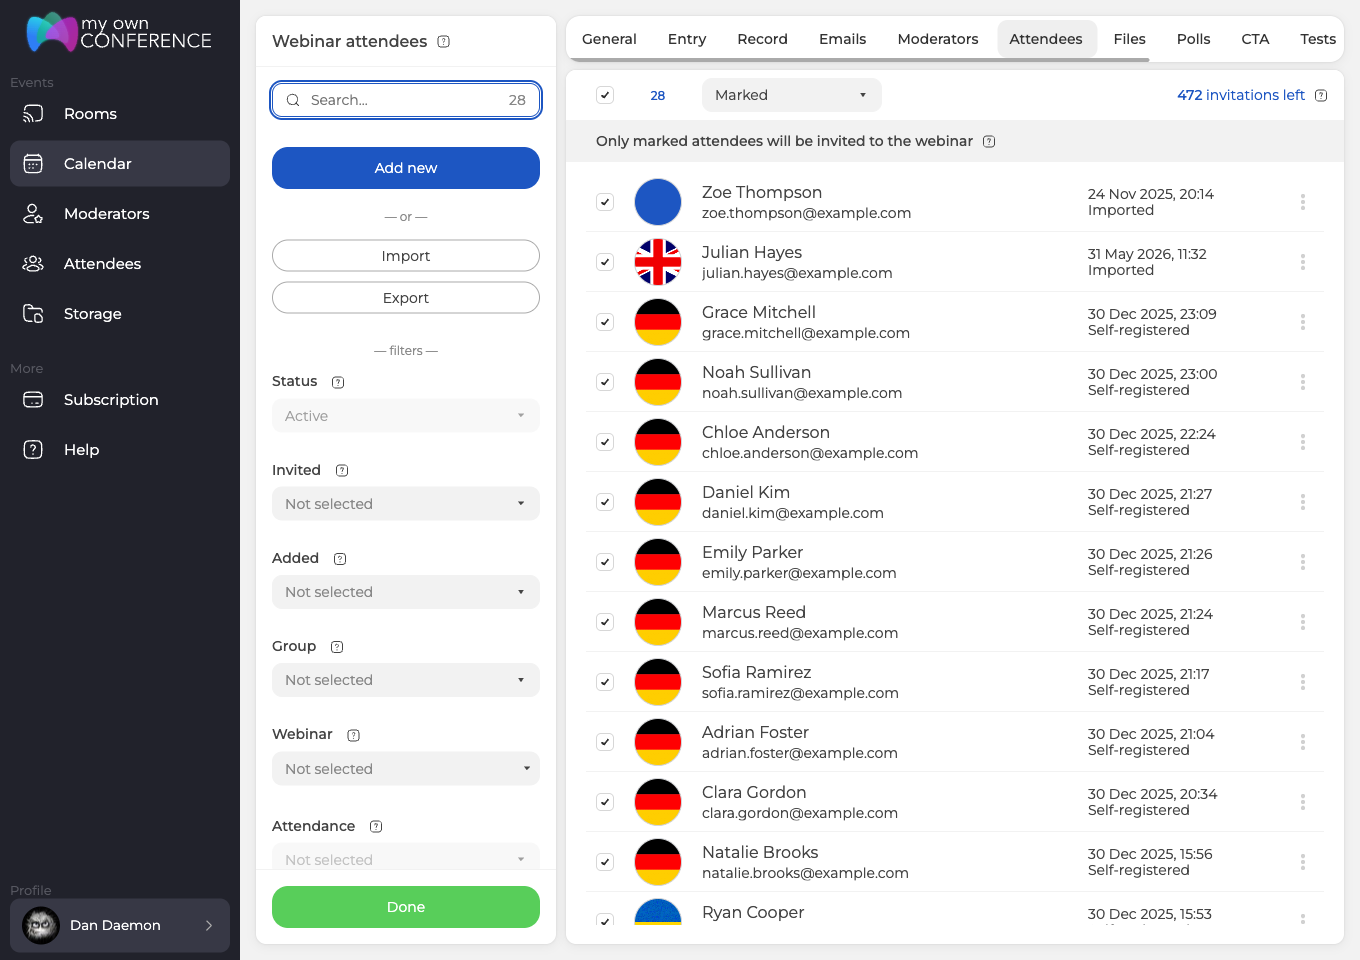
The counter in the top right shows how many invitations your plan has left for this event. Starting with an empty book gives you three ways to fill it, so type people in one at a time with a name and an email, upload a CSV or XLSX list you already have, or paste addresses straight into the box.
Everyone you tick who has an email address is invited automatically. Anyone you added without one is sent nothing at all, so their personal link is the only way in, and the three dots at the end of their row will copy it for you. Attendee invitations and management covers the groups, the imports and the eight filters.
Step 10: Upload your materials
Preparing materials in advance saves time during the event. The "Files", "Polls", "CTA" and "Tests" tabs all work the same way, so you attach what this webinar needs and leave the rest in storage.
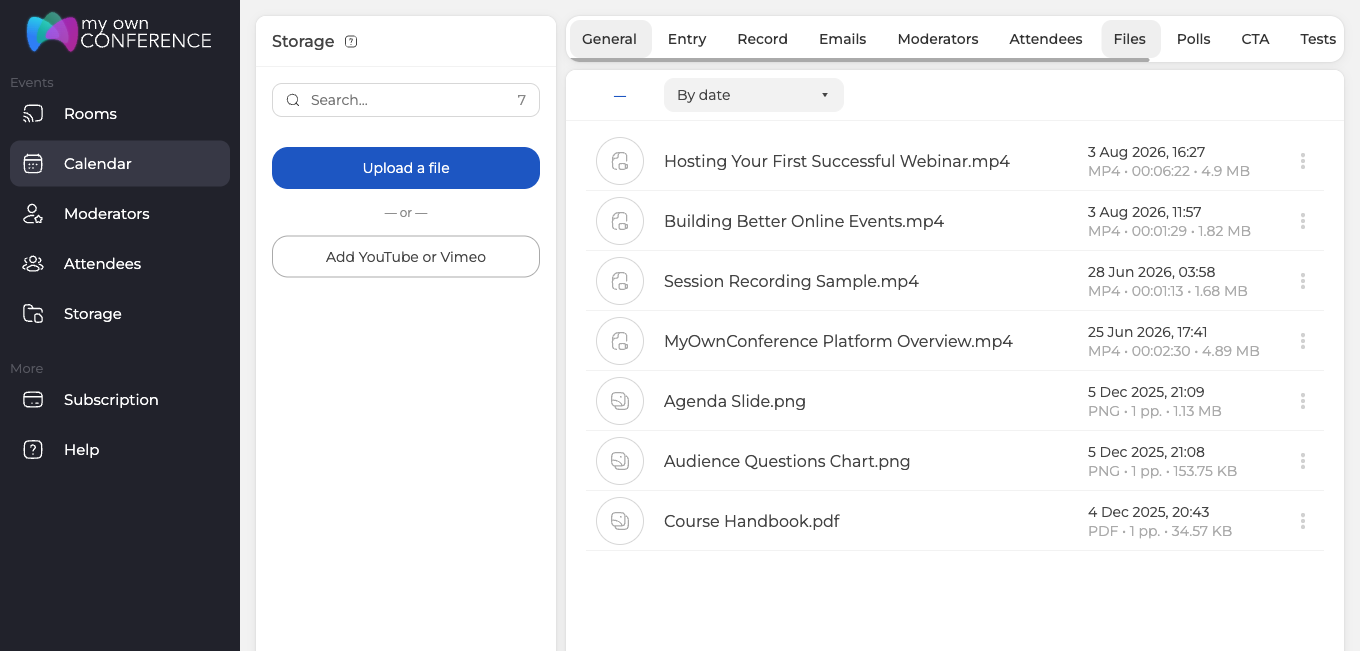
Presentations, images and video belong on "Files", and uploading a presentation covers the size limits and how long processing takes. Of the other three, polls are what wakes up a silent audience, a call-to-action button gives people somewhere concrete to go while their attention is still on you, and a test fits a session that teaches something or ends in a certificate. All three wait until you launch them by hand during the event.
Click "Done" and the webinar is scheduled. It appears straight away under "Upcoming webinars", and every setting from these steps is still there whenever you open the event again.
Step 11: Test your setup before the day
Do this while there is still time to fix whatever it finds. Our connection tester runs through your internet connection, browser, ports and devices, and at most steps it asks you a plain question rather than deciding for you.
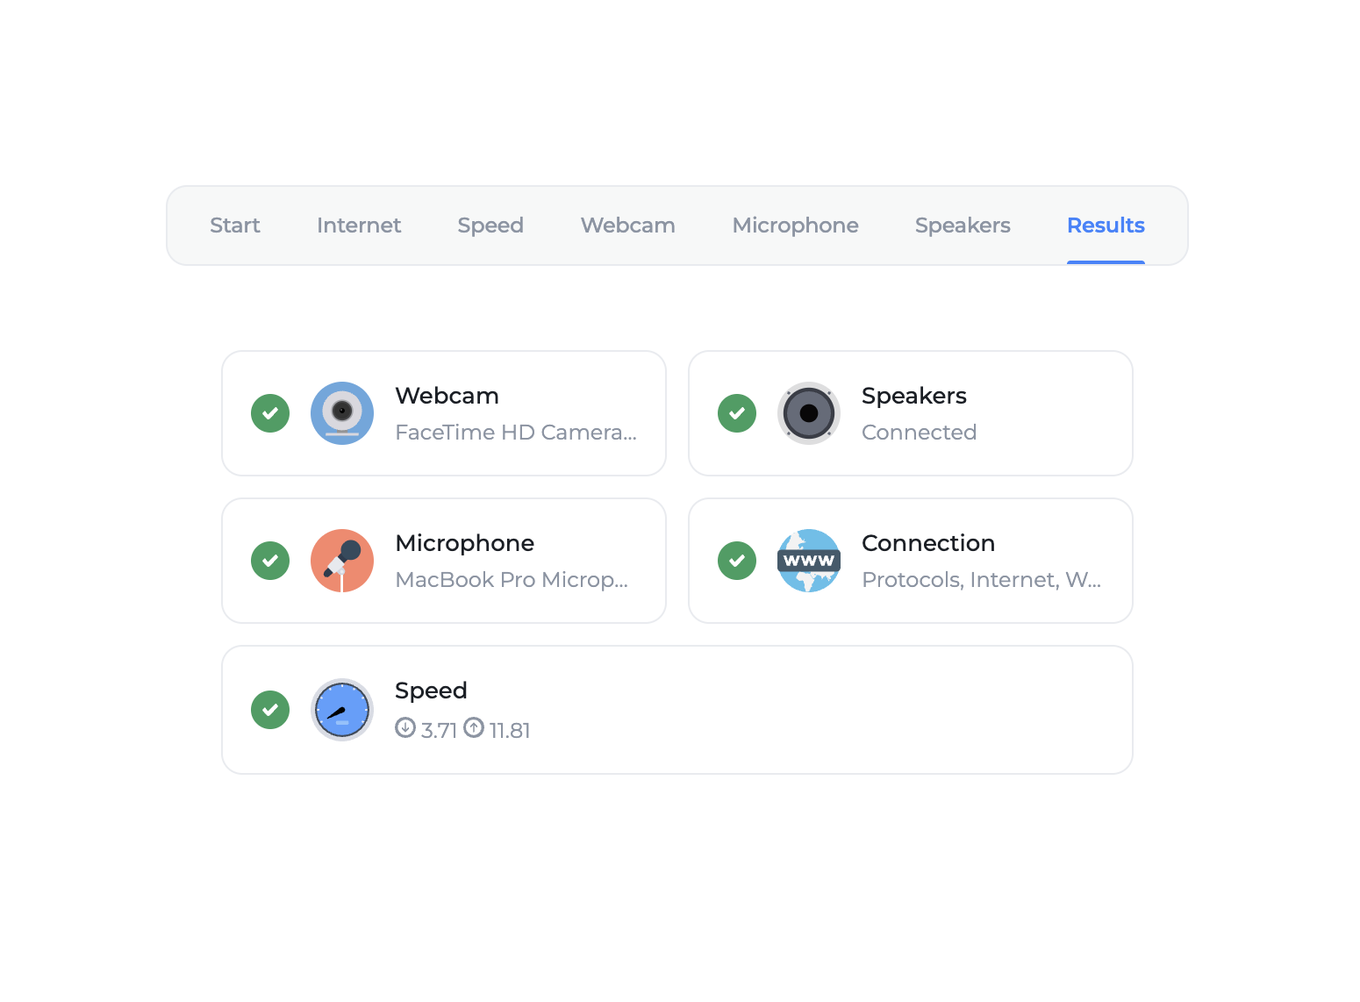
A good result means every item on the final screen carries a green tick. Anything less points at network instability or at a device that will let you down on the day, usually a webcam or a microphone, and what to try is a different network, a different browser, or a wired connection instead of Wi-Fi.
Hosts are not held to the schedule, so you can also sign into the room itself days ahead, upload your presentation and check your camera before anybody turns up. One thing to know before you do that. If "Auto-start upon any moderator's login" is switched on, recording begins the moment you sign in, so your rehearsal lands in the file along with the webinar.
Step 12: Go on air
On the day, open "Calendar", click the three dots at the end of the webinar's row and choose "Links".
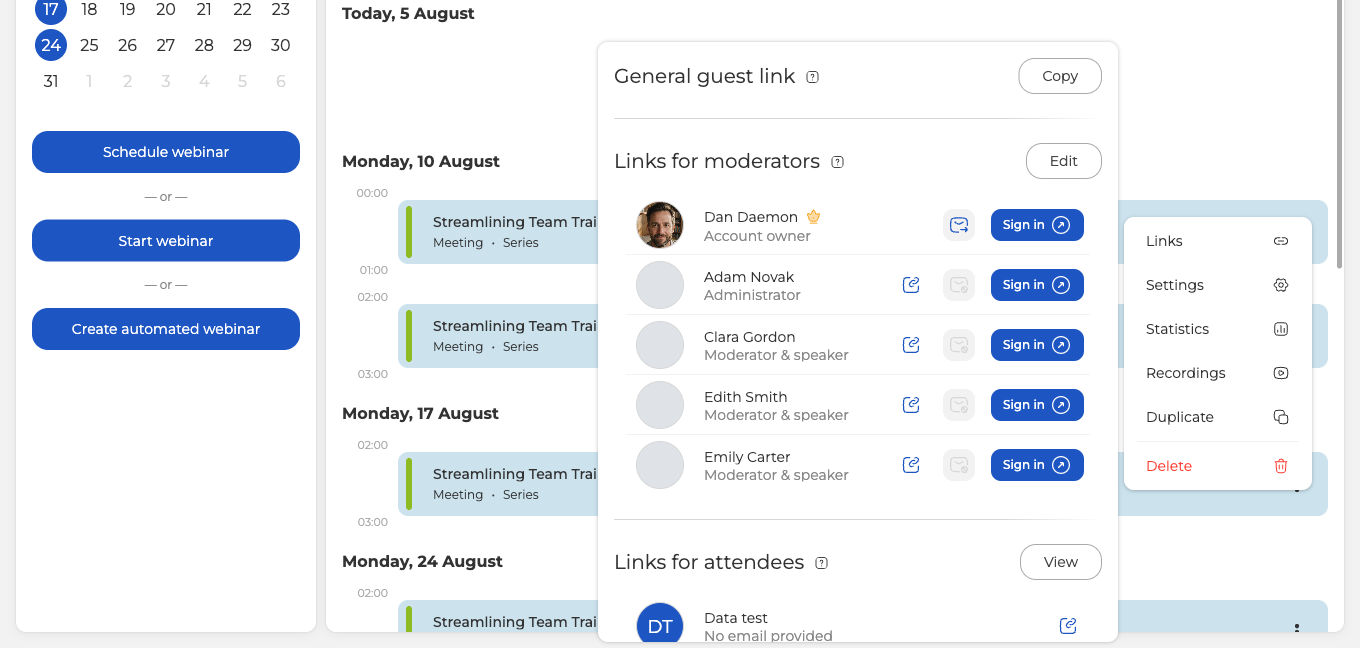
Find your own row under "Links for moderators" and press "Sign in", which opens the room as you. Telling a host link from an attendee link takes one glance, because only a host address contains "/moderator/". Look for it before you send anything, so the right link reaches the right person.
The general guest link at the top of the same panel is the one your audience needs. Each entry link is good for a single seat, so forwarding one never adds a viewer to your room. Whoever opened it most recently is the person sitting there, and the session that was running on it drops out instead. Personalized access links covers that, along with the one-time code that guards a private event.
Signing in is not going on air. Your camera and microphone stay off until you press "Speak", and until somebody presses it an attendee who is already inside sees an empty room and hears nothing. A scheduled webinar never starts by itself. Once a host is in the room the event carries a green "ONLINE" badge in "Calendar", and the badge disappears again when the last host leaves.
The webinar room for presenters covers everything you do once you are live, and going on air covers the browser permission prompt in seven browsers.
After the webinar
The recording waits in two places, beside the event it belongs to and in "Storage", which holds everything.
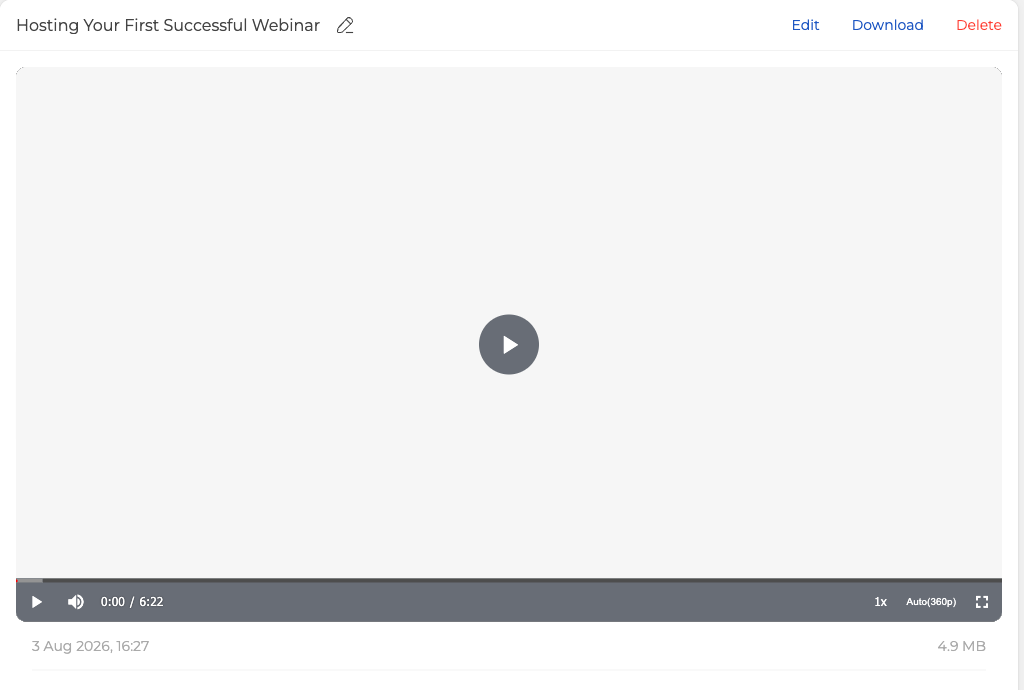
Find the event in "Calendar" on the day it ran and click the recordings icon, just left of the three dots. "Download" saves the file as MP4, the pencil beside the name renames it and "Edit" opens the recording editor. Recordings use the storage included with your plan, so download what you want to keep, and anything you delete waits in "Trash" for seven days. Finding a recording shows both routes to it.
The event itself moves to "Past webinars", where its statistics stay available, meaning who attended and for how much of it, the chat transcript and where your audience came from. Webinar statistics and reports covers the figures and the exports.
The checklist
Everything above in one pass, weighted towards the details that go wrong most often.
| Check | Why it matters |
|---|---|
| Time zone in your profile | Start times and every reminder are calculated from it, and nothing later warns you it is wrong |
| "Schedule webinar", not "Start webinar" | The second opens a brand new instant room instead of your event |
| The duration you set | It is informational, so nothing stops when the time is up |
| "Allow entry before" | Attendees cannot get in earlier, however long a host has been waiting inside |
| Recording mode | "Webcams and microphones only" drops quality to 480p and locks it |
| "Including a list of attendees" | Needs the interface in the mode and the list showing on "General" |
| Auto-start recording | With it on, signing in early puts your setup into the file |
| Ticked presenters | Only ticked people are invited, and the crown marks the owner |
| Attendees added without an email | They are sent nothing, so hand them their personal link |
| The eight automatic emails | All are on when you start, so turn off the ones you do not want |
| The recording link in the follow-up | It expires 30 days later unless you change the date |
| Storage on your plan | Recordings eat into it, so download what you want to keep |
| Somebody has to press "Speak" | Being in the room is not being on air, and a scheduled webinar never starts itself |
| A forwarded entry link | Each one carries a single seat, so the last person to open it takes the room and the first drops out |
| The browser your presenters use | Everyone speaking at the same time needs the same browser and the same version, or they hear an echo |
| The month grid | It counts dates in UTC, so a midnight event can appear on the neighbouring day |
If a step here does not match what you see on screen, open the online chat and tell us which step and what is in front of you.
Frequently asked questions
Do I have to pay to run my first webinar?
No. Registering puts you on the free Starter plan straight away, which holds 5 attendees in the room and 2 speakers on camera at once, gives you 500 MB of storage and records for up to 20 minutes at up to 1080p. The broadcast itself is not capped in length on any plan. Starter is meant for non-commercial use and puts our watermark on the broadcast and the recording, and how to choose and pay for a plan covers what changes when you move up.
Does a scheduled webinar start on its own at the time I set?
No, a host has to sign in and press "Speak". Signing in alone only puts you in the room, and until somebody presses "Speak" an attendee already inside sees an empty room and hears nothing. Take care not to press "Start webinar" in "Calendar" either, because that opens a brand new instant room rather than launching the event you scheduled.
Do I have to fill in all ten tabs before my first webinar?
No, most of them can wait. "General" carries the mode, the chat rules and the branding, "Entry" decides how people get in, "Record" sets what the recording captures and "Emails" holds the reminder chain, which runs on its own once the event exists. "Moderators", "Attendees", "Files", "Polls", "CTA" and "Tests" are what you fill in as you need them.
How does somebody I added without an email address get in?
You hand them their own link, because nothing is sent to them and that is the only way in. The three dots at the end of their row on the "Attendees" tab will copy it for you. Everyone you tick who does have an address is invited automatically, so this affects only the people you added without one.
How long can a webinar and its recording run?
The broadcast is not limited on any plan, including the free one. Only the recording is capped, at 20 minutes on the free Starter plan and at ten hours of continuous recording on any paid plan, and that ten hours is the ceiling of a single file rather than a total quota. Starting a new recording creates a separate file, so the practical limit after that is the storage included with your plan.
