
Uploading a presentation to a webinar
You can add presentations, images, YouTube or Vimeo videos, polls, tests and call to action buttons to a webinar in two ways. Upload them from the control panel while you are planning the event, or upload them from inside the webinar room while you prepare or run it.
What changes depending on where you upload
Where you upload from decides where the file is stored and who it belongs to. A file uploaded from the control panel lands in your main storage, and you then assign it to a webinar and to a presenter by hand. A file uploaded from inside the room is available in that webinar straight away and is tied to the presenter you are signed in as.
Size limits and processing time
A presentation or an image can be up to 1 GB, and a video or audio file up to 4 GB. The conversion takes the first 300 slides of a deck and drops the rest, so split a longer presentation into two files. The upload takes .pdf, .ppt, .pptx, .pptsx, .ppsx and .odp for slides, .png, .jpg and .jpeg for images, and .mp4, .mov, .webm, .mkv and .mp3 for media, which file formats covers in full. Every file also has to fit into the storage left on your plan.
Every file is processed before you can show it. The platform converts your presentation into its own internal format, so the slides look the same on every device. That format carries no animation and no embedded video. If your deck relies on builds, or on a clip playing inside a slide, neither survives the conversion. Upload the video as a separate file instead.
How long the conversion takes depends on the number of slides and what is inside them. A large file can take up to about 10 minutes. Leave room for both the upload and the conversion if you are adding materials shortly before the event starts.
Uploading beats sharing your screen, until it does not
There are two ways to get a deck in front of an audience, and they behave differently enough to be worth choosing on purpose.
An uploaded presentation is split into slides and each slide travels to every viewer as an image of its own rather than as part of the video coming out of the room. Text therefore lands on their screen as sharp as it is on yours, instead of softening the way a shared screen does once it has been through video compression. It also looks the same on every device, and somebody watching on a phone gets the same slide as somebody on a large monitor. Nobody has to install anything to see it.
What you give up is motion. Each slide becomes a static page, so builds, transitions and audio embedded in the deck do not survive the conversion. If your material depends on any of those, share your screen instead and run the deck from your own machine, where it plays exactly as it does locally. That route needs our broadcasting software on your side, which why screen sharing requires our software explains, while your audience still installs nothing either way.
Whichever you pick, readable slides beat clever ones. Arial, Tahoma, Verdana and Times New Roman at 14 pixels or more hold up best, and file formats covers the conversion in full.
Uploading from the control panel
Open "Storage" in the control panel and stay on its "Files" tab. "Upload a file" takes a presentation or an image, and "Add YouTube or Vimeo" takes a link instead of a file.
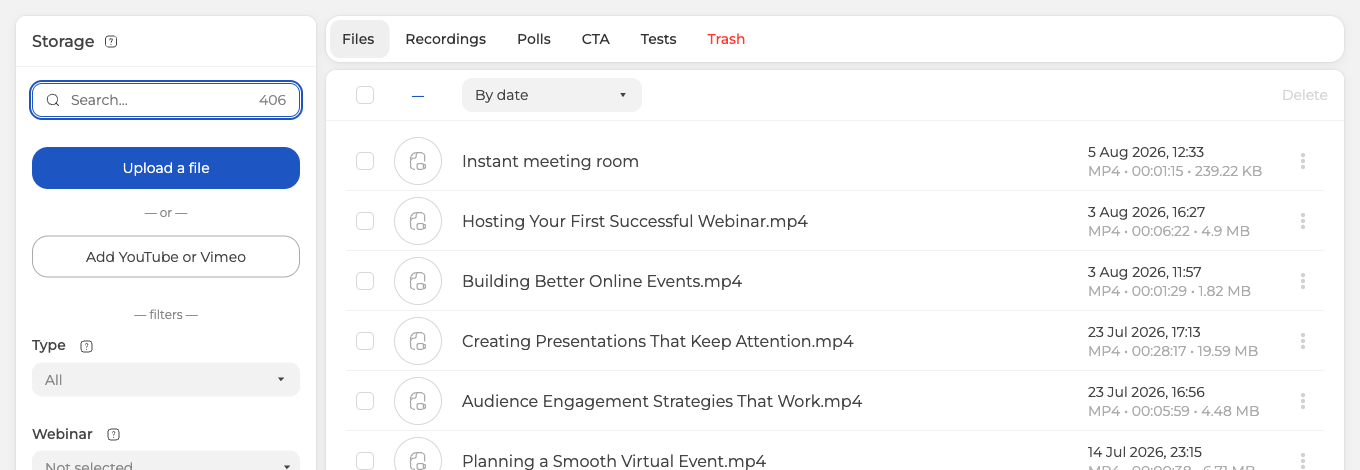
Pick your file and the upload starts on its own. The row appears at the top of the list marked "Processing…" while the platform converts it.
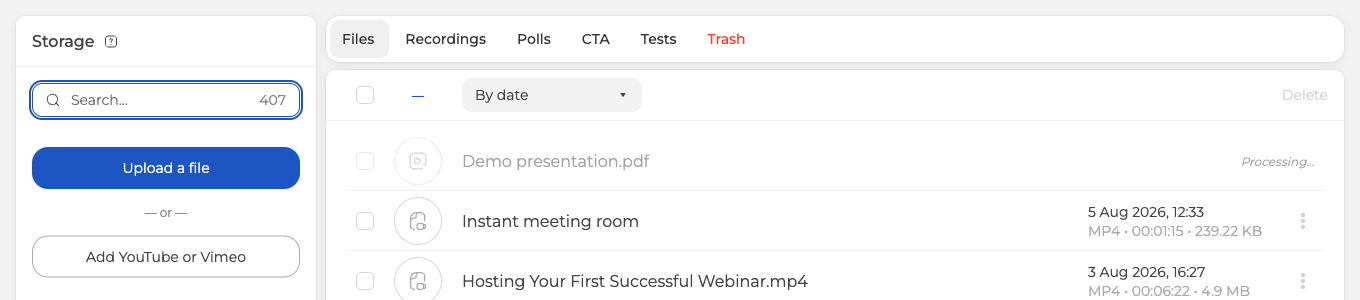
When the conversion finishes the row shows what you actually have, which is the format, the number of pages and the size.
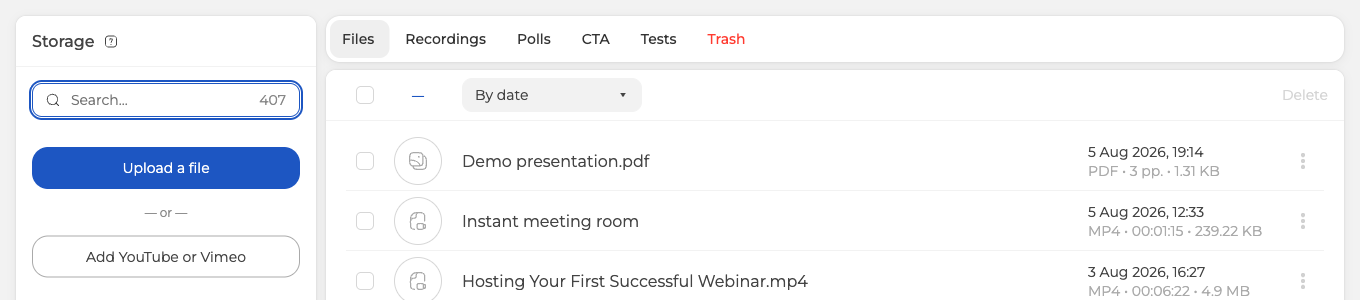
The three dots at the end of the row hold "View", "Download", "Settings" and "Delete". "Settings" opens "Edit file", where you rename the file, assign it to a webinar and hand it to a particular moderator. Save when you are done.
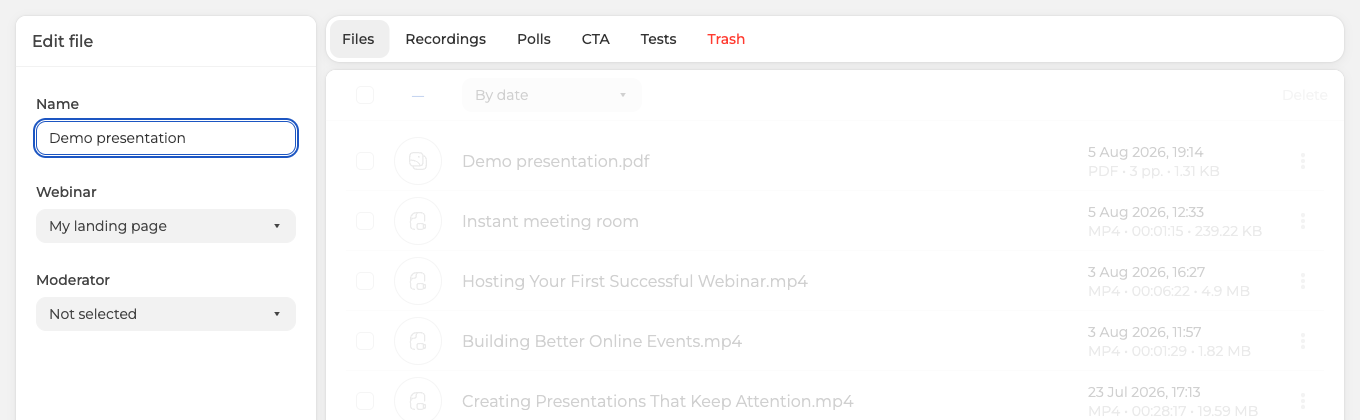
A file with no webinar assigned stays out of every event's own list, and in the room it turns up only once "Show all from past events" is switched on at the bottom of the materials panel. Assigning the webinar is what puts the file straight into that event's list.
Uploading from the webinar room
Enter the room and click "Show" in the left toolbar. The materials panel has seven tabs, which are "Presentations", "Media", "Screen", "Recordings", "Polls", "Surveys" and "CTAs", so a slide deck belongs on the first.
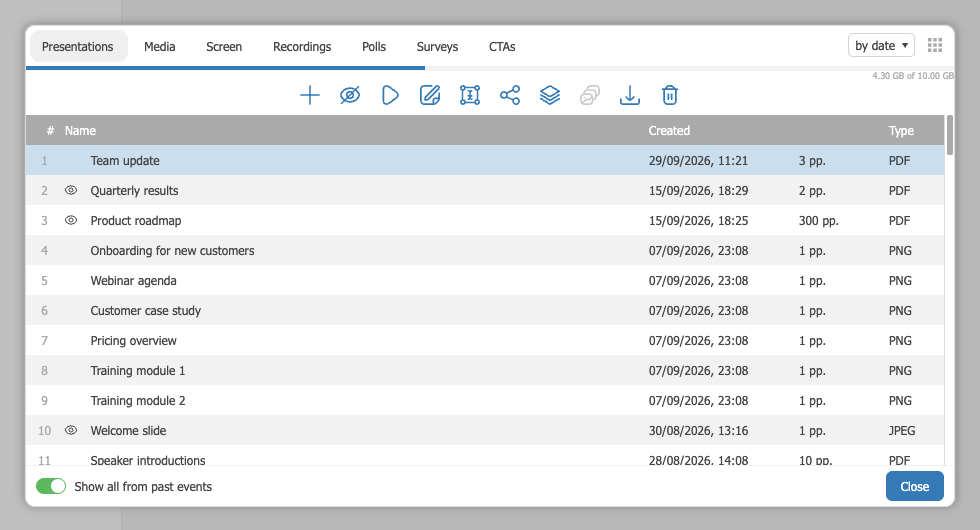
Click the "+" button, or drag the file straight onto the list, which the panel invites you to do. Upload and conversion run exactly as they do in the control panel, and the file is ready to show the moment they finish. The "Media" tab works the same way for .mp4, .mov and .mp3, with a field for a YouTube or Vimeo link beside "Select file", which YouTube live stream playback covers. A .webm or .mkv file goes in through "Storage" in the control panel instead.
Who sees an uploaded file
Every file carries two settings, a webinar and a moderator, and together they decide which moderators find it in the room and in which list.
You can always hand a file uploaded from the control panel to the one moderator who should see it. Open "Settings" on the file's row and pick that moderator in "Edit file", and the file stays hidden from the other moderators. Leave the field at "Not selected" and every moderator can use the file. Until it also has a webinar, though, it stays out of each event's own list, and that list is all the room's materials panel shows while "Show all from past events" at the bottom of the panel is off. Switch it on and the file appears. Despite its name, the switch brings in every file you are allowed to see, from any of your webinars or from none.
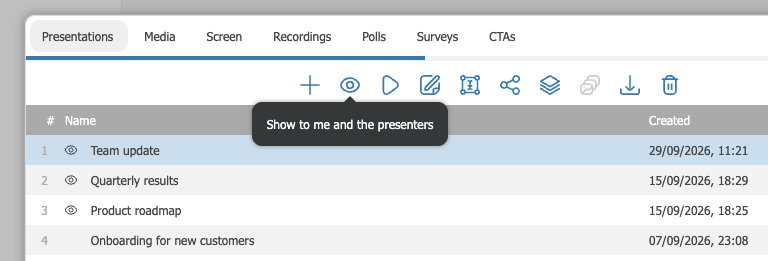
A file uploaded from inside the room belongs to the moderator who uploaded it, and the other moderators do not see it. To share it, select it in the list and click the eye icon right after the "+" button. The icon shows the file's current state. A crossed-out eye with the tooltip "Show me only" means the file is yours alone. An open eye with "Show to me and the presenters" means every moderator can see it, and a small eye then appears in front of the file's name as well. The lists of the other moderators in the room update at once, without a reload. Clicking the open eye makes the file private again, this time to whoever clicked it, so a colleague who does that takes the file out of your list too.
Which method to choose
The control panel suits early preparation, when you are gathering and organising materials well before the event. Use the webinar room for a quick upload once the event is running.
Polls, tests and call to action buttons are built in a form rather than uploaded. A file belongs to one webinar and one moderator at a time, and "Not selected" in the moderator field leaves it open to every moderator. You still upload a deck only once, because "Show all from past events" at the bottom of the room's materials panel brings in what you uploaded for your other events.
If a file will not upload, or it arrives in the room looking wrong, open the online chat and tell us the format, the size and which of the routes above you used.
Frequently asked questions
My slide builds and the video inside my deck do not play. What happened?
The conversion removed them, because the platform converts your presentation into its own internal format so the slides look the same on every device, and that format carries no animation and no embedded video. Upload the video as a separate file instead, which the platform accepts up to 4 GB.
I uploaded the file but it does not appear in my webinar. What did I miss?
Almost certainly the assignment step, because a file with no webinar assigned stays out of the event's own list and turns up in the room only with "Show all from past events" switched on. Open the three dots at the end of the row and choose "Settings", which opens "Edit file", where you rename the file, assign it to a webinar and hand it to a particular moderator. A file handed to one moderator stays hidden from the other moderators, so keep "Not selected" there if the whole team needs it. Save when you are done.
A colleague uploaded a deck in the room, but I cannot see it. Why?
A file uploaded from the room belongs to whoever uploaded it until they share it. Ask your colleague to select the file and click the crossed-out eye right after the "+" button, which then opens with the tooltip "Show to me and the presenters". The file appears in that webinar's list for every moderator after that, and in your other webinars once "Show all from past events" is on.
How long before the event should I upload my slides?
Leave room for both the upload and the conversion, because every file is processed before you can show it and a large one can take up to about 10 minutes. How long it takes depends on the number of slides and what is inside them. The row sits at the top of the list marked "Processing…" until the platform finishes.
Can I play a video during the webinar?
Yes, as a separate file of up to 4 GB in .mp4, .mov, .webm, .mkv or .mp3, since a clip playing inside a slide does not survive the conversion. The room's "Media" tab takes .mp4, .mov and .mp3, so a .webm or .mkv file goes in through "Storage" in the control panel. You can also point at one instead of uploading it, because "Add YouTube or Vimeo" in "Storage" takes a link, and the room's "Media" tab has the same field beside "Select file". That side is covered in YouTube live stream playback.
I run the same webinar every month. Do I have to upload the deck each time?
No, one upload covers every run, even though a file belongs to one webinar at a time. Everything you upload stays in your storage, and "Show all from past events" at the bottom of the room's materials panel brings in the files from your earlier events. If you would rather have the deck in the new event's own list, change its webinar under "Settings" in the control panel. A file uploaded from inside the room is available in that webinar straight away instead, and is tied to the presenter you are signed in as.
