
Landing page mode
Any of your webinar rooms can be switched into landing page mode. The room link then serves a registration page instead of the room itself. Its job is to collect email addresses and other contact details, such as phone numbers, organisation and department names, and it keeps collecting them even when you have nothing scheduled.
A landing page is not tied to one particular webinar, so it can run alongside the rest of your marketing. Use it to gather interest in events that do not have a date yet. The link never changes, so you can put it on your own site or in your materials and leave it there.
Everyone who signs up appears in the "Attendees" section of your control panel, ready to be invited to a future event.
Before you switch it on
While landing page mode is active, the webinar room itself stops working. Everyone who follows the link reaches the registration page, and that includes you, so you cannot get in to upload materials or hold a session. Switch the mode off again when you need the room back.
Switching it on is also not a quiet change. The panel stops and asks you to confirm, because the mode takes effect immediately.
Activating landing page mode will end the current webinar and log all attendees out from the webinar. Are you sure you wish to proceed?
Read that literally. If a session is running in the room at that moment, everyone in it is put out. Wait until the room is empty unless you mean to clear it.
Switching it on
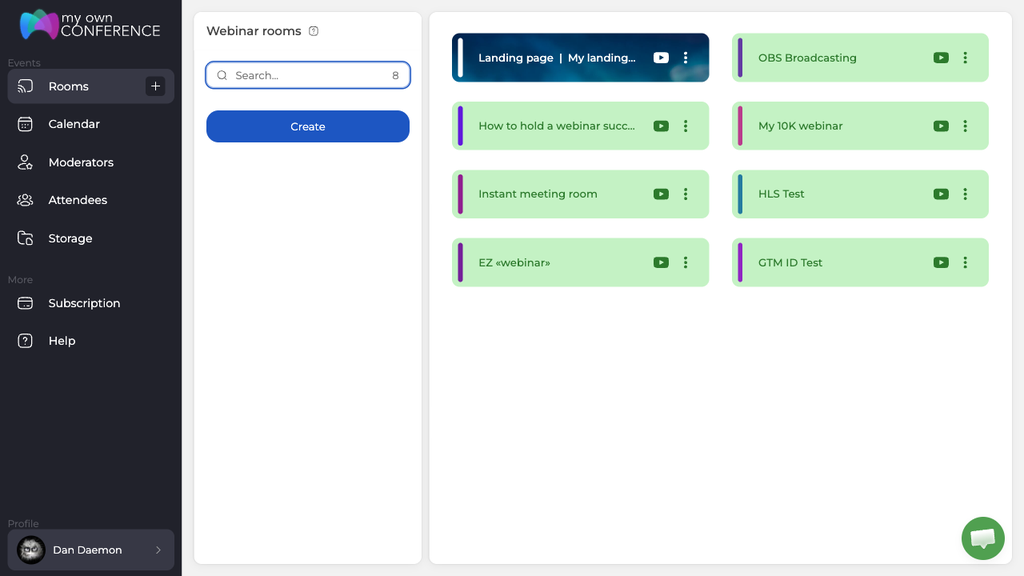
Open "Rooms" in the control panel. Every webinar room you have is listed here.
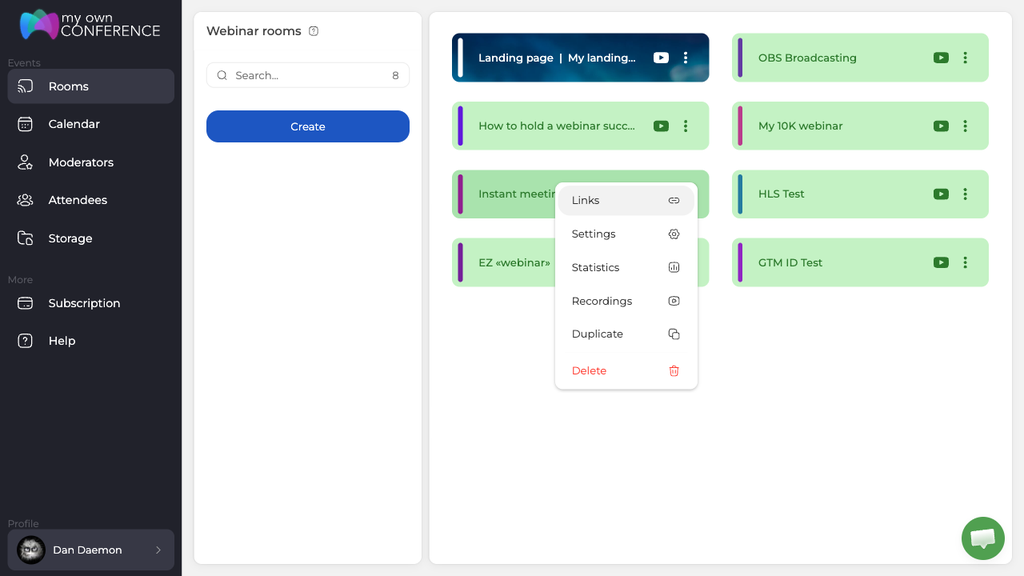
Click the three dots on the room you want to use, then choose "Settings".
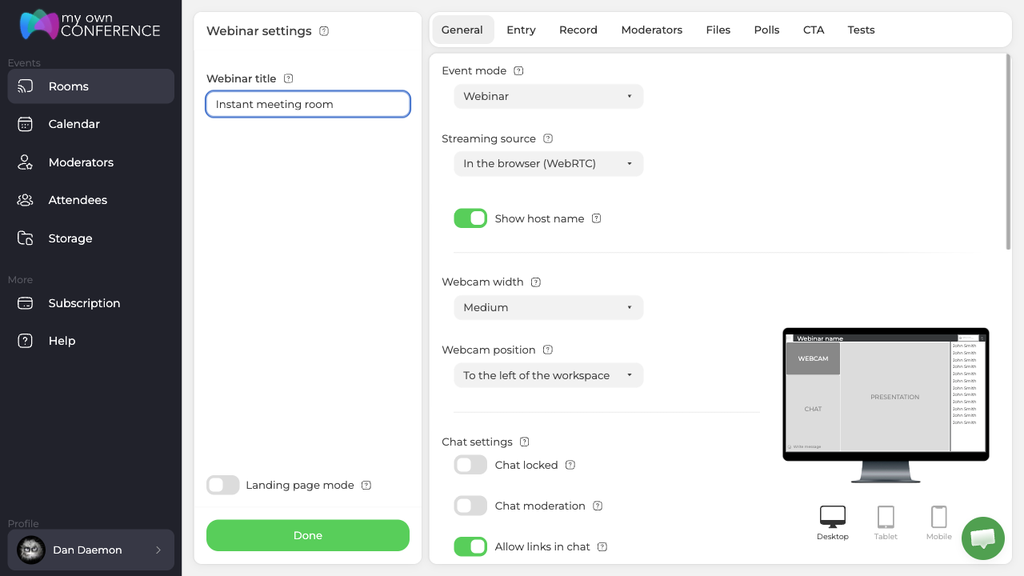
The "Landing page mode" switch sits at the bottom of the left column, just above the "Done" button.
Answer "Yes" and the panel changes to "Edit landing page", with a notice confirming that standard webinar mode is off. The settings tabs disappear, because there is no room to configure any more, and everything on the right belongs to the registration page instead.
What you can set up
The top of the panel holds the things you need to get the page working.
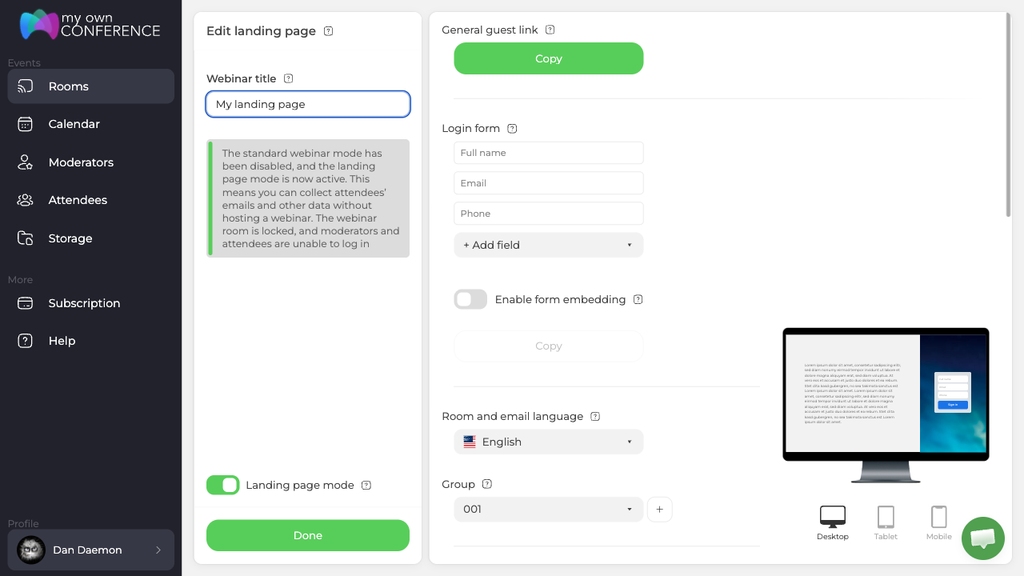
"General guest link" is the address of the page. Click "Copy" and share it wherever you like.
"Login form" decides what a visitor has to fill in. Full name, email and phone are there by default, and "+ Add field" holds eighteen field types in all, among them ID, First name, Messenger, Date of birth, Postal code, City, Region, District, Street address, Company, Company code, TIN, Job, Specialty, Position and Department. Note that Company code and TIN are two different things, so pick the one your accounting actually needs. Ask only for what you will use, because every extra field costs you sign-ups.
"Enable form embedding" gives you a second Copy button with an embed code, so the same form can live on a page of your own website instead of on ours.
"Room and email language" sets the language of the page and of any email it sends. "Group" decides where the people who sign up are filed, which is what lets you invite exactly that audience later.
Further down are the presentation settings.
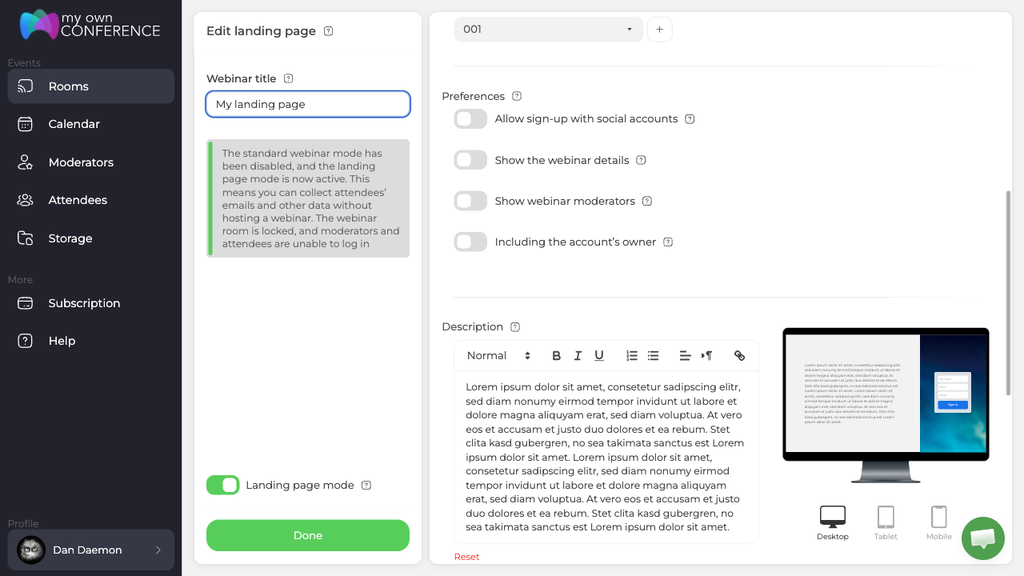
"Preferences" control what the page reveals. You can allow sign-up with a social account, show the webinar details, list the moderators, and choose whether the account owner appears among them.
"Description" is a rich text editor, so the text you write can carry headings, bold, lists and links rather than being plain text. "Reset" puts the default text back.
The last section covers appearance and tracking.
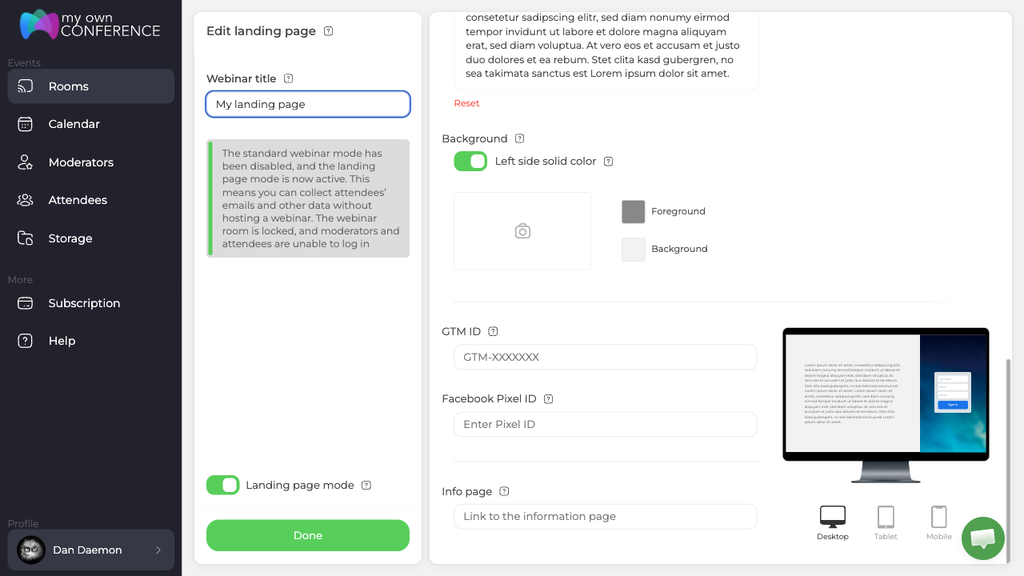
"Background" controls how the page looks. The toggle is called "Left side solid color", so it governs the left half of the page rather than the whole of it, and beside it sit an image upload and two swatches, Foreground and Background. The upload takes .jpg, .jpeg, .gif and .png. The preview updates as you go, and you can check it as desktop, tablet or mobile.
"GTM ID" and "Facebook Pixel ID" connect the page to Google Tag Manager and to Facebook, so sign-ups show up in whatever you already use to measure campaigns.
"Info page" is where somebody lands once they have signed up, so use it to say thank you or to point them at what comes next. There is no "Open in new window" toggle here, unlike on a scheduled webinar, which Information page after registration explains.
Click "Done" to save.
Sharing the page
The link is always available from the room itself. Click the three dots on the room and choose "Links", and a panel headed "Landing page URL" opens with a Copy button.
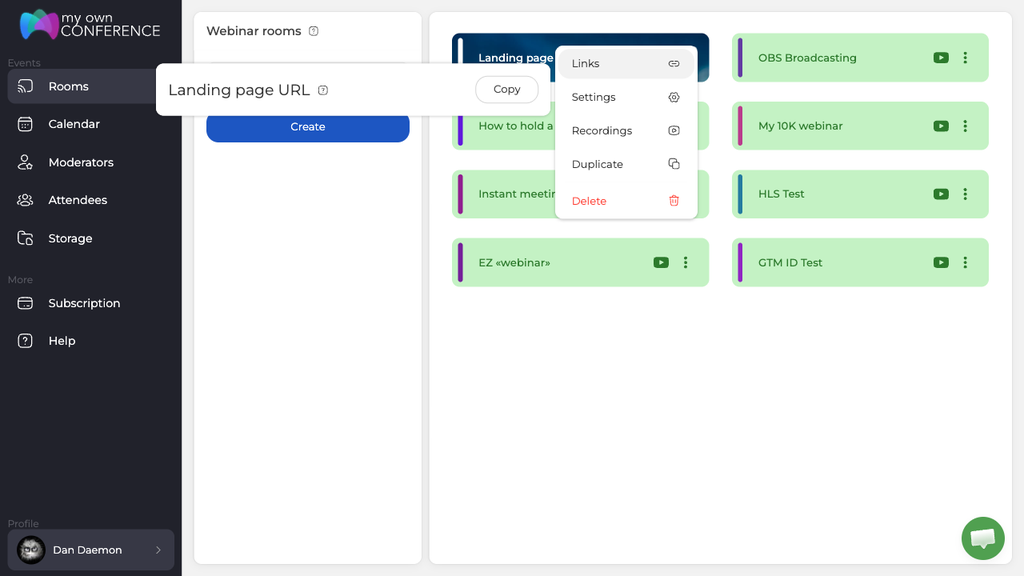
A room in landing page mode has no separate moderator or attendee links, because nobody is entering the room while the mode is on. There is only the one address, and it stays the same for as long as the room exists.
Switching back is the same control in reverse. The "Landing page mode" toggle stays where it was, at the bottom of the left column above "Done", so it is still reachable even though the settings tabs are gone. Everyone who signed up while the page was live stays in your "Attendees" section, because those are contacts of the account rather than of the room.
Two other things change while the mode is on. The room is labelled "Landing page" in the rooms list, so you can tell at a glance which one is collecting sign-ups, and "Statistics" drops out of its three dots menu, because there are no sessions to report on.
Everyone who signs up through the page lands in the "Attendees" section marked as self-registered, filed under whichever group you chose. Inviting and managing attendees covers what you can do with them from there, and Permanent link to the webinar room covers the room in its ordinary state.
If the page is live but the sign-ups are not reaching your attendee list, open the online chat and tell us the webinar name and the address you published.
Frequently asked questions
Do I lose the people who signed up when I switch the mode off?
No, everyone who signed up while the page was live stays in your "Attendees" section, because those are contacts of the account rather than of the room. They sit there marked as self-registered, filed under whichever group you chose, which is what lets you invite exactly that audience later. Inviting and managing attendees covers what you can do with them from there.
Does the address change when I turn the mode on or off?
No, the link never changes, so you can put it on your own site or in your materials and leave it there. While the mode is on there is only that one address, because a room in landing page mode has no separate moderator or attendee links, and it stays the same for as long as the room exists. You reach it by clicking the three dots on the room and choosing "Links", where a panel headed "Landing page URL" opens with a Copy button.
Can I put the sign-up form on my own website instead?
Yes. "Enable form embedding" gives you a second "Copy" button with an embed code, so the same form can live on a page of your own website instead of on ours. "GTM ID" and "Facebook Pixel ID" connect the page to Google Tag Manager and to Facebook, so sign-ups show up in whatever you already use to measure campaigns.
What can I ask a visitor for besides their email?
Full name, email and phone are there by default, and "+ Add field" holds eighteen field types in all, among them ID, First name, Messenger, Date of birth, Postal code, City, Company, Company code, TIN, Job and Department. Note that Company code and TIN are two different things, so pick the one your accounting actually needs. Ask only for what you will use, because every extra field costs you sign-ups.
Why has "Statistics" dropped out of the room menu?
Because there are no sessions to report on while the mode is on. The room is also labelled "Landing page" in the rooms list, so you can tell at a glance which one is collecting sign-ups. Both of those changes last only while the mode is on, and the "Landing page mode" toggle that reverses it stays at the bottom of the left column above "Done".
