
Webinar planning
Planning a webinar here takes a few minutes. Every technical setting sits in its own small step with a hint beside it, so your attention can stay on the content and the audience. The steps below run from picking a date through to uploading materials and sending the invitations. If you are starting with nothing at all, the step-by-step guide to setting up a webinar from scratch covers the wider path around them, from the account and the time zone through to the rehearsal, going on air and the recording.
Basic setup
Step 1: Open the calendar
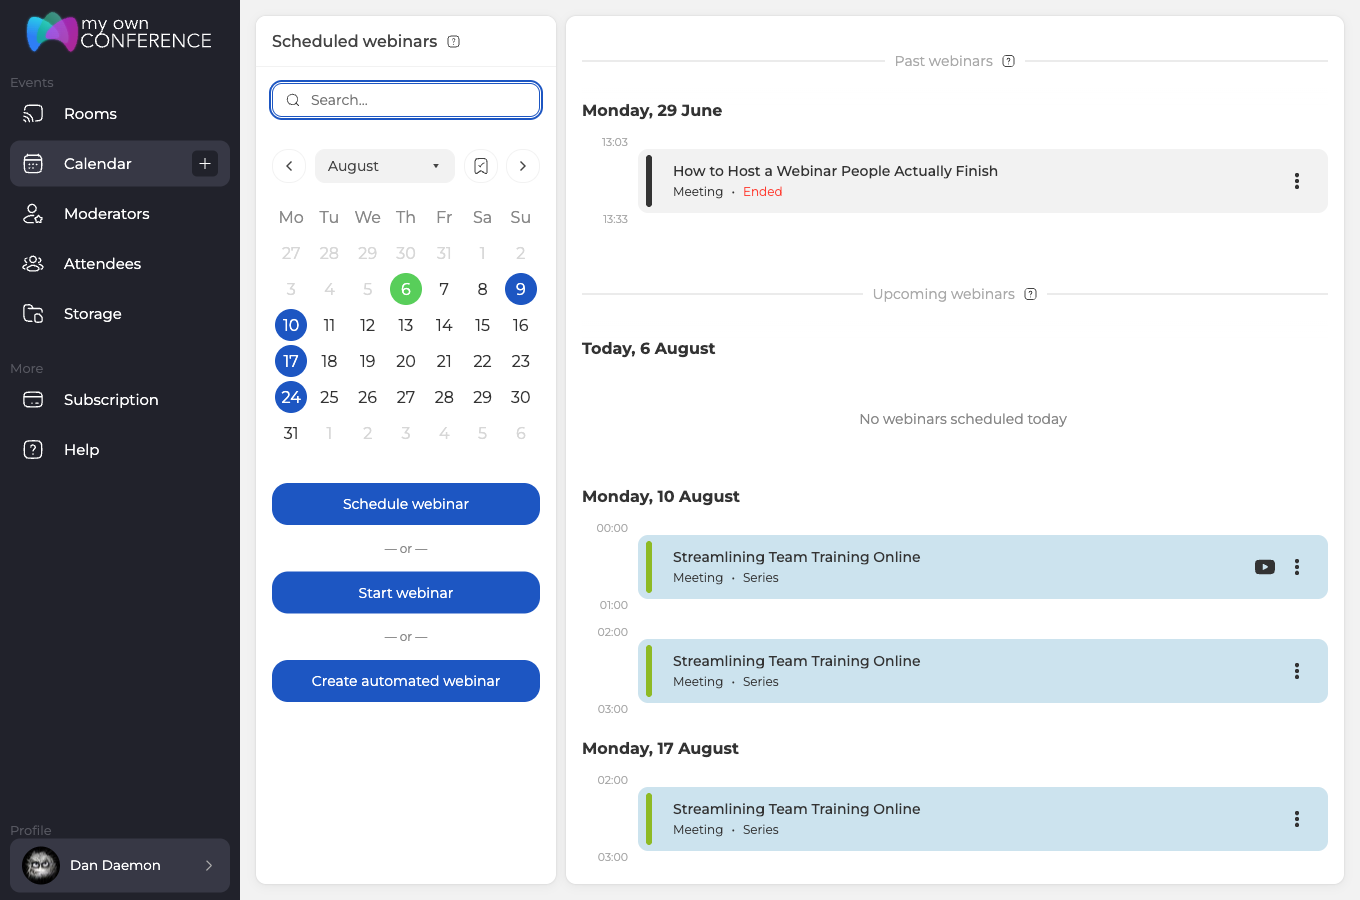
Go to the calendar. It lists everything you have already run under "Past webinars" and everything still to come under "Upcoming webinars", and a new webinar starts from here.
Step 2: Start a new webinar
Three buttons sit under the month grid in the left column. "Schedule webinar" is the one that opens the full creation form. "Start webinar" throws you straight into a room without any of this planning, and "Create automated webinar" builds one that plays a recording to a schedule. Note that "Start webinar" opens a new room of its own rather than launching an event you have already scheduled, and Starting a scheduled webinar covers how those go live.
Step 3: Name it, then set the date and time
The left column holds the three things every webinar needs. The title is the first thing attendees see, because it appears in your emails, on the registration page and inside the room itself, so make it clear before you make it clever.
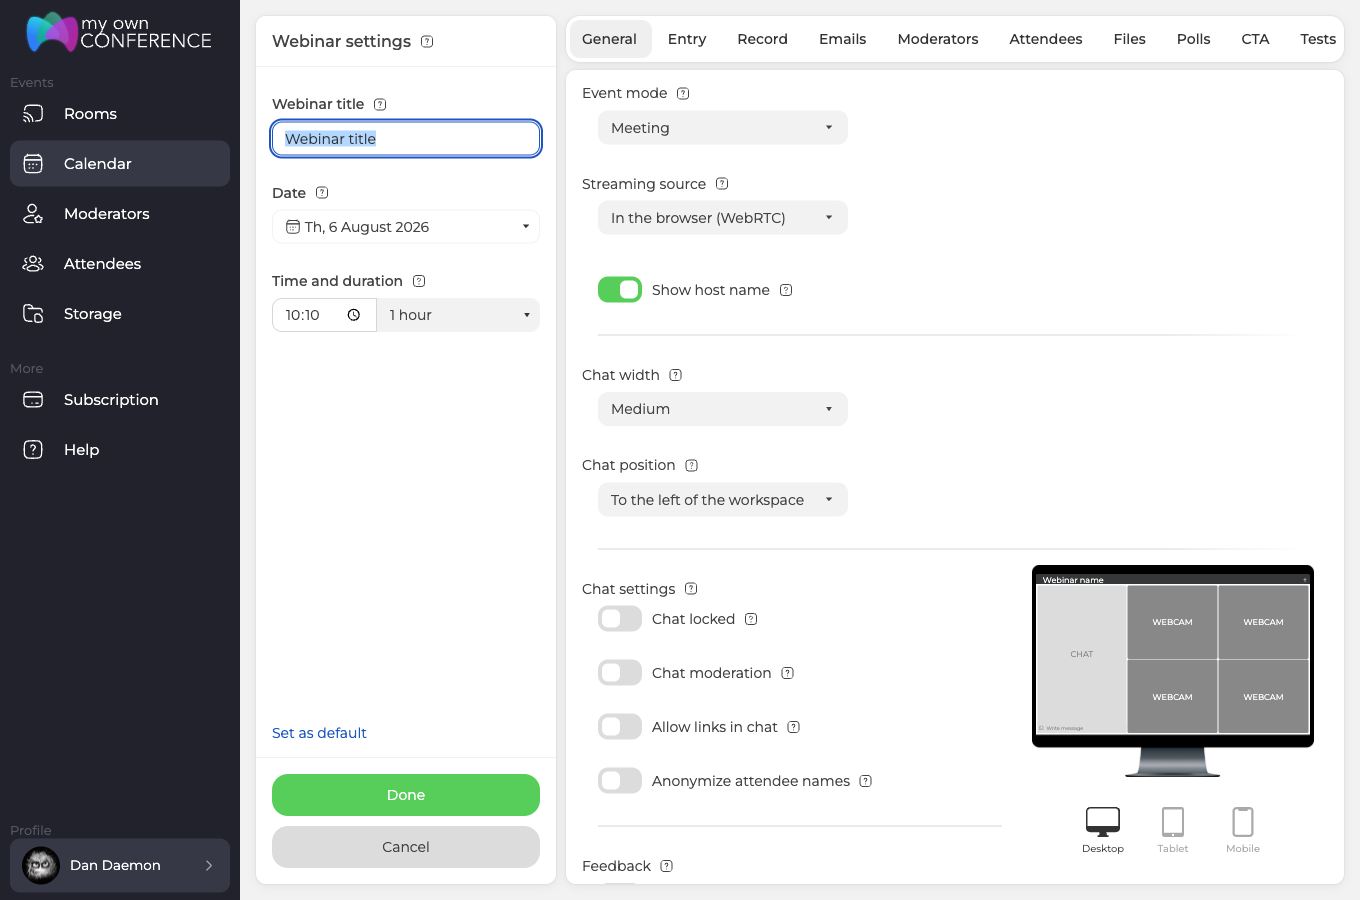
Time and duration share one row. The duration is informational, so the webinar does not stop when the time is up. What it changes inside the room is smaller than that.
- The room closes on its own only after 8 hours with no activity.
- The "Finish" button at the bottom of the left rail is available at any point, whatever the planned end time says.
Times follow the time zone in your profile, so they appear correctly in emails and on registration pages, and every attendee sees the start converted into their own local time.
Step 4: Run a series instead of one event
Click the date field and a small calendar drops open with two toggles above it.
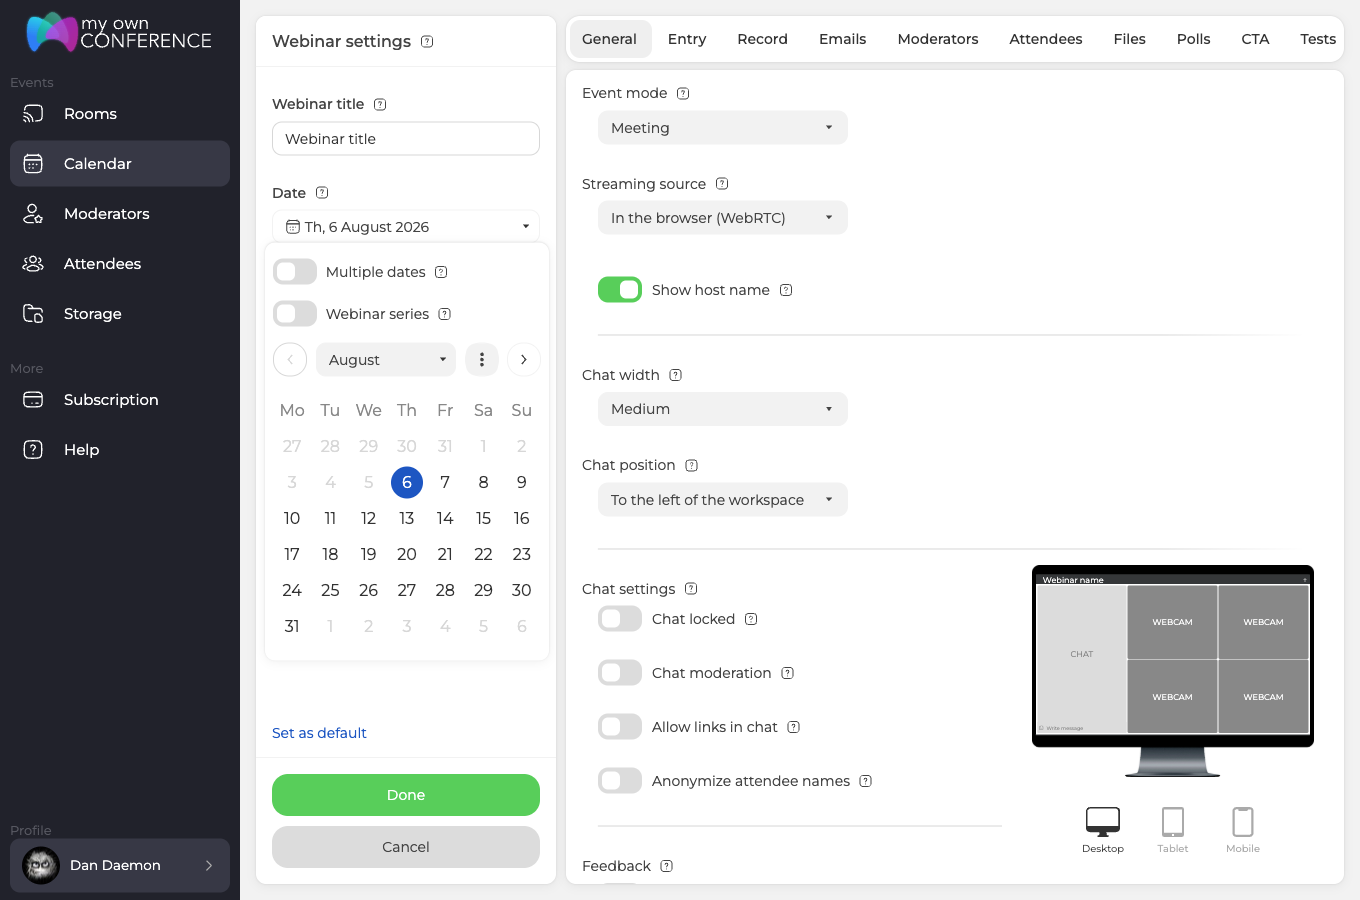
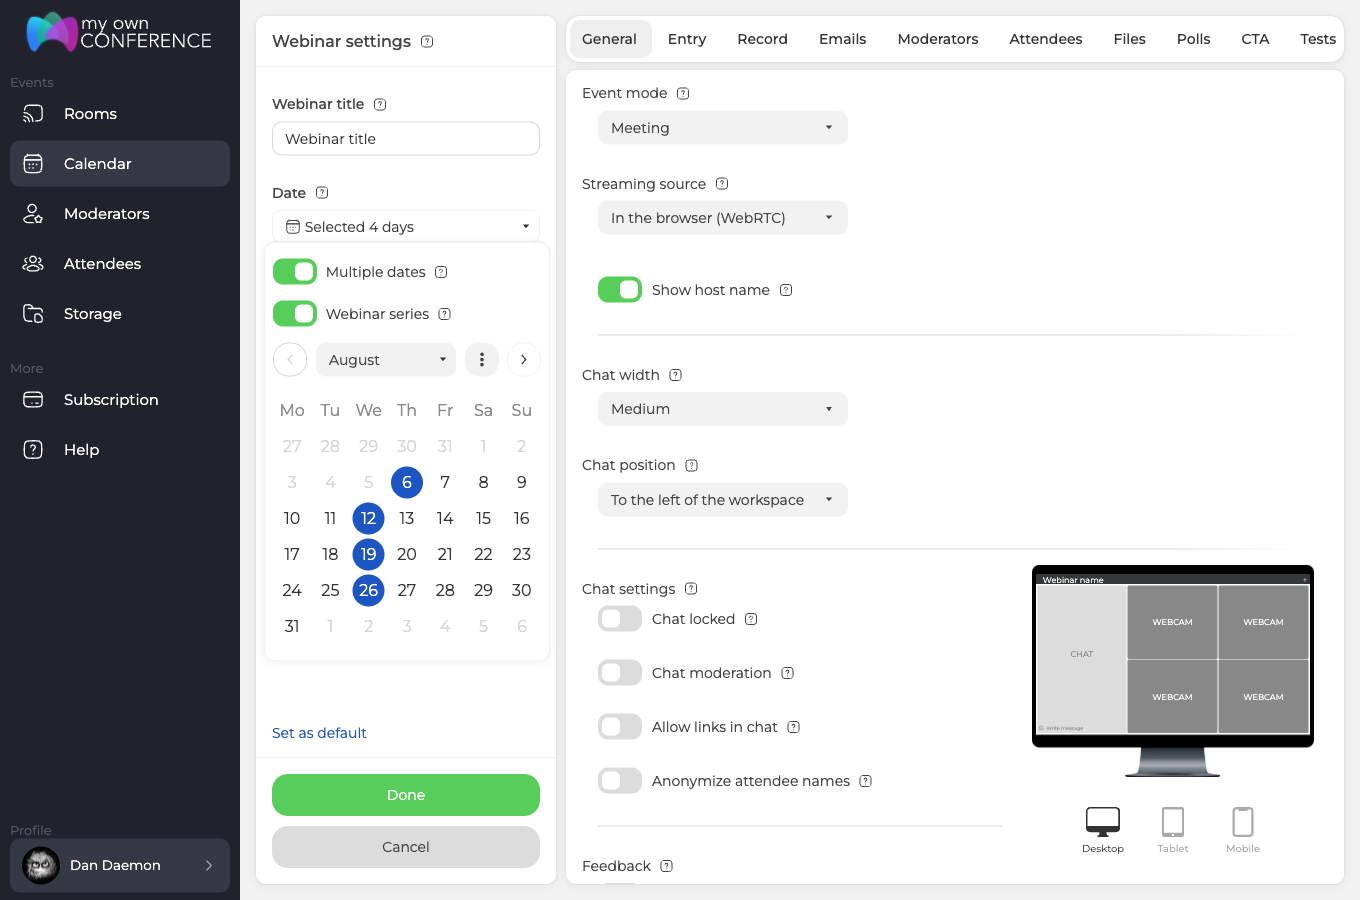
Turn on "Multiple dates" and you can tick as many days as you need. "Webinar series" switches itself on at the same moment, which is what ties those dates together as one series rather than a pile of unrelated events. The field then stops showing one date and reports how many days you picked instead.
Advanced settings
Step 5: General settings
Event mode is the first choice, and there are two of them. "Webinar" puts your audience in the role of viewers, and "Meeting" lets everyone speak. Directly under it sit the streaming source and the width and position of the chat, the three settings already visible in the creation form back at step 3.
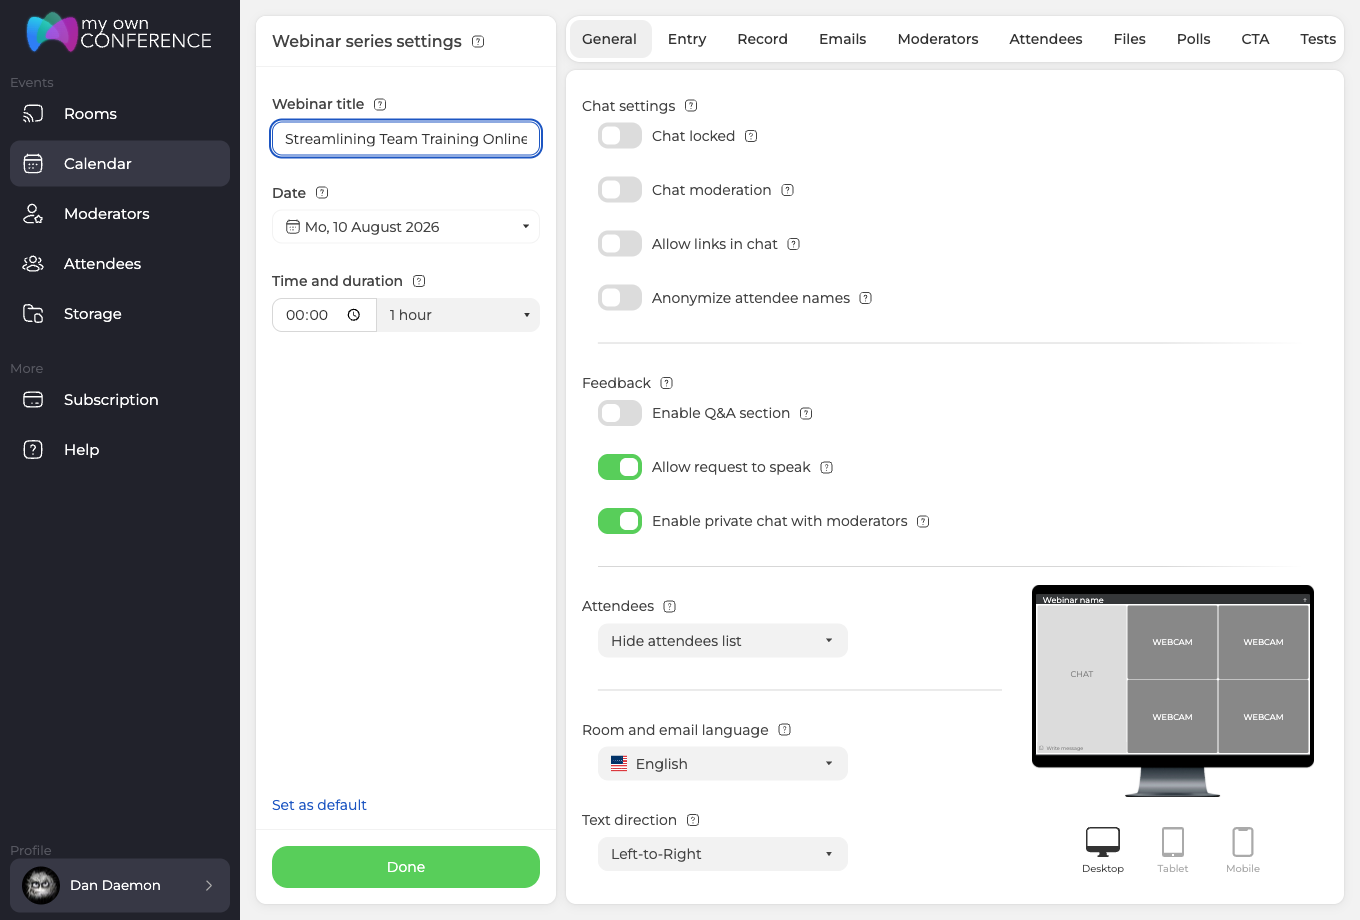
Scroll on and the same tab decides how the room behaves once people are in it. You can lock the chat, moderate it, allow links in it and anonymise the names in it, open a Q and A section, let attendees request the microphone, hide the attendee list, and set the language the room and its emails use.
Further down is everything that makes the room look like yours. You get background and foreground colours, a logo at 38 by 38 pixels, a banner at 380 by 38, and a "Thank you page" field for the address people land on when the webinar ends or when they leave early.
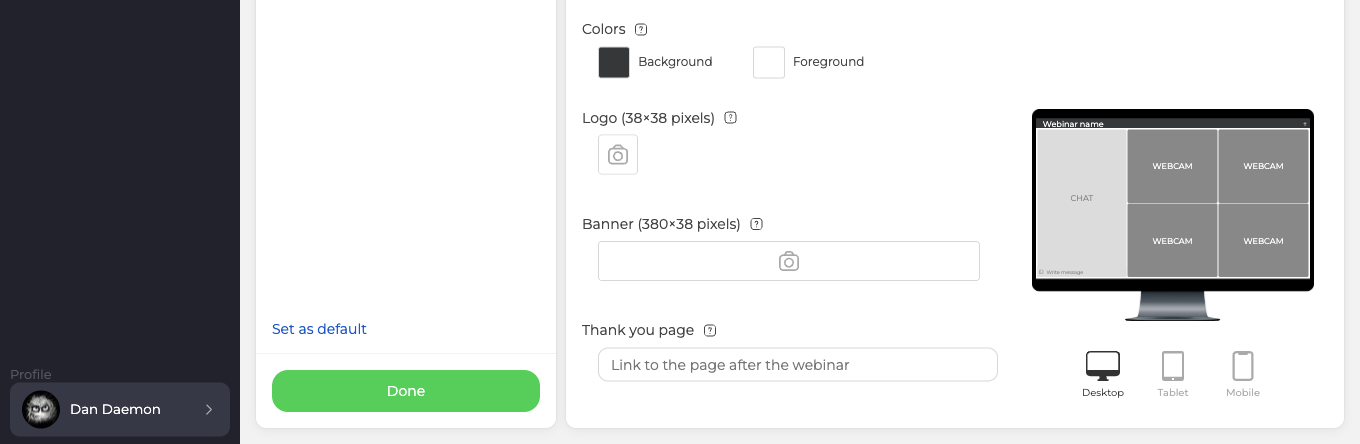
Spend a few minutes here, because this is what forms the first impression. Every field in that block, and the click-through links hiding under the two uploads, is covered by webinar room branding.
Step 6: Entry settings
This tab decides how people get in. The login form starts with a full name and an email, and "+ Add field" asks for anything else you need. You can require an invitation link, charge for access, cap registration at your plan's capacity, embed the form on your own site, and set how long before the start the doors open.
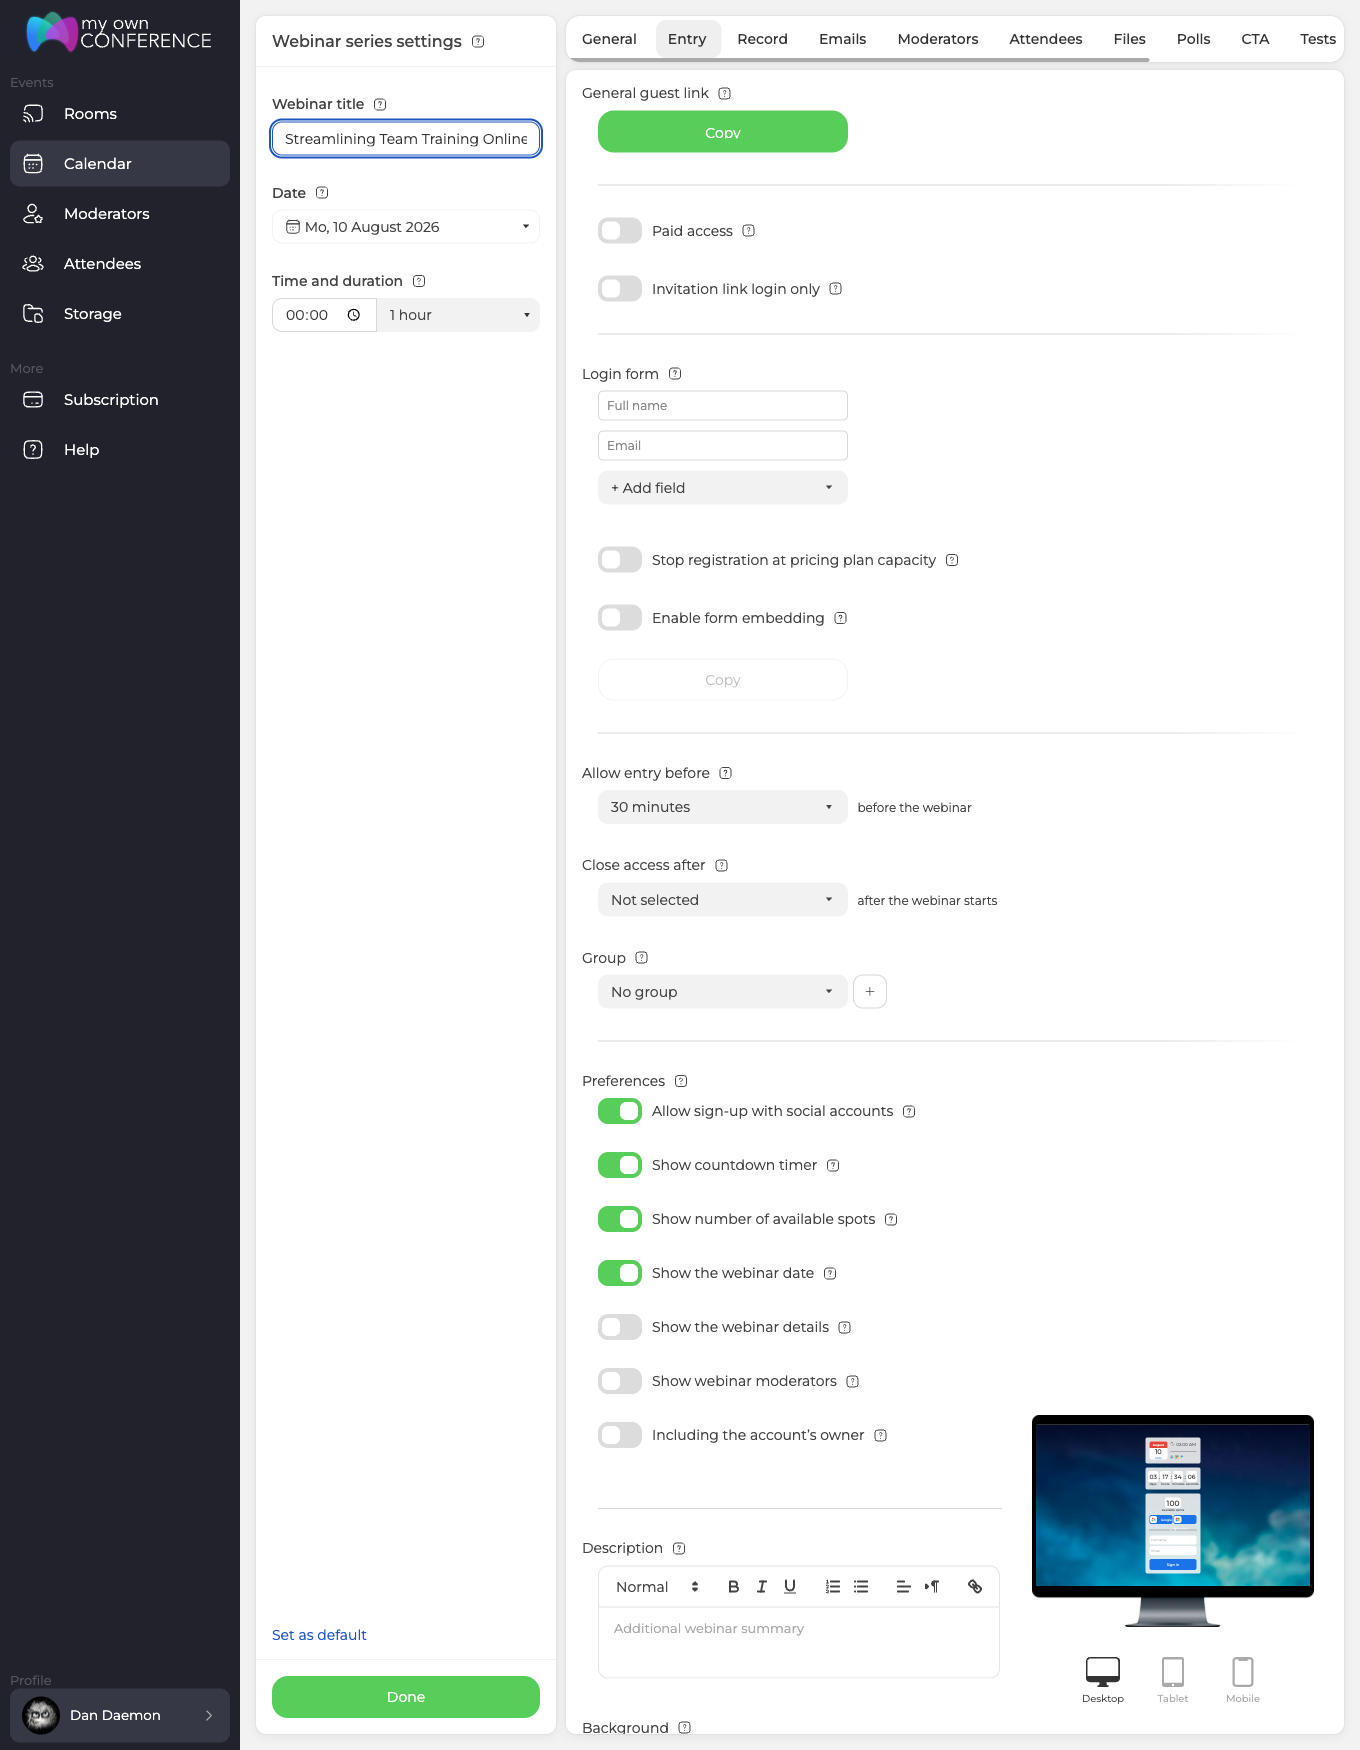
A live preview of the registration page sits on the right, so you can see the effect of each change immediately.
Step 7: Recording options
Quality and mode are the two settings that matter. Mode decides how much of the room ends up in the file, and it offers three choices.
- Webcams, microphones, working area, and interface captures the room exactly as it looked.
- "Webcams, microphones, and working area" keeps the content and drops the panel around it.
- "Webcams and microphones only" records the speakers and nothing else.
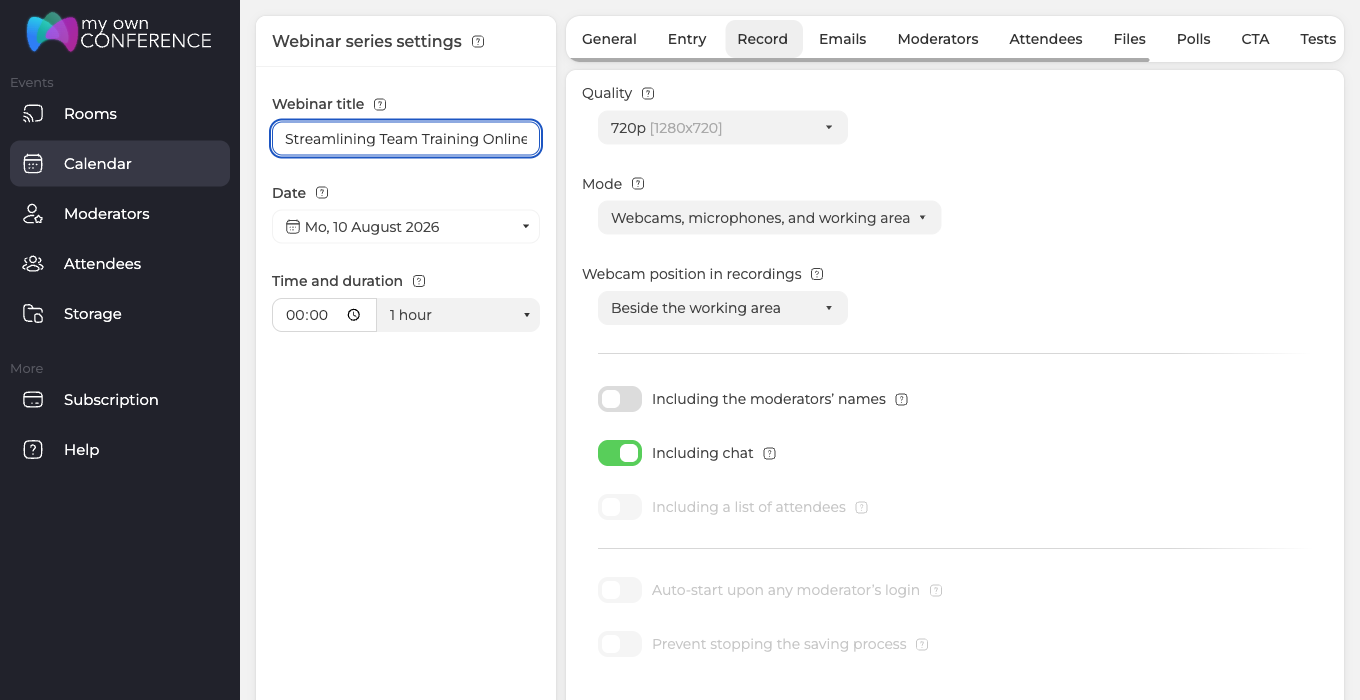
Picking "Webcams and microphones only" drops the quality to 480p and locks it there. That is deliberate, because a camera-only recording needs nothing larger.
There is no "do not record" option on this tab. Recording usually starts in the room, so these settings describe what gets captured when it does. The exception sits at the foot of the same tab, where plans from 300 attendees can switch recording on automatically, and Automatic webinar recording covers that.
One thing worth knowing. "Including a list of attendees" needs two things at once, the Mode has to include the interface and the "Attendees" setting on the General tab has to be showing the list. Miss either one and the option greys out.
Step 8: Invitation emails
Here you design what lands in people's inboxes, meaning the banner, a signature, a calendar invite and the addresses behind the buttons in the message. UTM tags covers those three address fields.
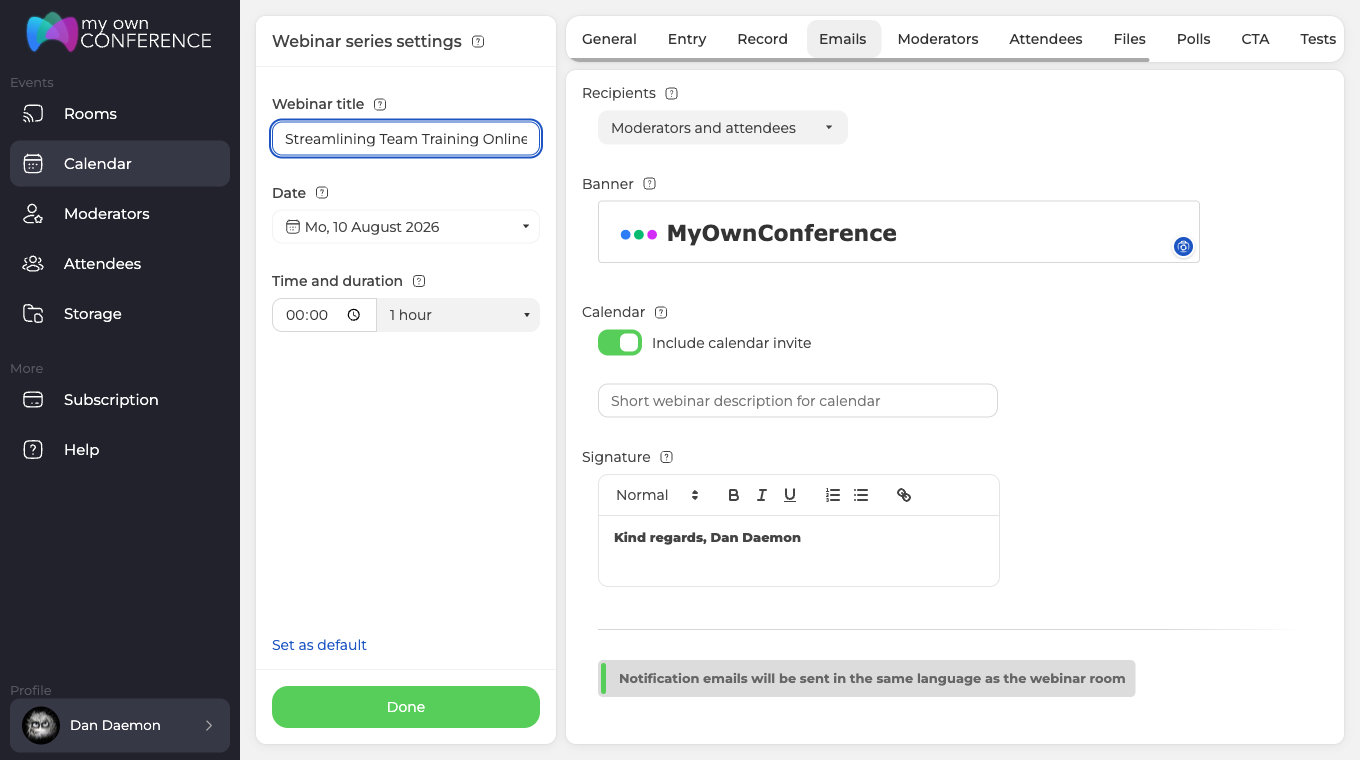
The body text of the emails cannot be edited, and that is on purpose, because fixed wording is what keeps delivery rates high. The banner and the signature are yours to design freely.
Below that sits the full schedule, and all eight messages are switched on when you start.
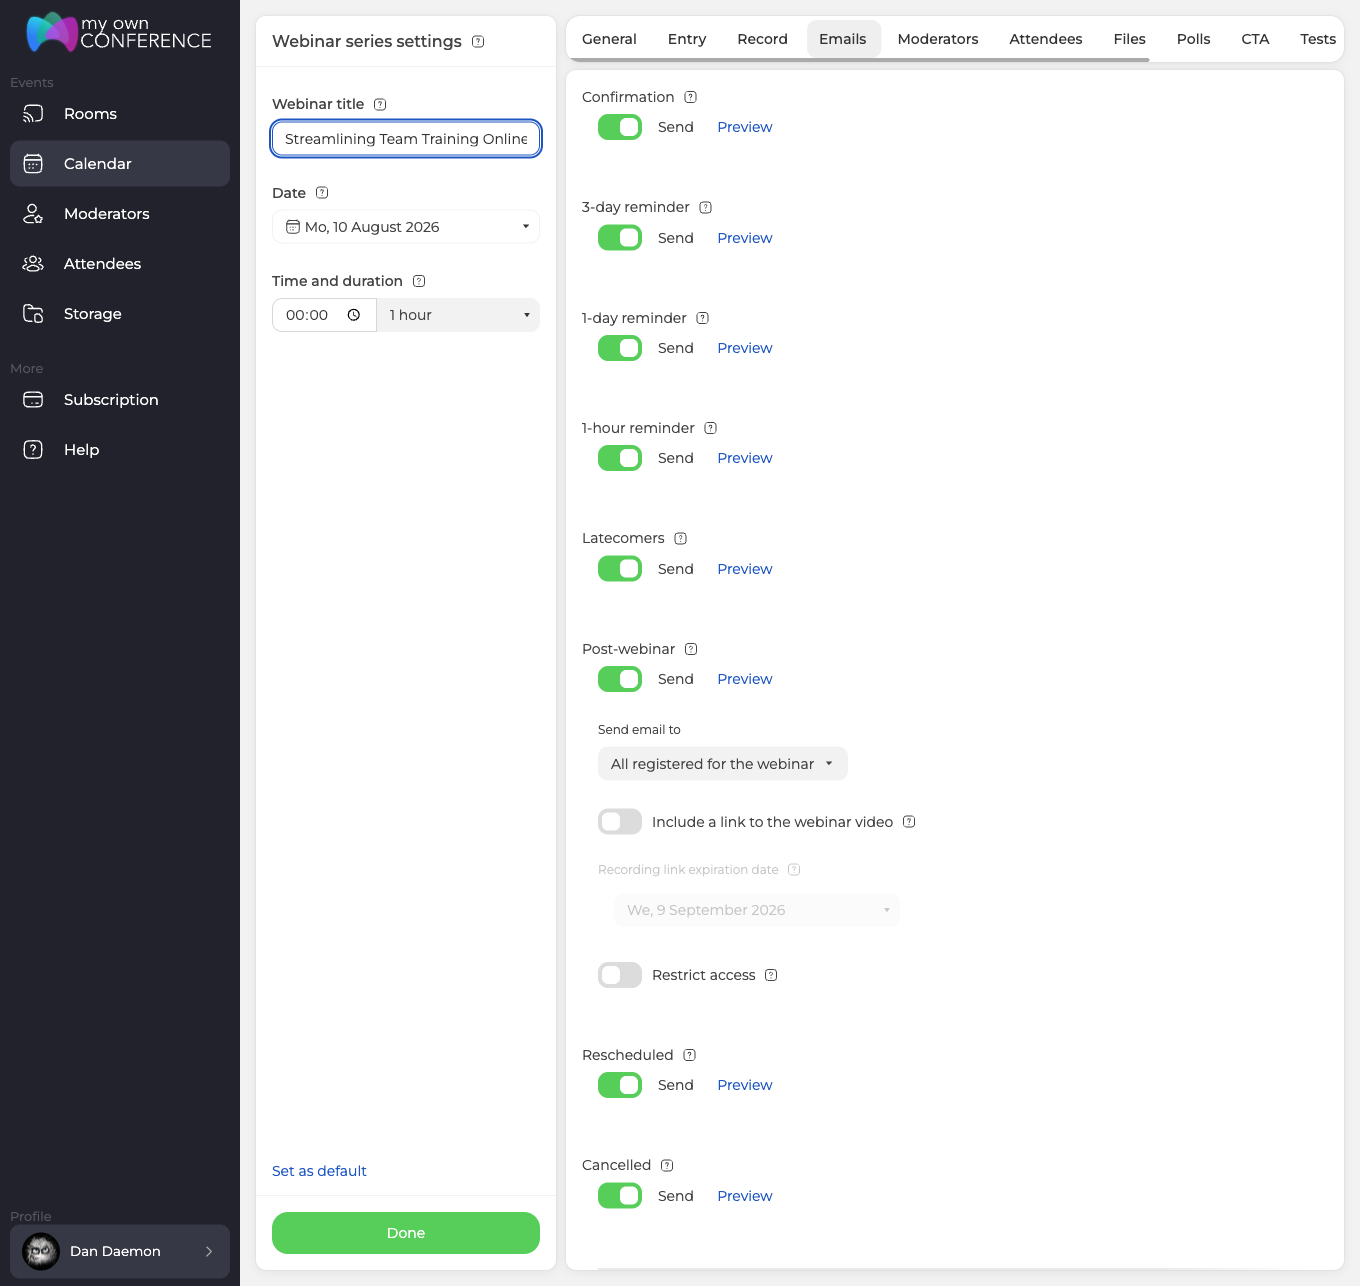
- "Confirmation" goes out as soon as somebody registers.
- 3-day, 1-day and 1-hour reminders count down to the start.
- "Latecomers" catches anyone who has not joined once the webinar begins.
- "Post-webinar" follows the event and can carry a link to the recording, which expires 30 days later unless you change the date.
- "Rescheduled" and "Cancelled" fire only if you move or call off the event.
Turn off any of them with its "Send" toggle, and use "Preview" to see exactly what the message looks like first.
Inviting presenters
Step 9: Open the presenters list
The "Moderators" tab lists everyone in your account, and the checkbox decides who is invited to this particular webinar. Only marked people are, which is what the note above the list means.
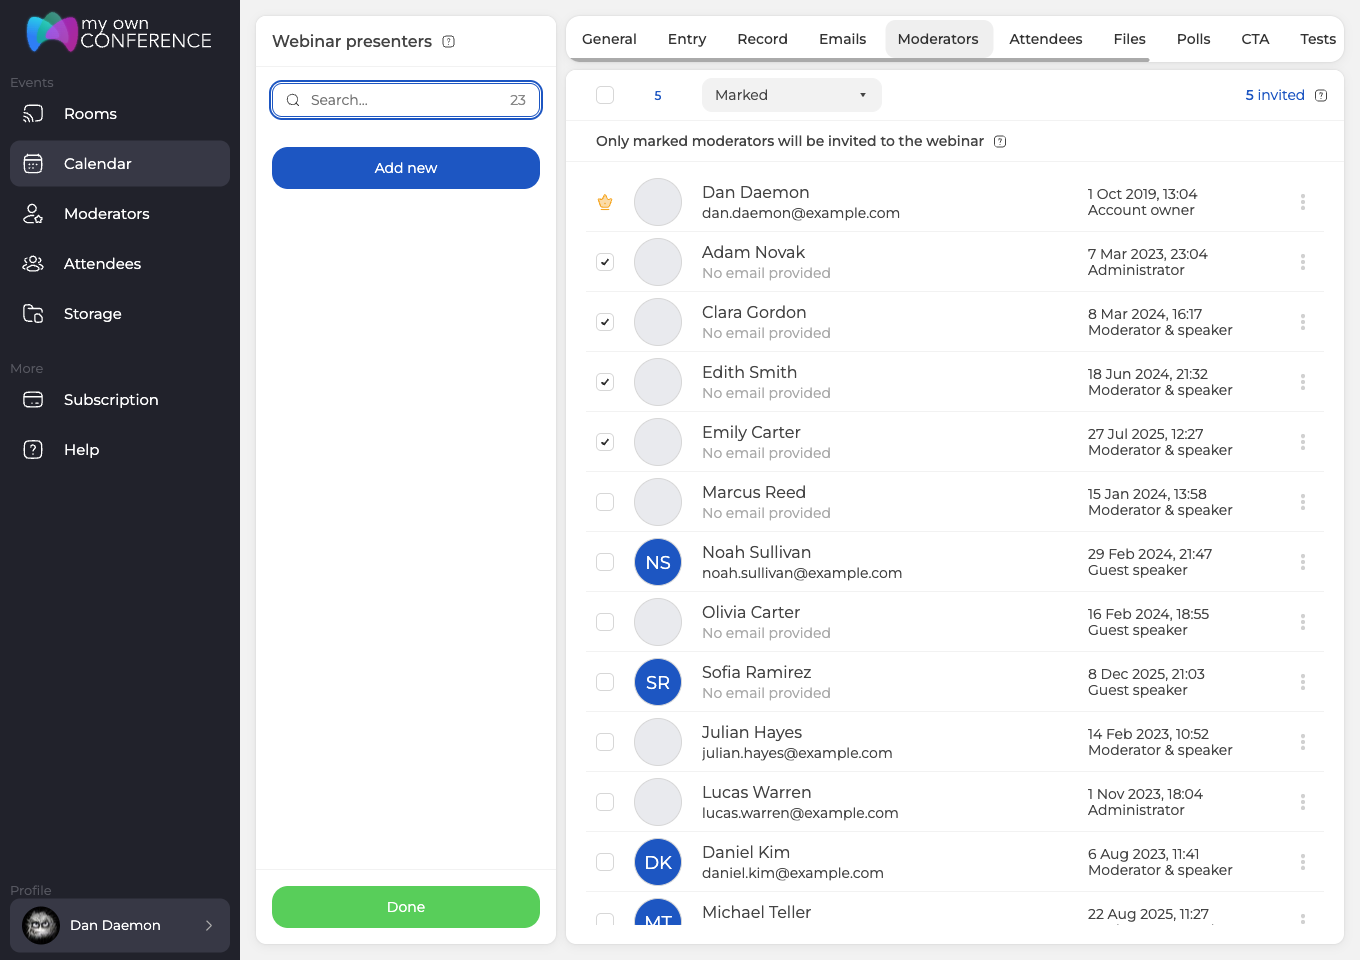
The account owner carries a crown instead of a checkbox, because that access cannot be removed. You can still hide the owner from the presenter list attendees see, using the entry window settings.
Roles differ. An administrator reaches everything, a moderator and speaker can go on air and run the room, and a guest speaker joins to present without the wider controls.
Step 10: Choose who presents
Tick each person you want. The counter at the top left updates as you go, and "invited" on the right tells you how many are attached right now.
The checkbox in the header row selects everyone at once, and clicking it again clears the selection. The dropdown beside it filters the list, which helps once you have more presenters than fit on a screen.
Untick somebody and they are dropped from this webinar. Attach nobody at all and the account owner presents alone.
Inviting attendees
Step 11: Open the attendees list
Your audience comes from the address book you have already built, so nobody has to be re-entered before each event. Tick the people this webinar is for.
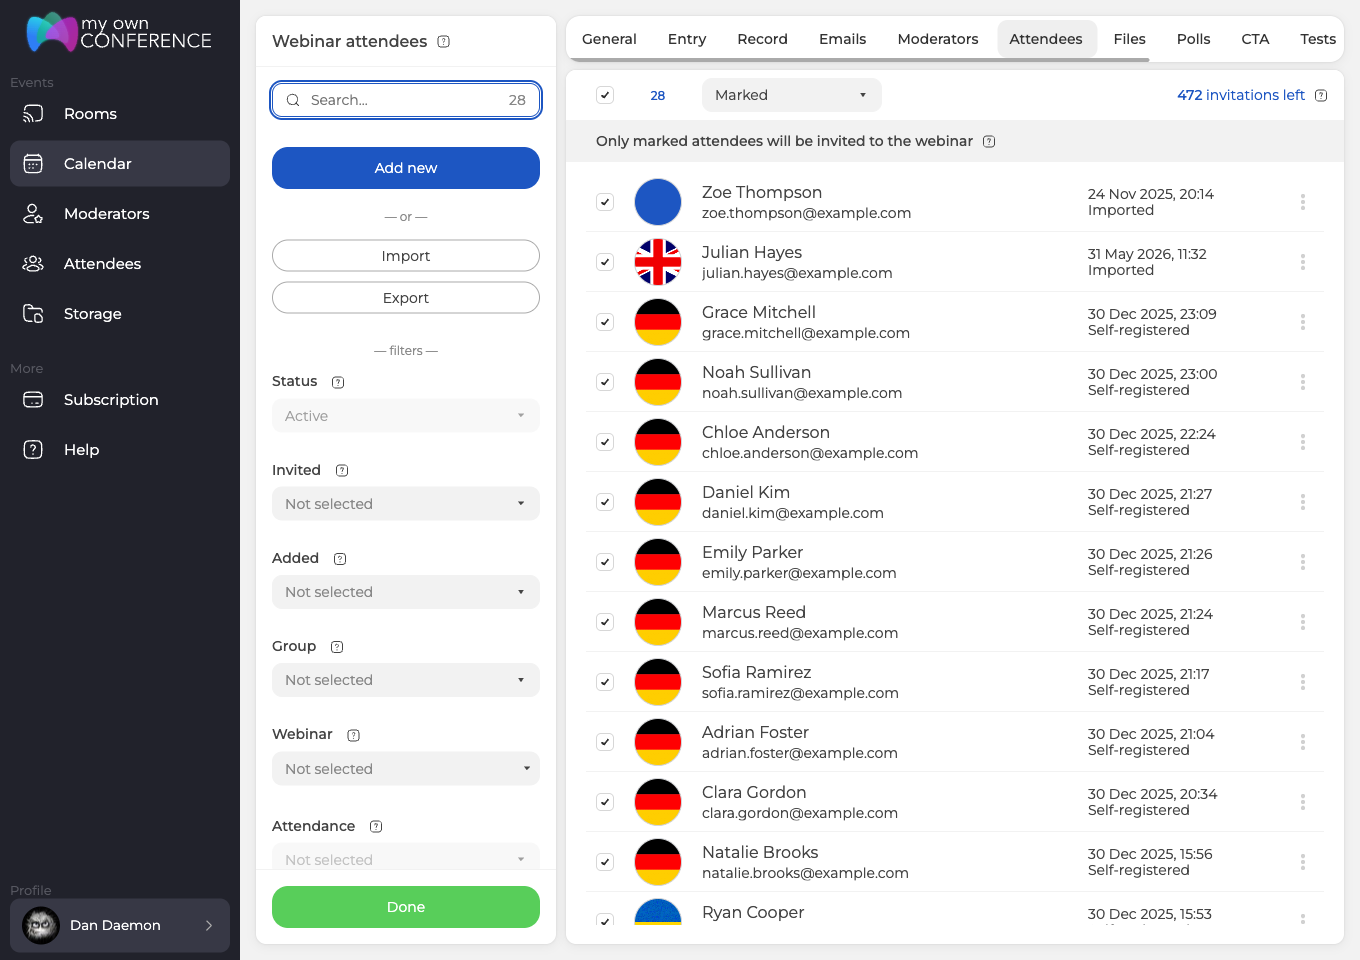
The counter in the top right is the one to watch, because it shows how many invitations your plan has left for this event. Sorting the list by "Marked" brings the people you have already ticked to the top, which helps once the book is long. The left column adds eight filters that narrow the book while you pick, covering status, invitations, how somebody was added, group, webinar, attendance, replay views and payment. Attendee invitations and management covers what those mean along with "inactive" and "banned".
If the book is still empty, add people one at a time with a name and an email, or import a ready-made list from a CSV or XLSX file. Pasting addresses straight in works too.
Files, videos, polls, tests and CTAs
Preparing your materials in advance saves time during the event. Each of these tabs works the same way, so you attach what this webinar needs and leave the rest in storage.
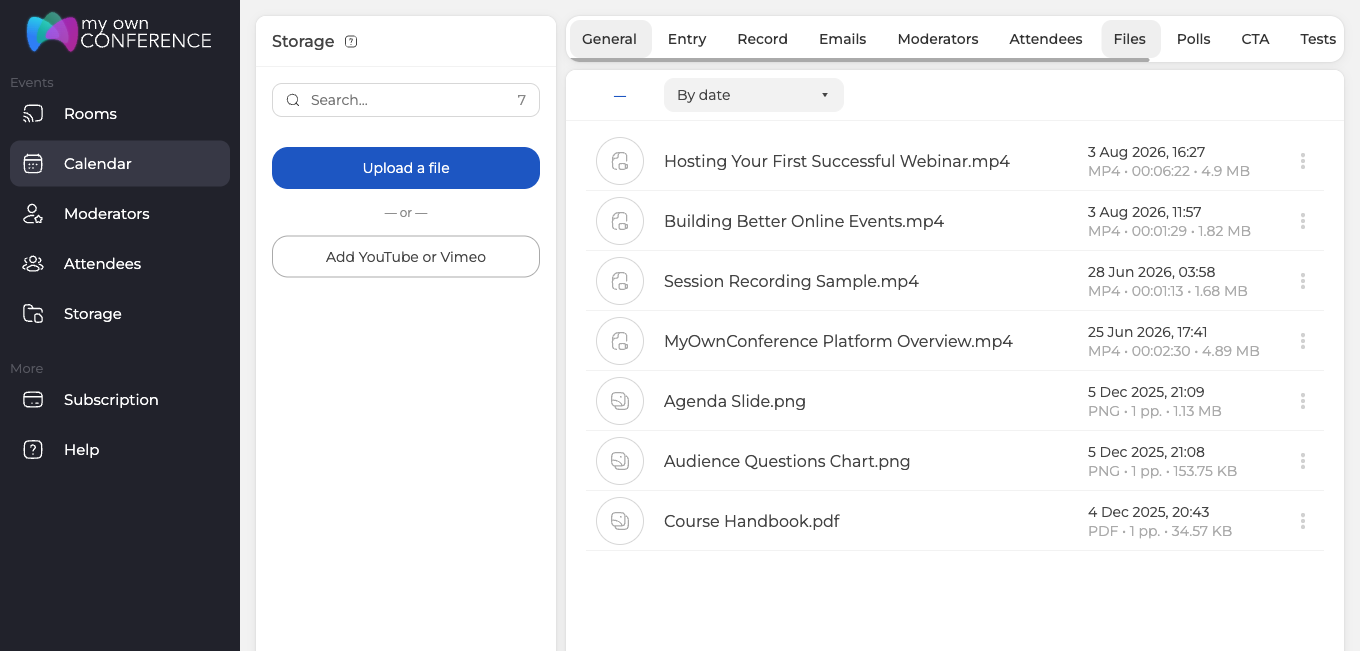
Upload presentations, images and video ahead of time.
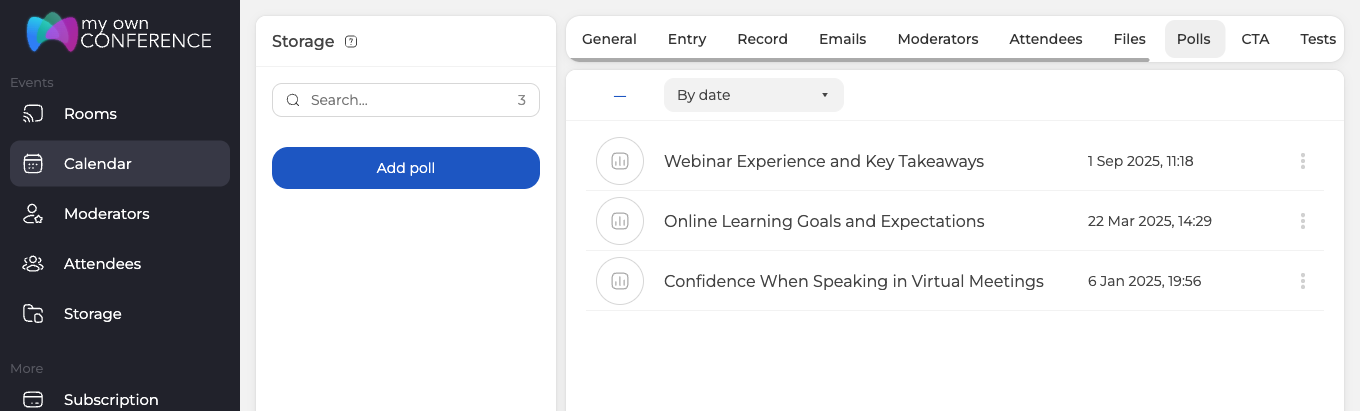
Polls are the quickest way to get a quiet room to respond.
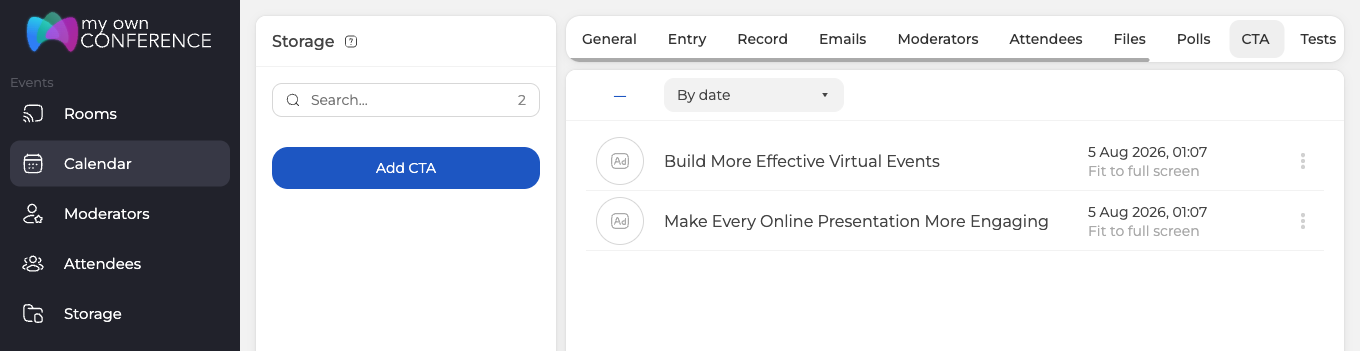
Call-to-action buttons push people towards a concrete step such as buying, visiting a page or registering.
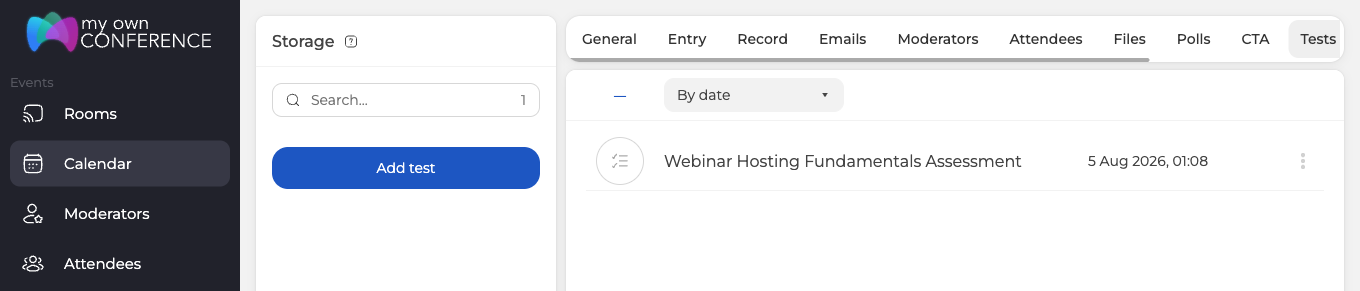
Tests suit a webinar that teaches something or leads to a certificate. You launch them by hand during the session.
All done
Settings configured, presenters and attendees invited, materials uploaded. Click "Done" and the webinar is scheduled.
It appears straight away under "Upcoming webinars", and the day it falls on is marked in the month grid. An event that begins around midnight can put that marker on the neighbouring day, because the grid counts dates in UTC while the list underneath shows them in your own time zone. Once the webinar has run, that highlight turns grey and the event moves down to "Past webinars", where its statistics and recordings stay available. Open the event from either list whenever you need to change something, because every setting from these steps is still there.
If a webinar you created does not appear where this says it should, open the online chat and tell us its name and the date and time you set.
Frequently asked questions
What happens if the webinar runs past the duration I set?
Nothing stops it. The duration is informational, so the webinar does not end when the time is up, and the "Finish" button at the bottom of the left rail is available at any point whatever the planned end time says. The room closes on its own only after 8 hours with no activity.
Can I change anything after I click "Done"?
Yes, every setting from these steps is still there. Open the event from "Upcoming webinars", where it appears straight away, or from "Past webinars", where it moves once it has run and where its statistics and recordings stay available.
Why is my webinar marked on a different day in the month grid from the one in the list?
An event that begins around midnight can put its marker on the neighbouring day, because the grid counts dates in UTC while the list underneath shows them in your own time zone. The list is the one to read, since the times you set follow the time zone in your profile.
How many people can I invite to one webinar?
As many as your plan has invitations left for that event, and the counter in the top right of the attendees list shows that number while you tick. The "Entry" tab has a separate control that caps registration at your plan's capacity. If the address book is still empty, add people one at a time with a name and an email, or import a ready-made list from a CSV or XLSX file.
How long does the recording link in the follow-up email stay live?
30 days, unless you change the date. That link rides in the "Post-webinar" message, one of eight automatic emails that are all switched on when you start. Turn any of them off with its "Send" toggle, and use "Preview" to see exactly what a message looks like first.
